Install Import/Exporter Tool here: .
Go to the tab Preferences. On the left panel go to KML/COLLADA/glTF Export -> General. In the General window:
a. Tick the ‘Create glTF model; Path of the COLLADA2glTF Tool:’b. Select Export glTF version 2.0
c. Tick ‘Write JSON file’ -> ‘of type JSONP’ -> ‘with callback method name’: handle_3DCityDB_data
At the KML/COLLADA/glTF tab fill in the file to export to with the ‘Browse’ button.
a. Specify if you want to export a single object or by bounding box. You can calculate the bounding box of features in the database with the ‘Database’ tab.b. Go to the Database tab. Fill in all the necessary connection details to connect to your 3DCityDB. In the section ‘Database operation’, go to ‘Bounding box’ tab. Here you can choose the top feature to include in your bounding box calculation. Then calculate the bounding box. Copy the calculated bounding box and use it in ‘KML/COLLADA/glTF’ tab for your export.
c. For the tiling option, choose automatic to have a tile size of 125mx125m.
Choose the level of detail from the section ‘Export from level of detail’. In the Display as you can choose to export either the ‘Footprint’, ‘Extruded’, ‘Geometry’ and ‘COLLADA/glTF’.
Footprint - export the footprint of the feature. For LOD 0 objects.
Extruded - export the extrusion of the footprint.
Geometry - each surface of the feature is exported.
COLLADA/glTF - geometry and texture of the feature is exported
a. For the visible from ____ pixels. When viewed in google earth pro and the web map client, 0 pixels means it will always be rendered, a bigger number means it will only be rendered when you zoom closer, the bigger the number the closer you need to zoom.
b. In the section Feature Types, choose the feature type to export.
Check the exported geometries by viewing them in Google Earth Pro.
Next go to the SPSHG tab. Let’s export the attributes of the exported feature. In the previous steps, only the geometries are exported, the semantics of the features are not exported with the glTF.
In the SPSHG tab allows you to export the attributes of the features into a CSV file, we will first define the columns and content of the CSV to be exported.
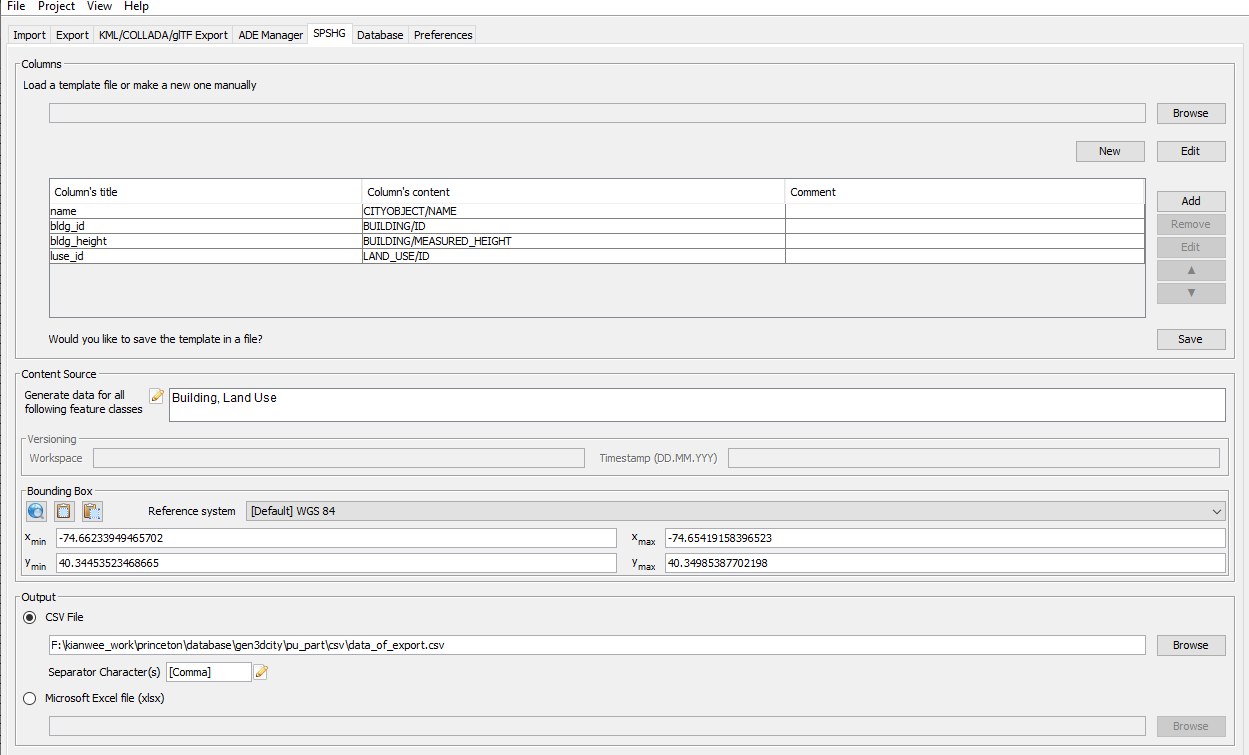
Figure 1:Export attributes to csv.