2.3. Shoebox Model-Part 1: 3D BIM#
2.3.1. Create slab, walls and window#
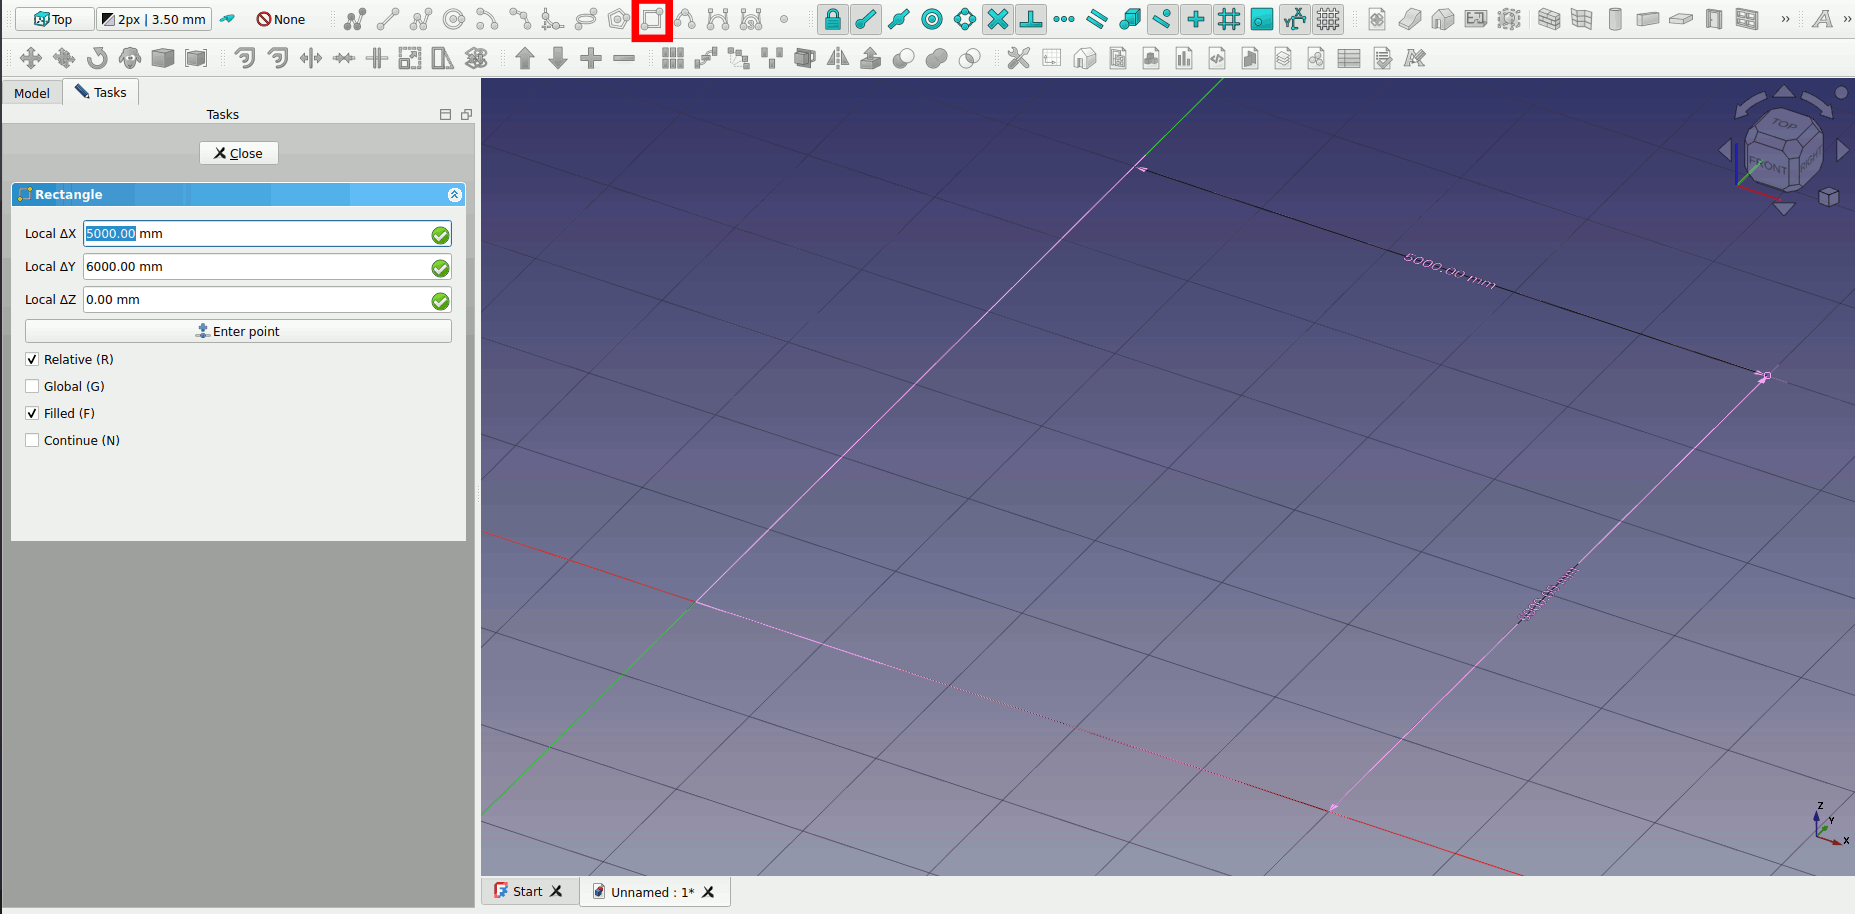
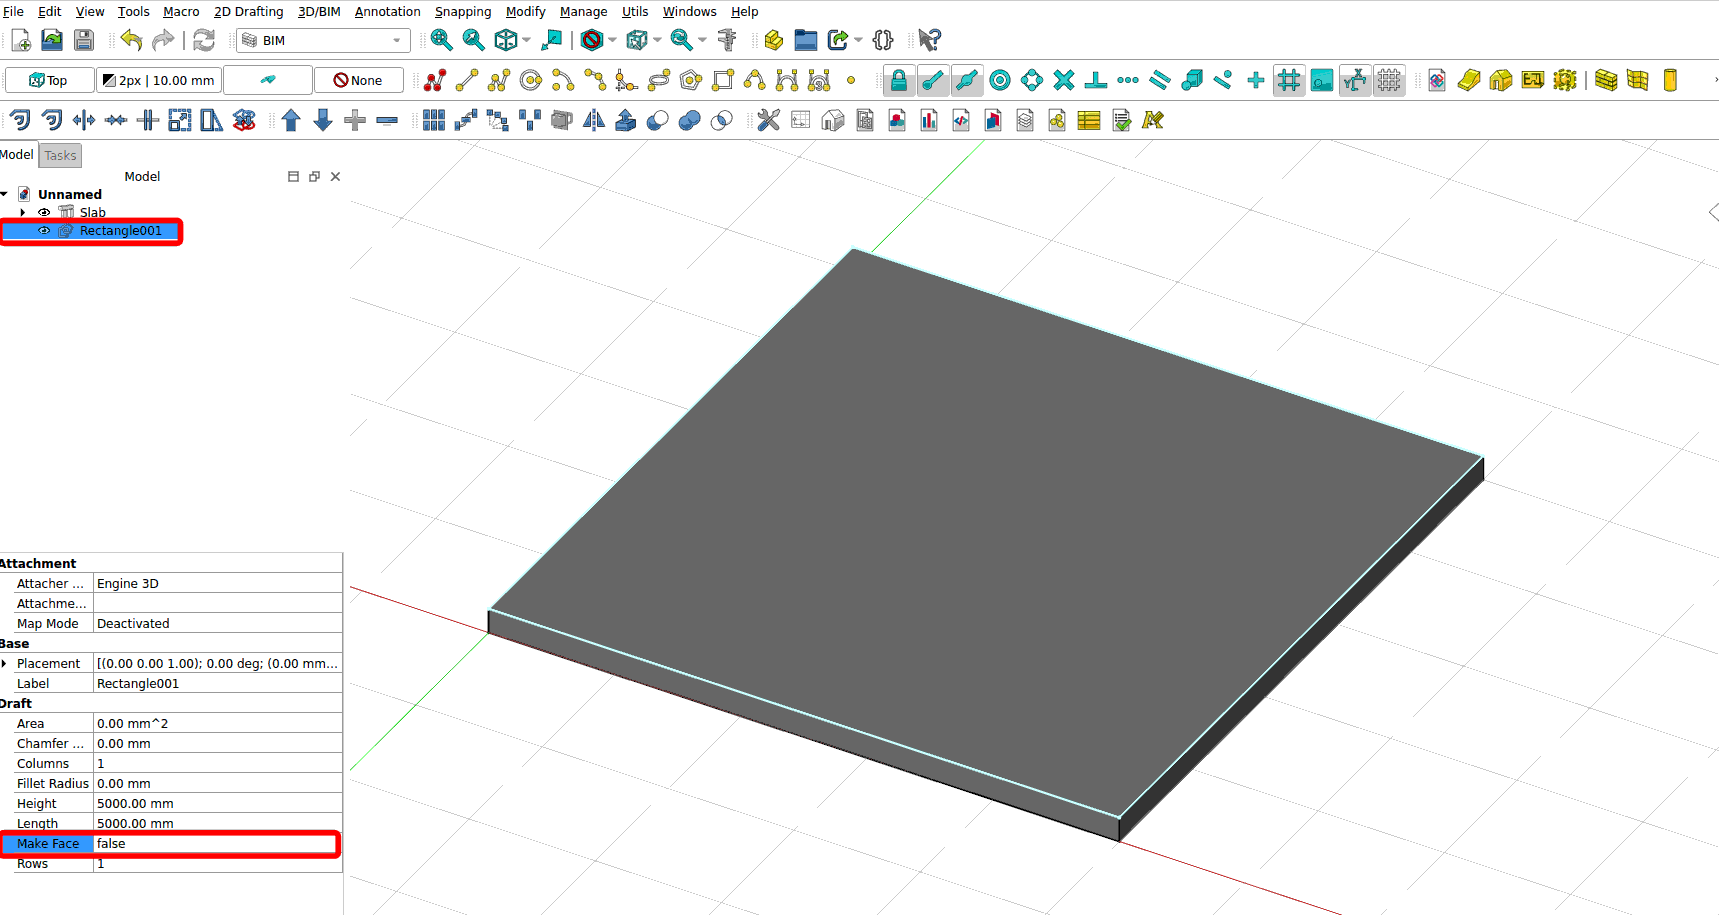
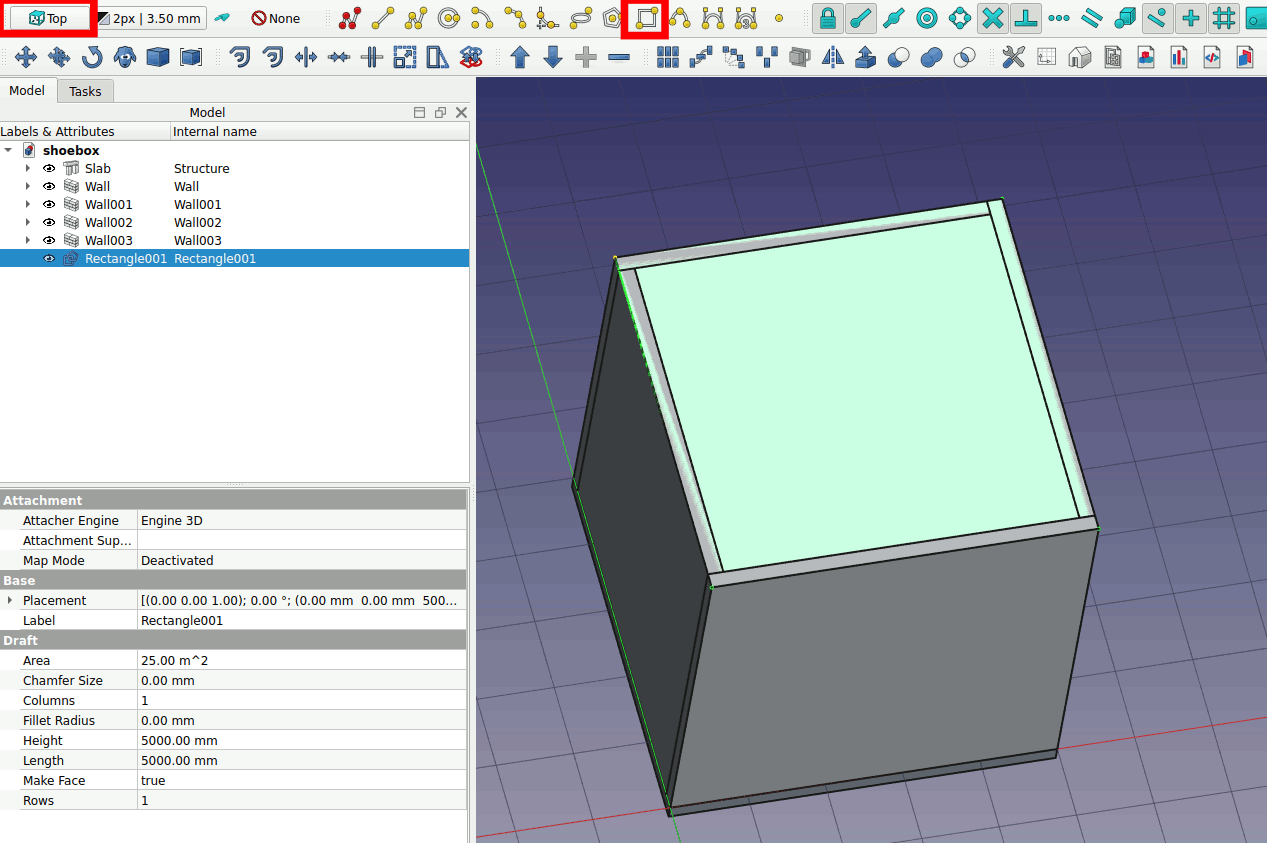
Model a 5m x 5m x 5m box in FreeCAD. Create a floor slab that is 5m x 5m. Draw a rectangle that is 5m x 5m. Click on the Rectangle tool on the BIM workbench (highlighted in red box below). Draw a square.
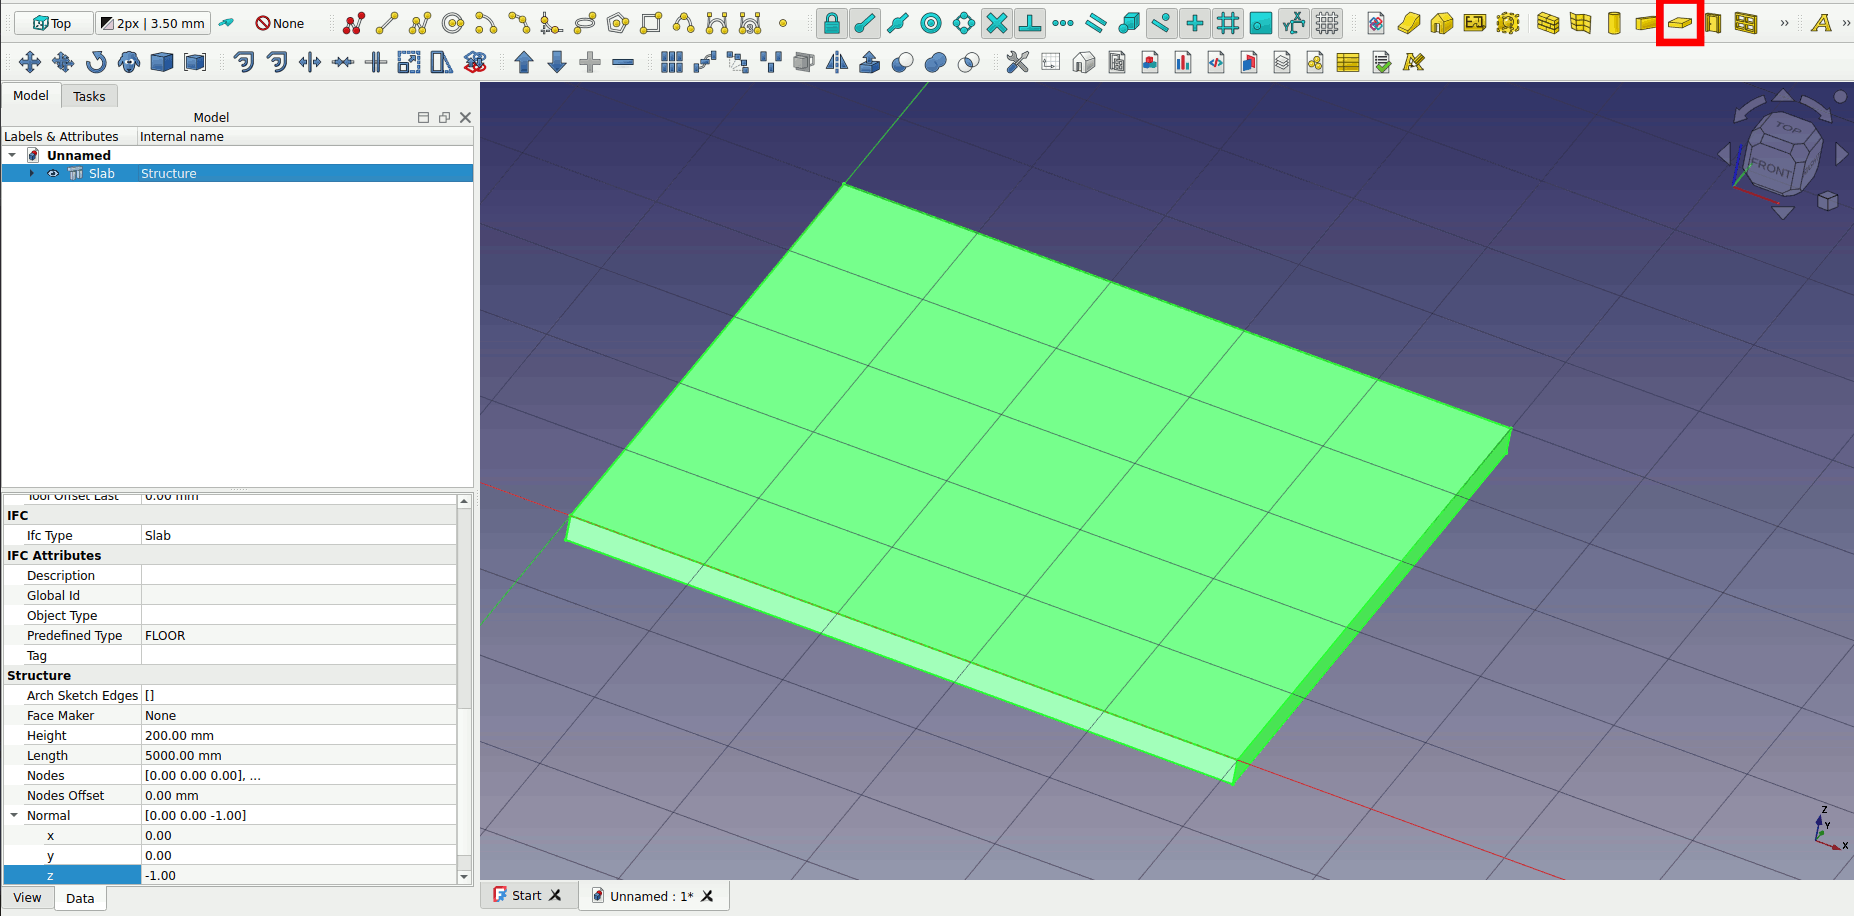
2. Select the rectangle and click on the Slab tool on the workbench. A floor slab is created.
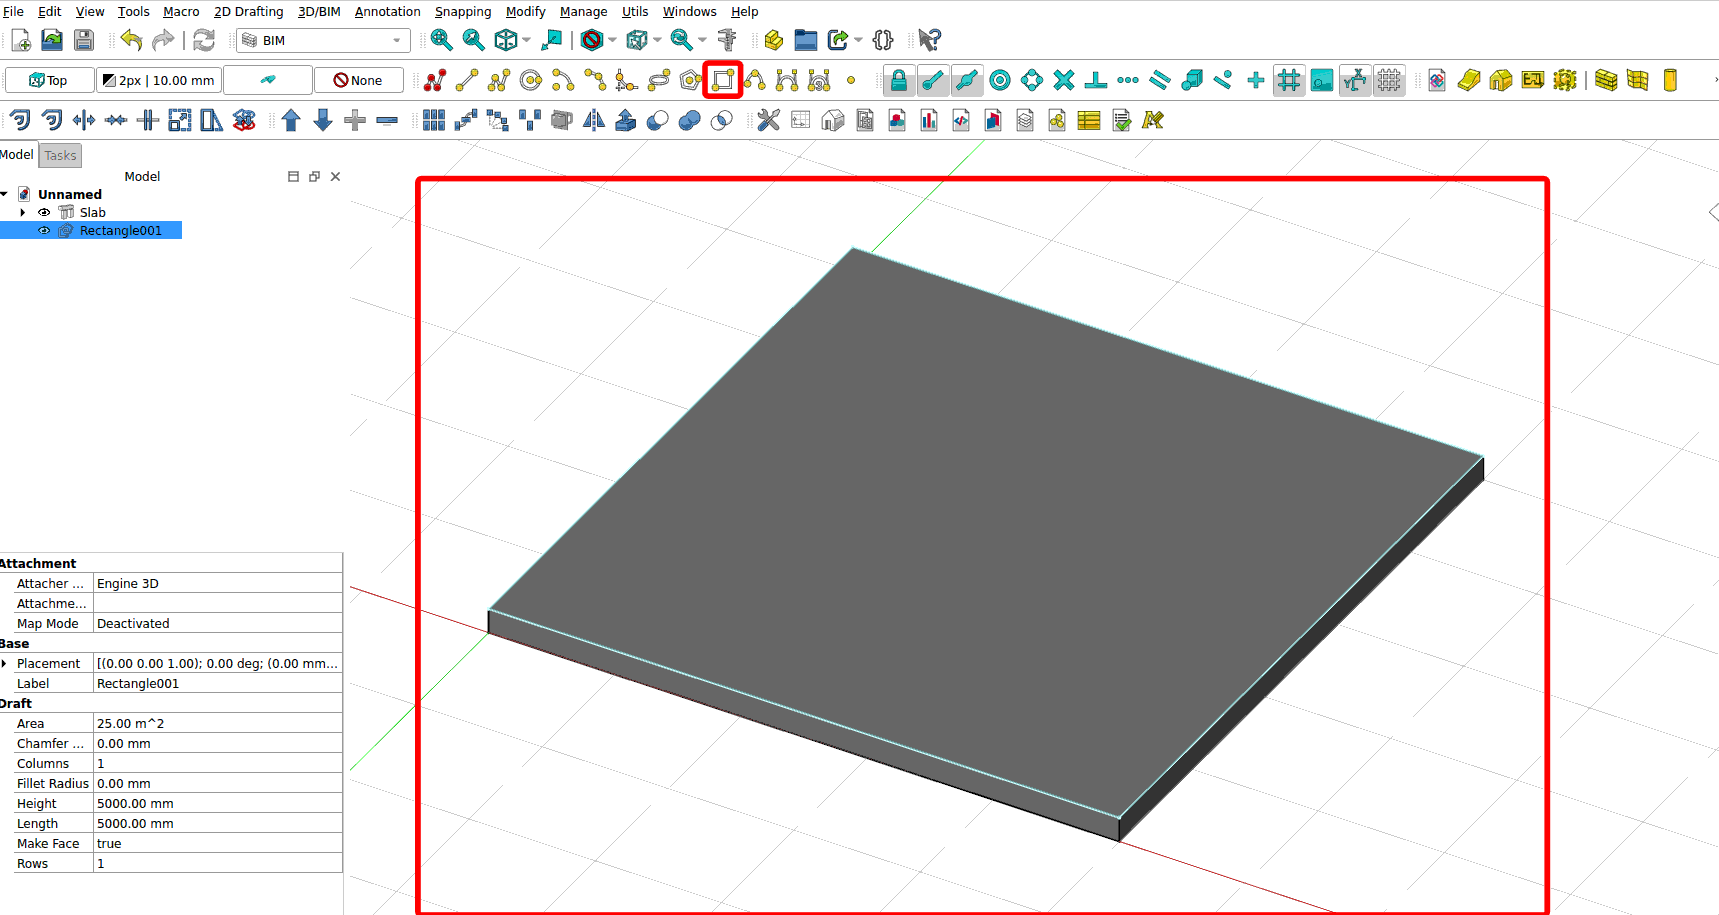
Click on the rectangle tool and draw a rectangle on the slab. If the appropriate snaps are on your cursor will snap to the edge points of your slab.
Select the rectangle. And change the ‘Make Face’ parameter to ‘false’
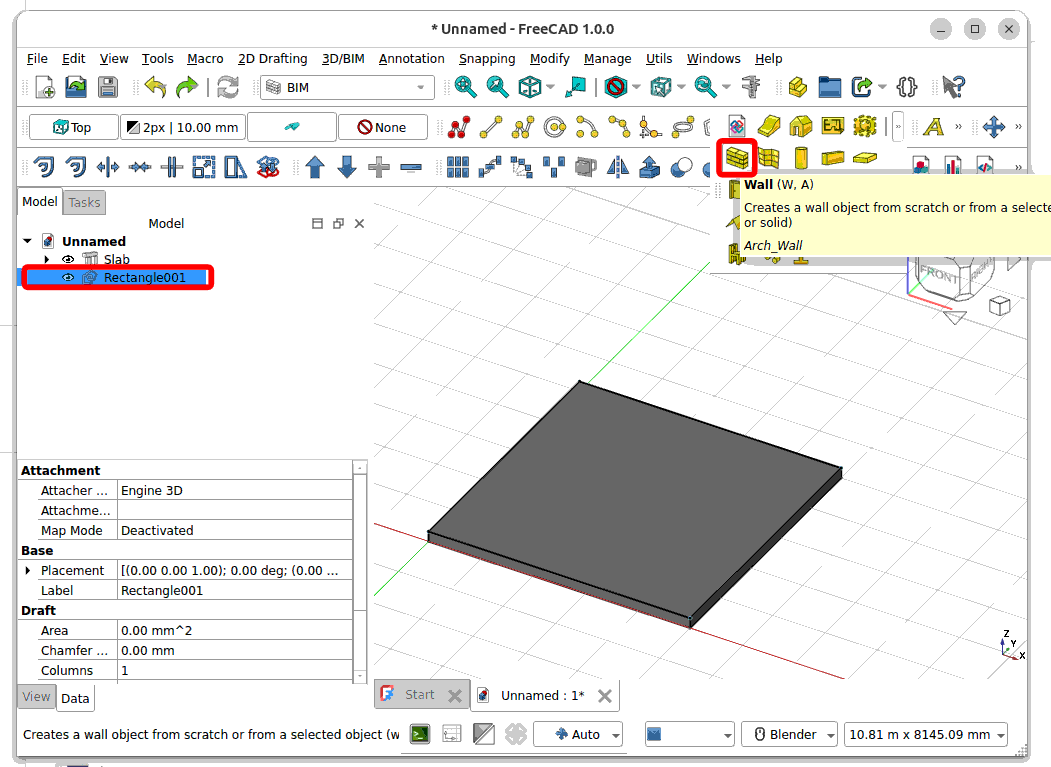
Select the rectangle and click on the ‘Wall’ icon.
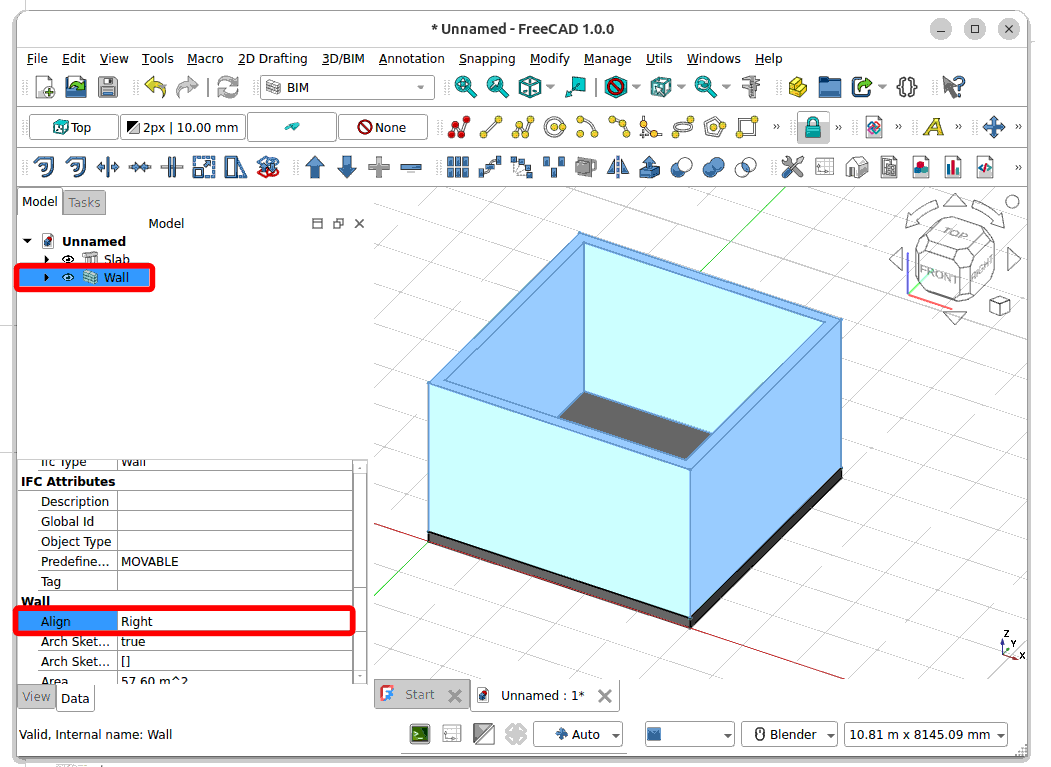
Select the created ‘Wall’. Change the ‘Align’ parameter to ‘Right’ so that the wall are within the slab.
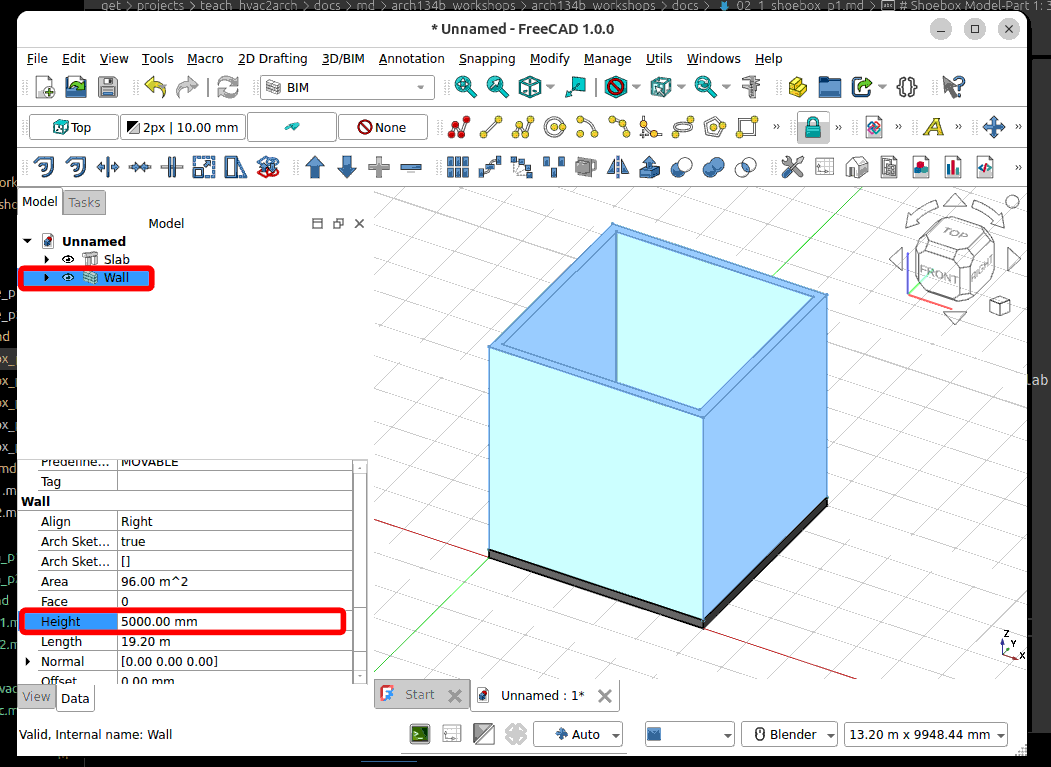
Go to the Height parameter and change the height to 5000mm.
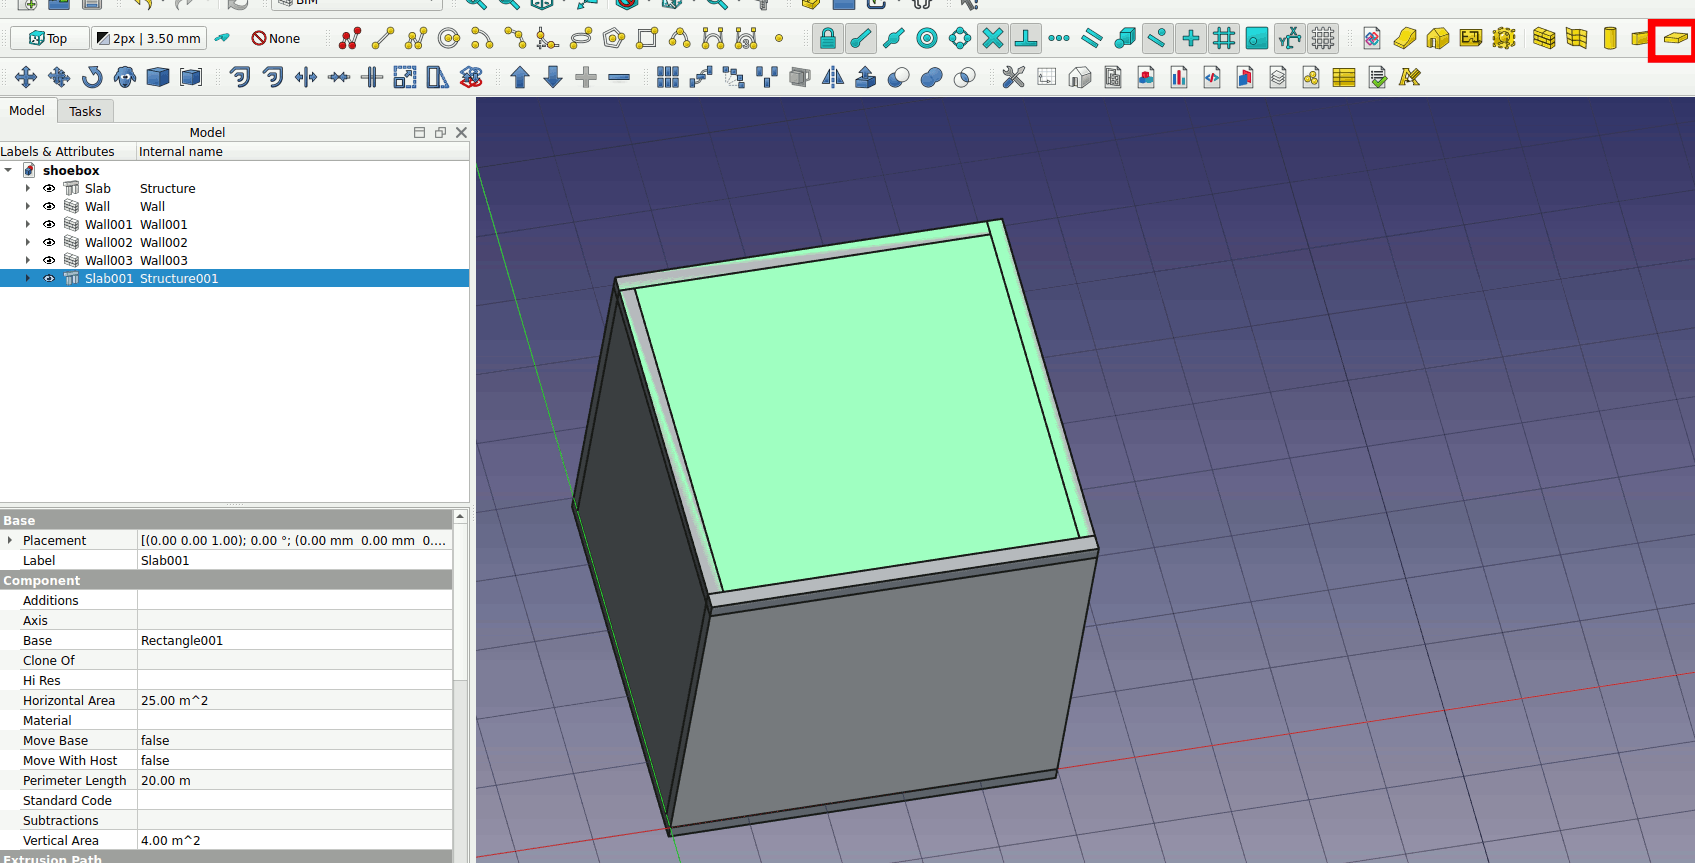
Now draw the roof slab. Draw a rectangle on top of the four walls. Make sure your working plane is Top.
Click on the slab icon and make the rectangle a slab.
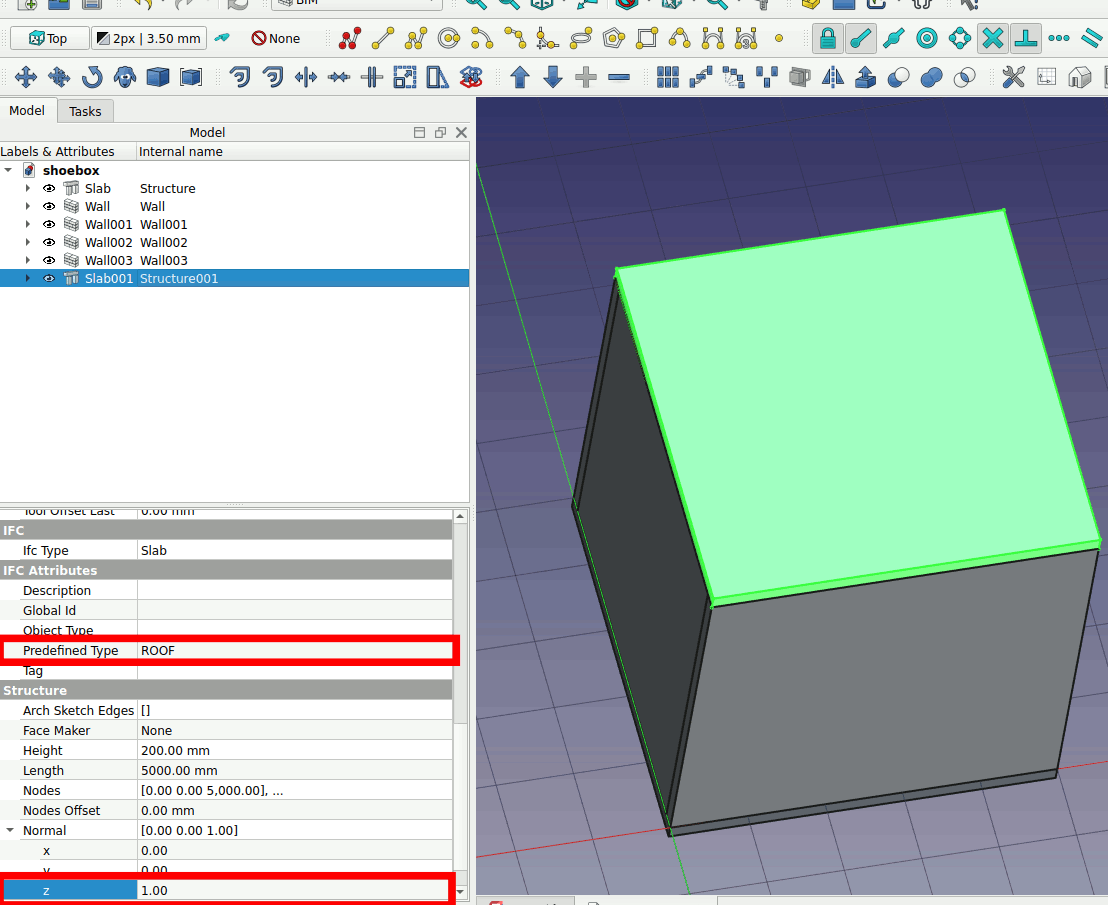
Select the slab. Change the Predefined Type to Roof, and change the Normal Z direction to 1.00
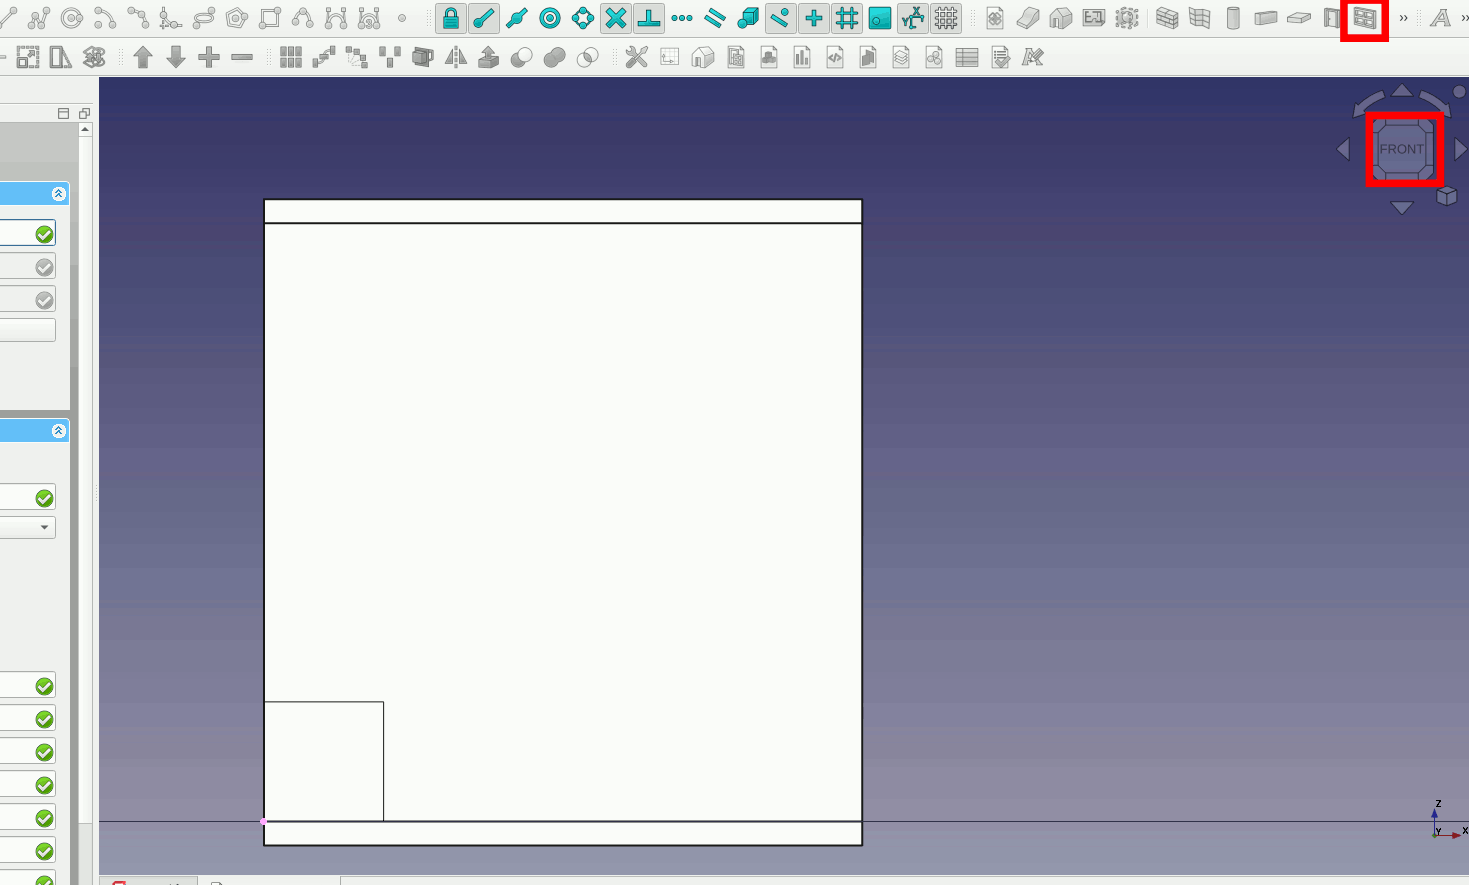
Create a window on the front wall. Make sure your view is adjusted to Front. Click on the window icon and place your window on the lower left corner.
Select the window and adjust the Height and Width of the window to 1500mm.

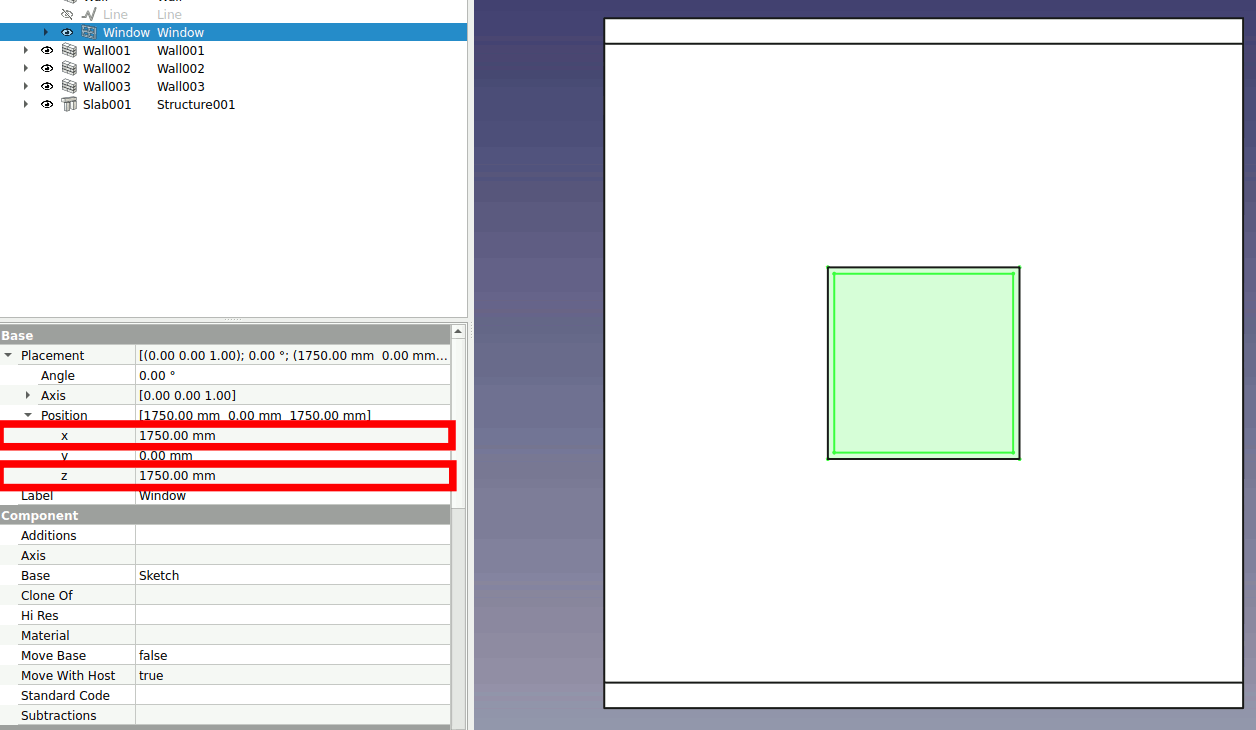
Select the window, change the position x and z of the window to 1750.
2.3.2. Organize your model#
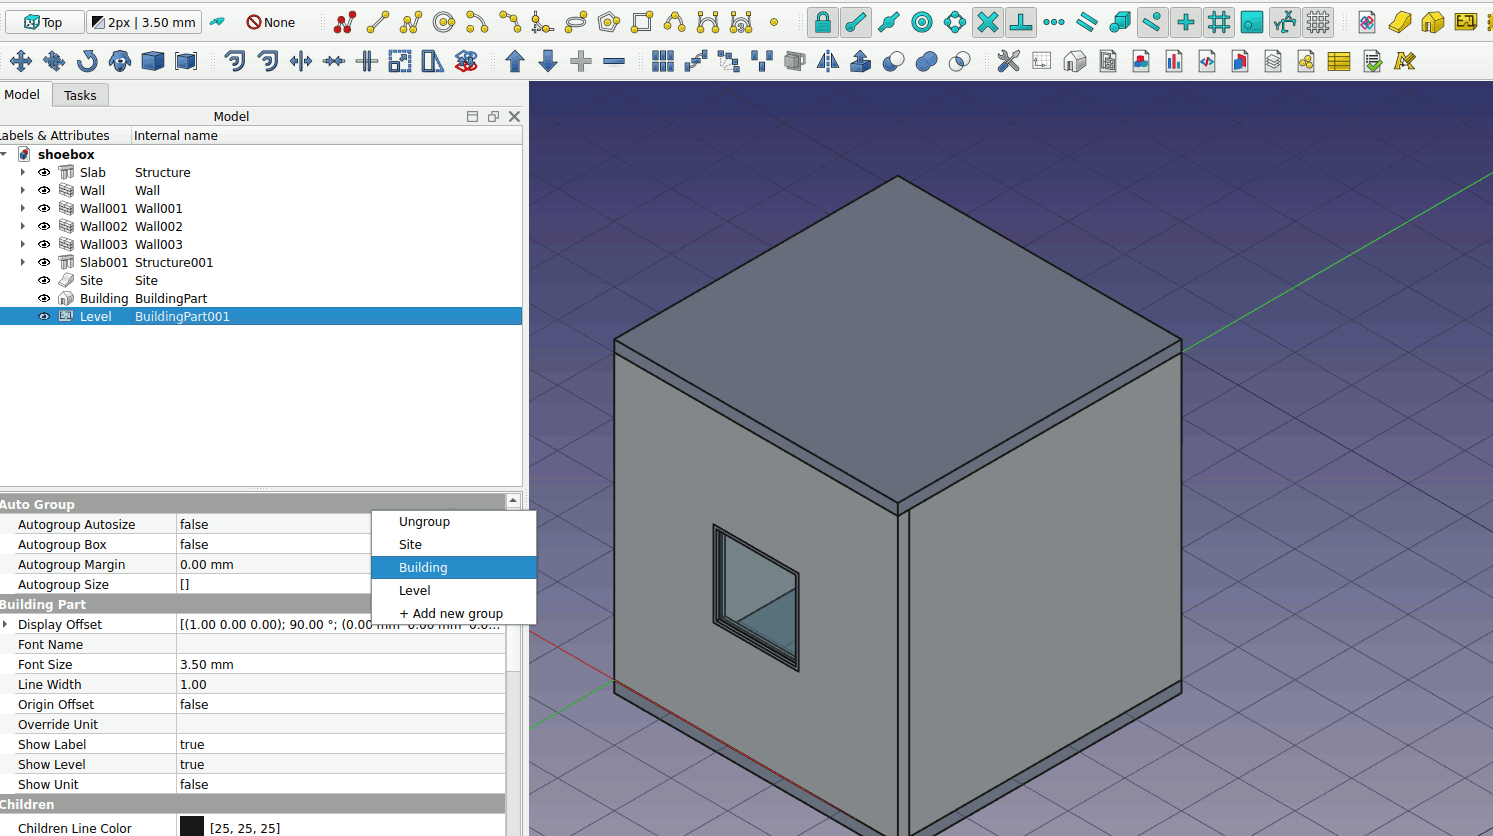
Now it is time to organize your model. Click on the Site, Building and Level icons to create the respective objects.

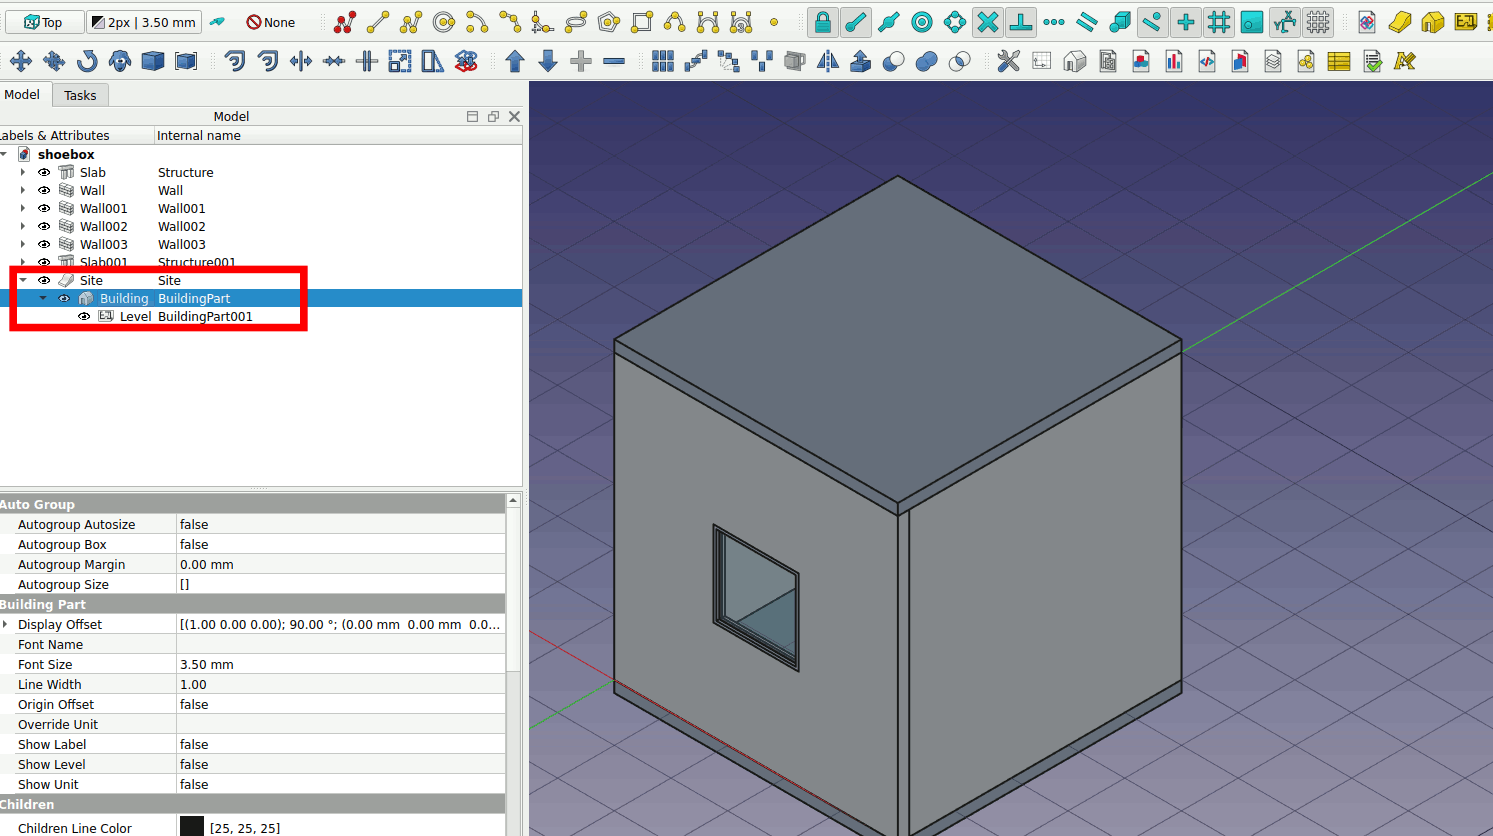
2. Right click -> Level -> Move to group …. Left click on it. Move the Level to the Building object.
3. Right click -> Building -> Move to group … Repeat the same procedure for moving the Building into the Site object.
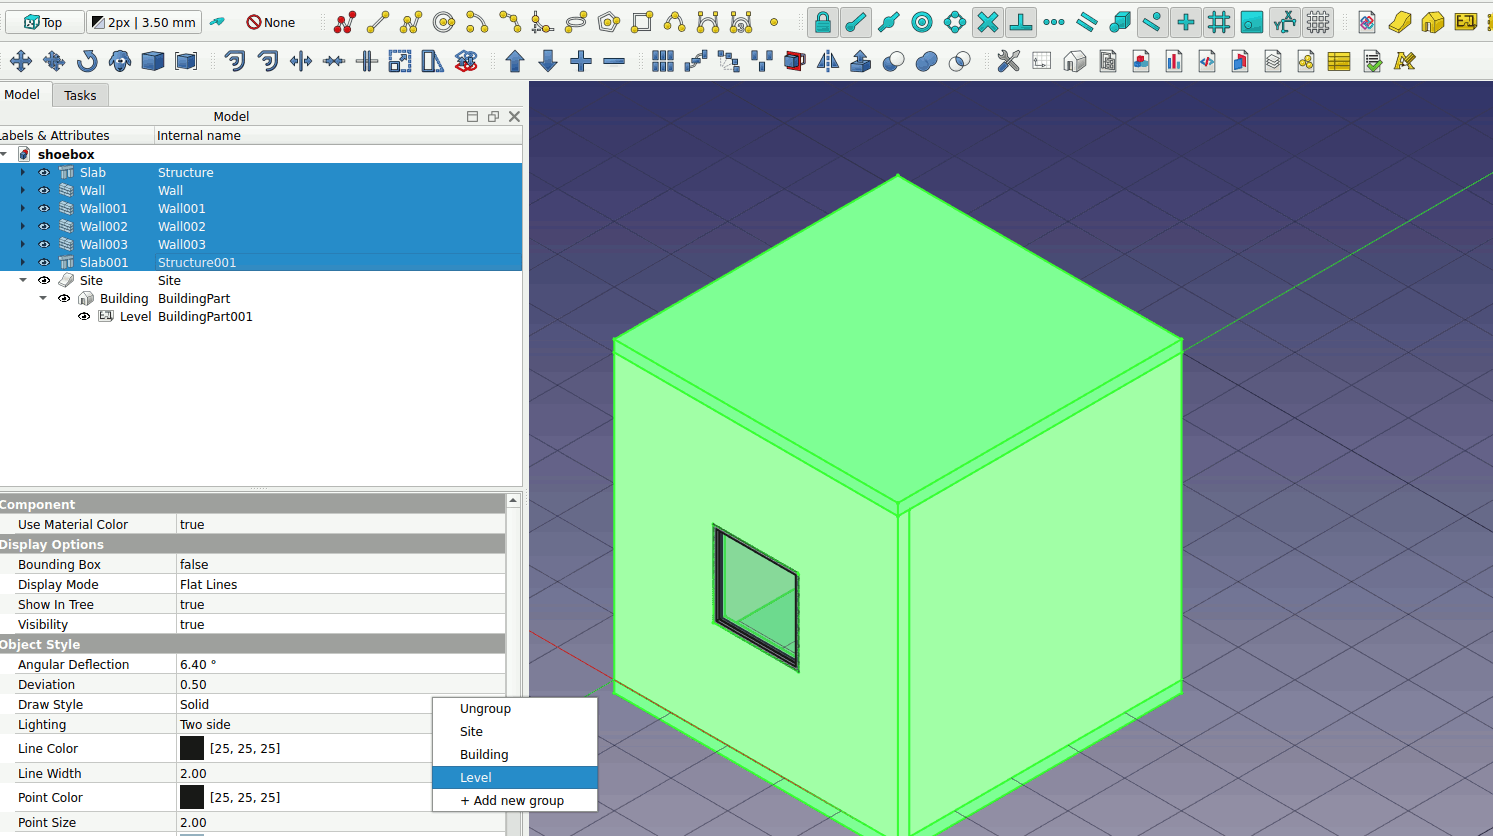
4. Select the slabs and walls by Shift + Left Click. Right click -> Move to group … Repeat the same procedure for moving the all the selected object into the Level object.
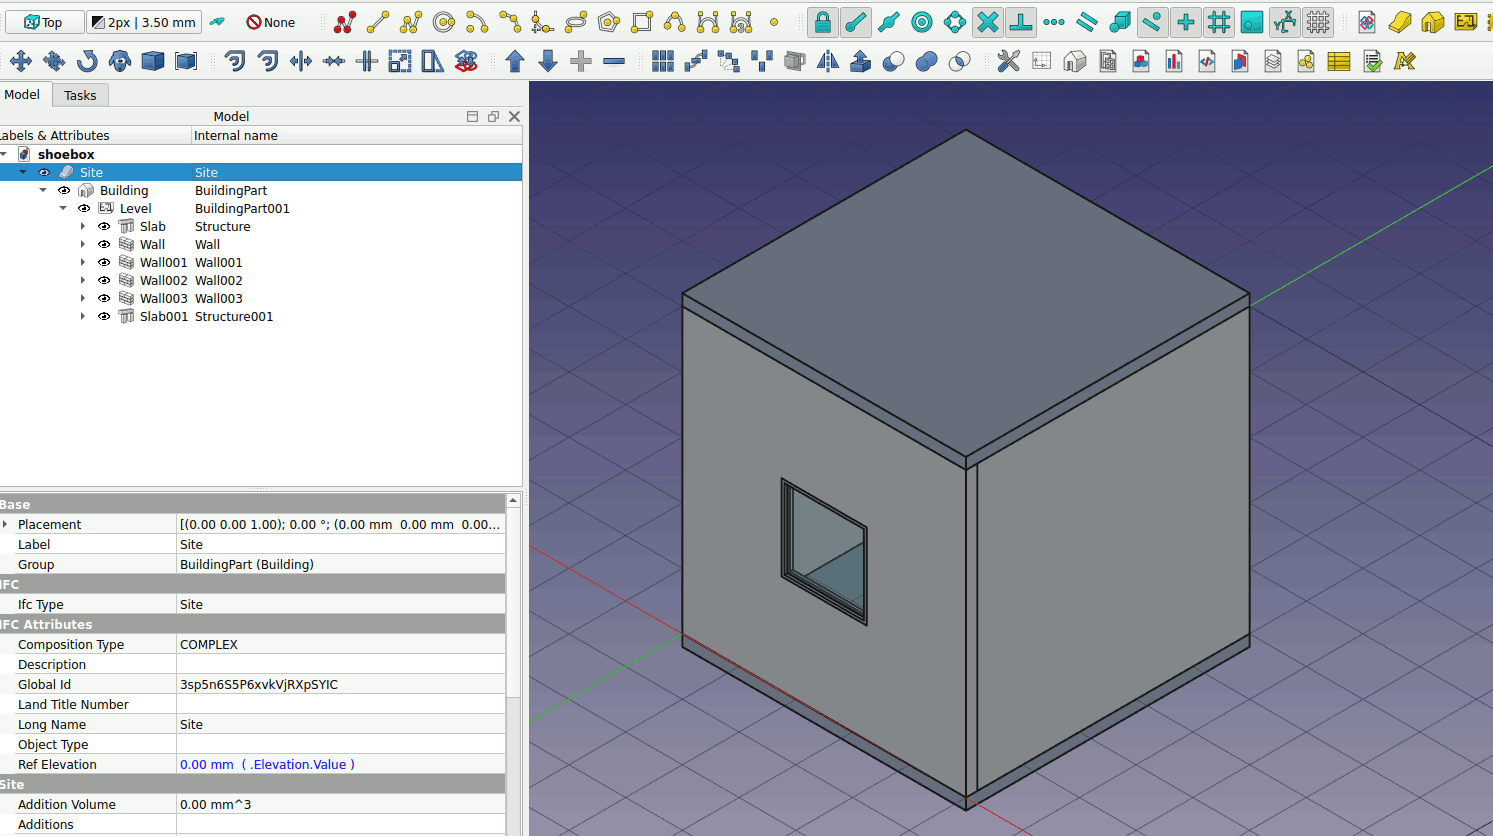
5. This is the end of Part 1. Your model should look like this.