2.6. Shoebox Model-Part 4: OpenStudio Model Constructions#
2.6.1. Specify the construction of the building envelope#
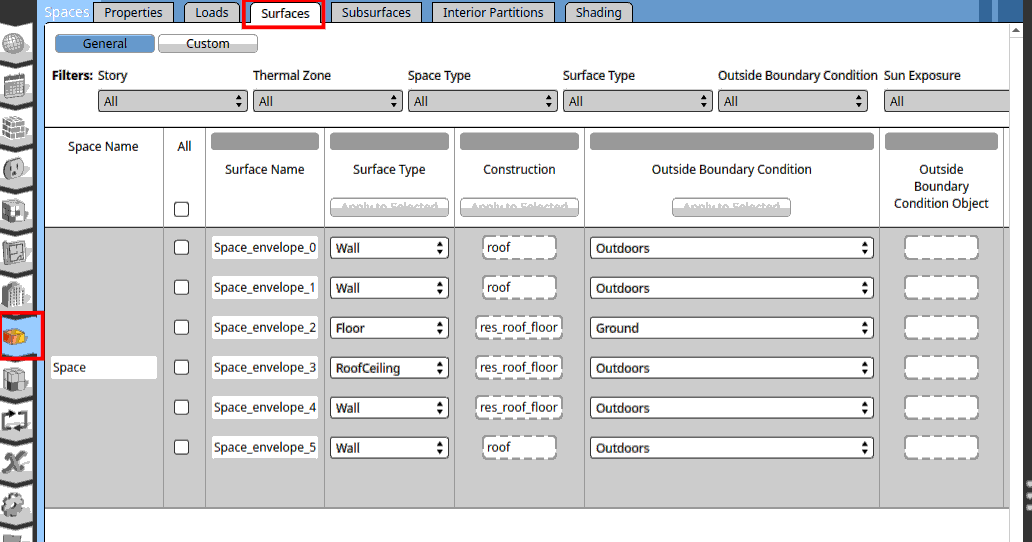
Next click on the Spaces tab. Click on the Surfaces tab. We can see that the shoebox model only have 6 surfaces. 4 walls 1 roof and 1 floor. Here you can see the specification of each surface.
2.6.2. Add a new wall construction#
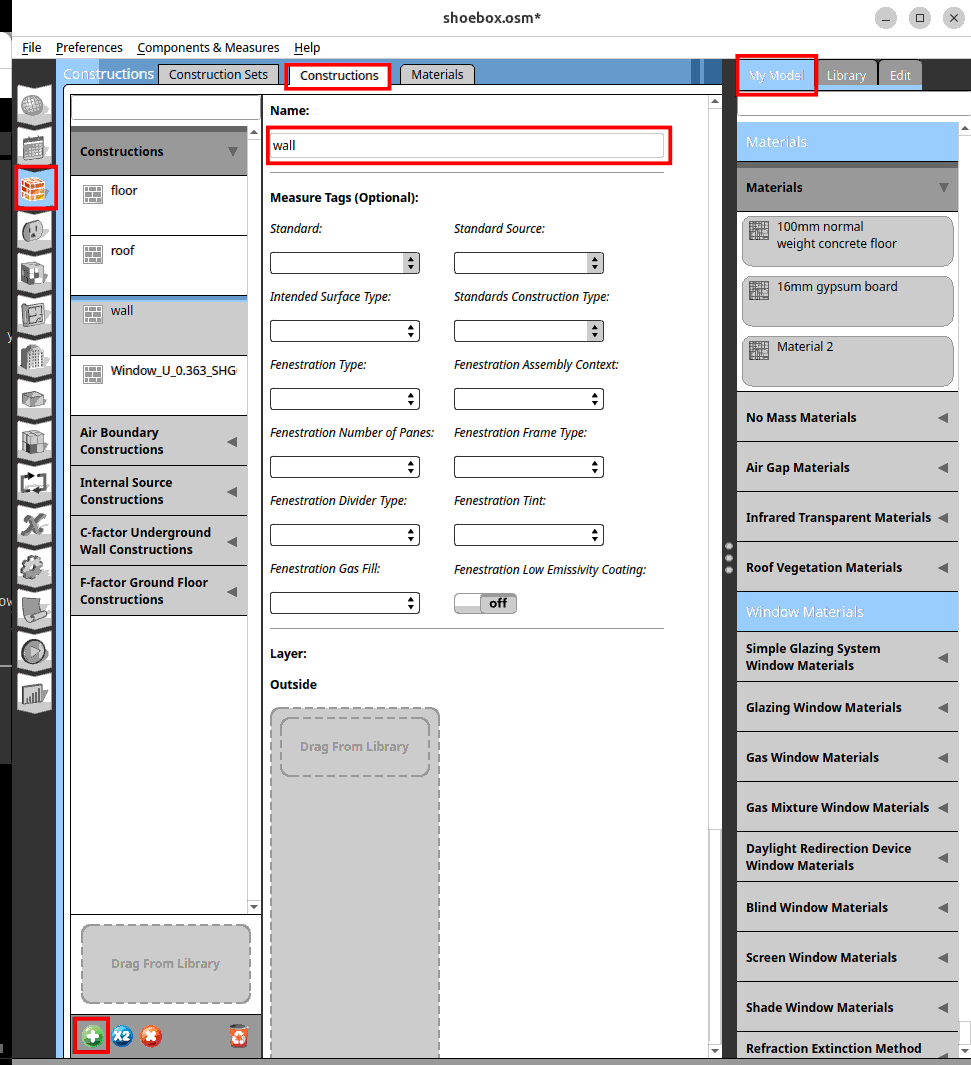
Next go to the Constructions tab. In the window go to the Constructions tab at the top. Click on the + button at the Constructions tab. Change the name of the construction to ‘wall’. At the right window click on the ‘My Model’ tab. There are no wall materials yet.
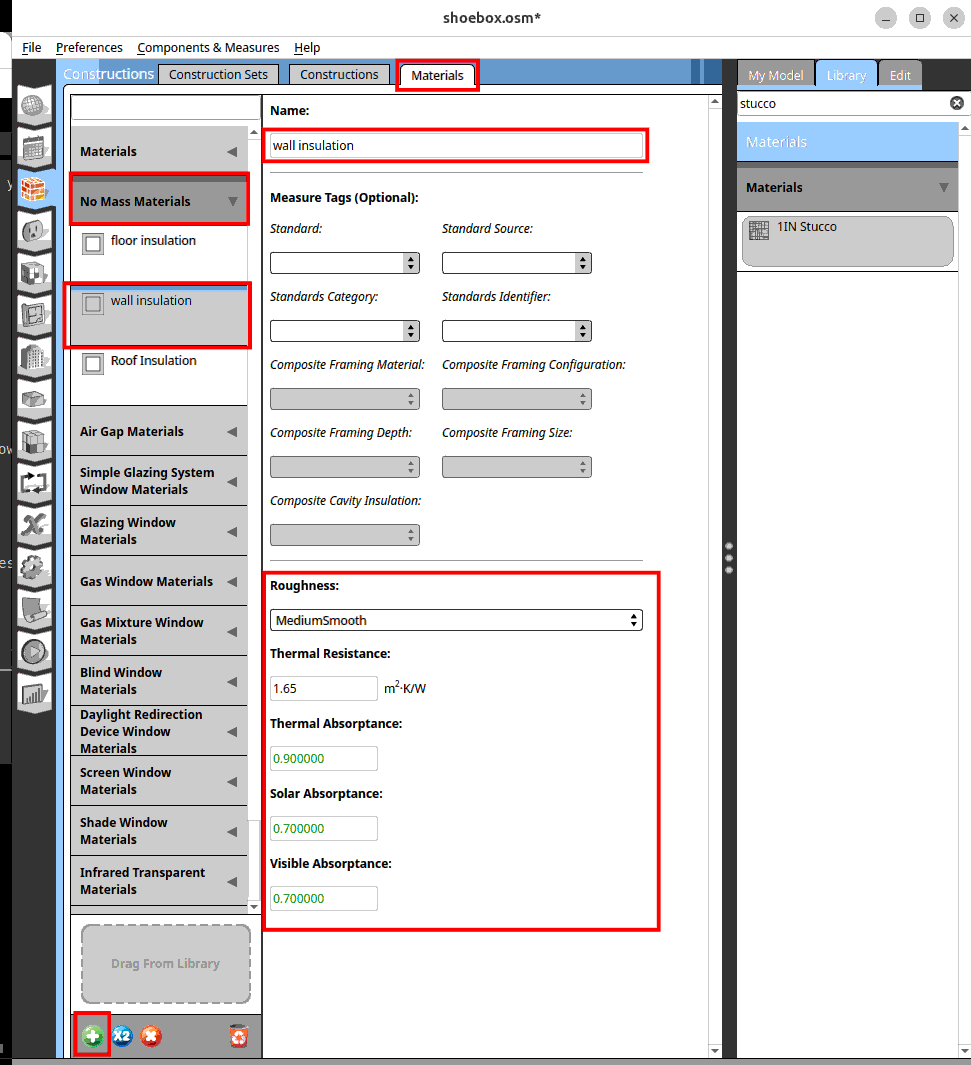
Go to the Materials tab. Click on the ‘No Mass Materials’. Click on the ‘+’ button. Name the new material ‘wall insulation’. Adjust the value of the properties as follows.
Roughness: MediumSmooth
Thermal Resistance: 1.65
Thermal Absorptance: 0.9
Solar Absorptance: 0.7
Visible Absorptance: 0.7
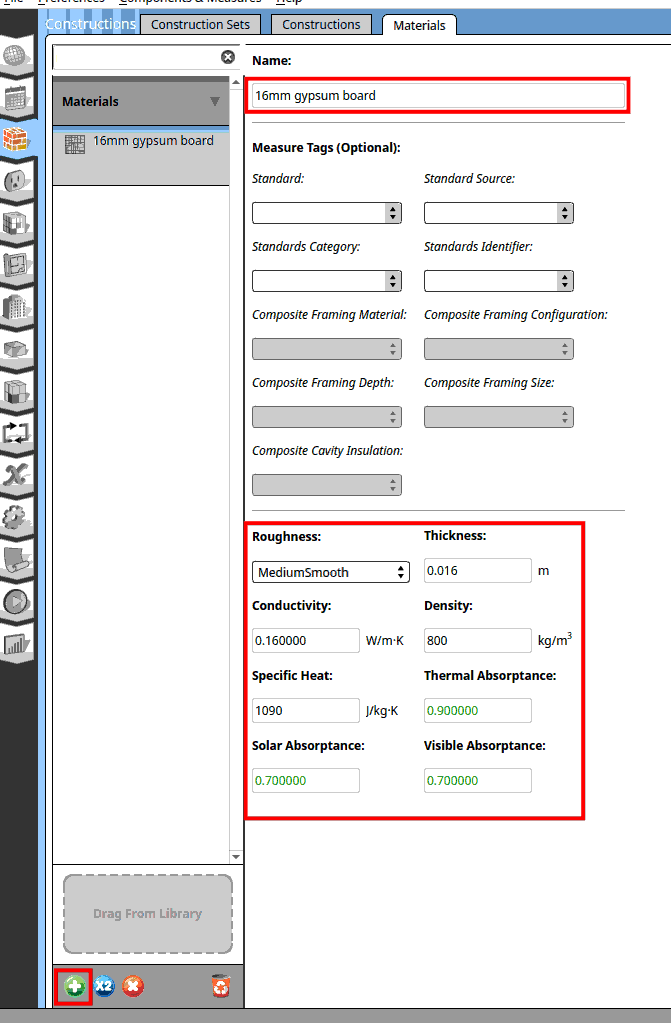
Click on ‘Materials’. Click on the ‘+’ button. Name the new material ‘16mm gypsum board’. Adjust the value of the properties as follows.
Roughness: MediumSmooth
Thickness: 0.016
Conductivity: 0.16
Density: 800
Specific Heat: 1090
Thermal Absorptance: 0.9
Solar Absorptance: 0.7
Visible Asorptance: 0.7
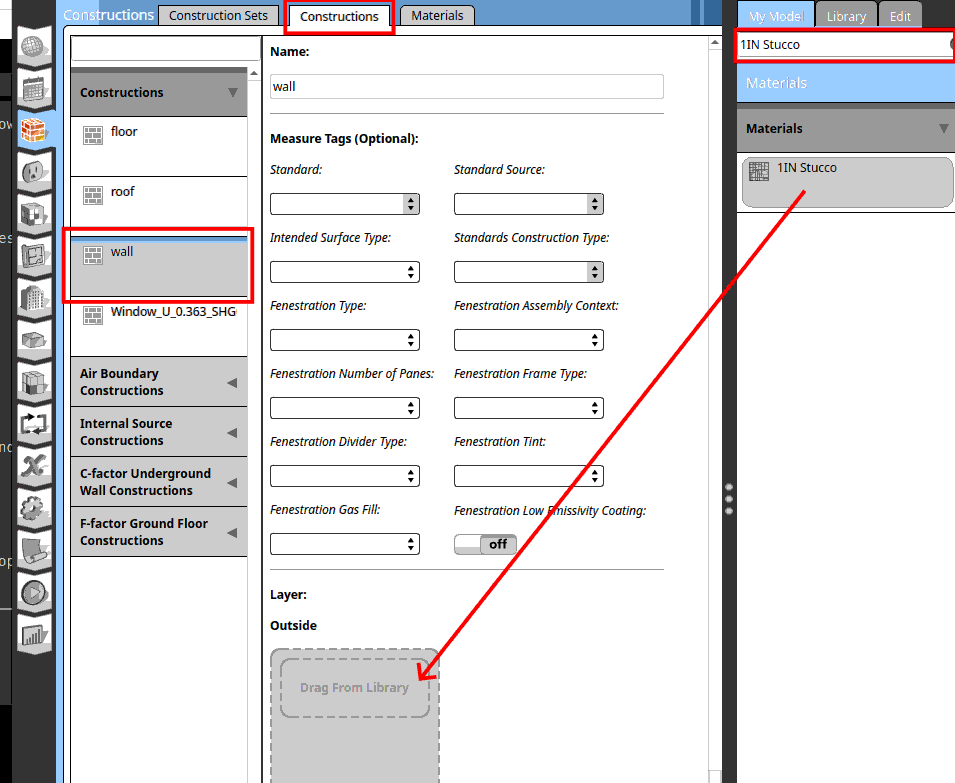
Next we will use a material from the standard material library of OpenStudio Application. Click on ‘Library’ on the right window. Search for ‘stucco’. Drag and drop ‘1IN Stucco’ to the ‘Drag from Library’ parameter. Pay attention to the arrow to turn to a ‘+’ sign before dropping the material. You will be able to see 1IN stucco in the Materials tab.

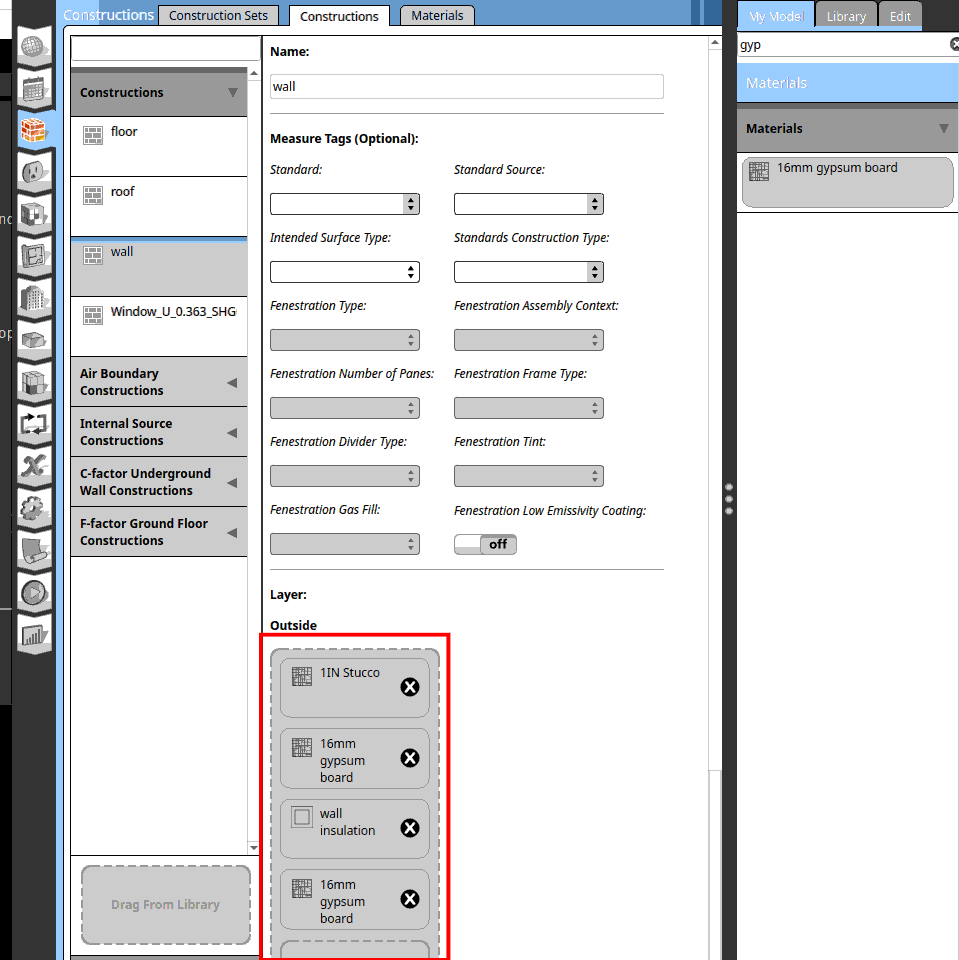
Now we can go back to the Constructions tab. Click on the wall construction. Go to the My Model tab at the right window. Search for ‘1IN Stucco’. Drag and drop the material onto the wall construction. Repeat for the rest of these materials.
16mm gypsum board
wall insulation
16mm gypsum board
Your wall construction should look like this.
Do the same for the roof and floor construction.
2.6.3. Roof and floor construction#
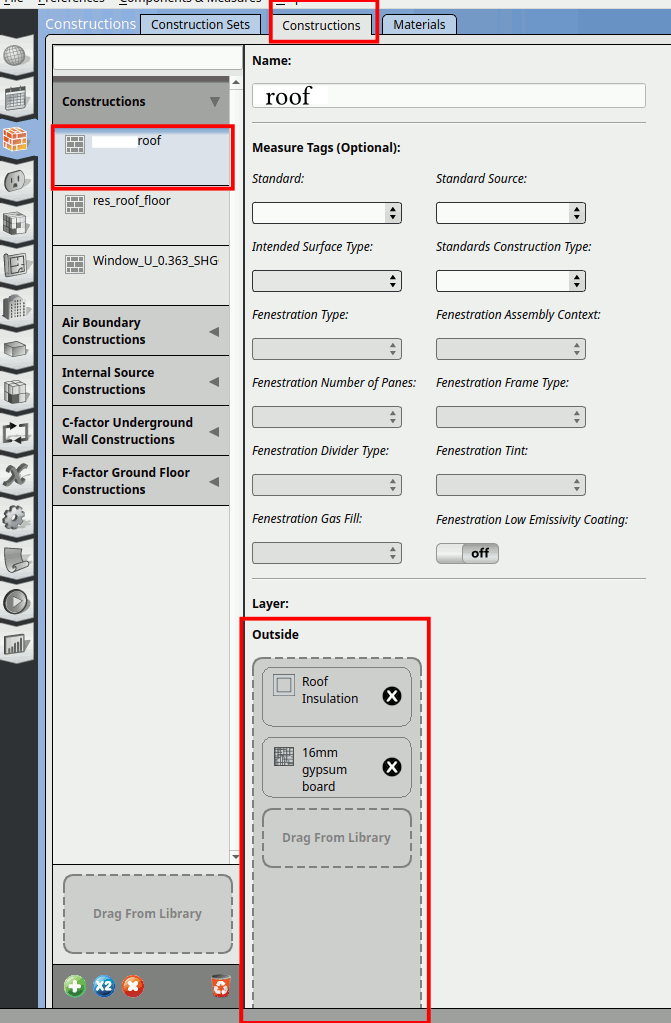
Create a no mass roof insulation with the following values:
Roughness: MediumSmooth
Thermal Resistance: 8.1
Thermal Absorptance: 0.9
Solar Absorptance: 0.7
Visible Absorptance: 0.7
Reuse the 16mm gypsum board for your roof construction. Your roof construction should look like this.
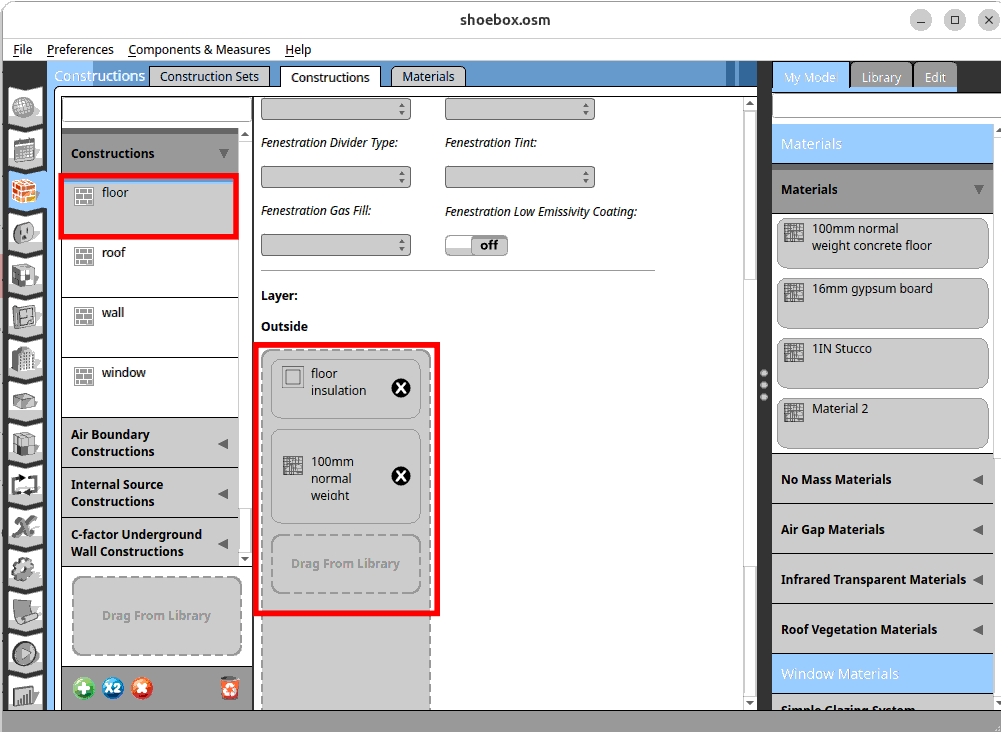
Now let’s create the construction for your floor. Create a no mass material for your floor called ‘floor insulation’.
Roughness: MediumSmooth
Thermal Resistance: 4.13
Thermal Absorptance: 0.9
Solar Absorptance: 0.7
Visible Absorptance: 0.7
Next create a material called ‘100mm normal weight concrete floor’. Change the values of the parameters as follows.
Roughness: MediumRough
Thickness: 0.1
Conductivity: 2.31
Density: 2322
Specific Heat: 832
Thermal Absorptance: 0.9
Solar Absorptance: 0.7
Visible Asorptance: 0.7
Your floor construction should look at follows:
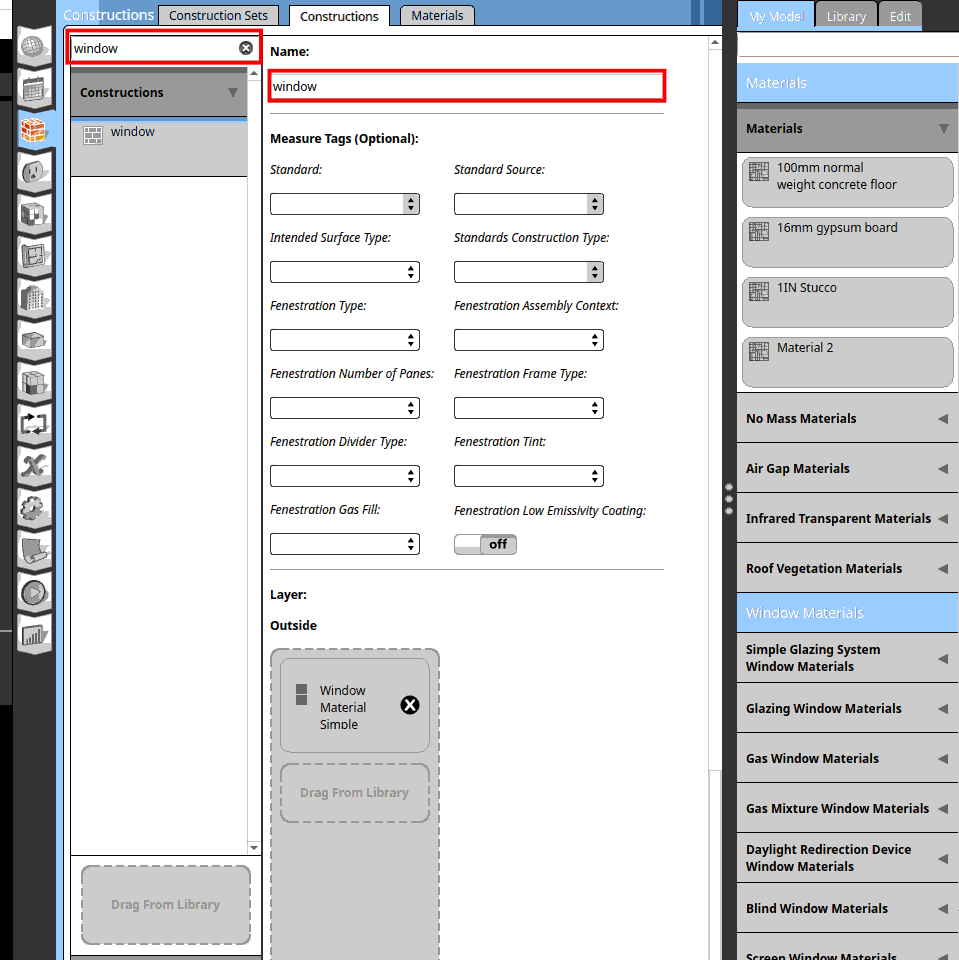
2.6.4. Edit window construction#
In the Constructions tab. Search for ‘window’. Click on the result ‘Window_U_0.363_SHGC_North_0.359’. Change the name to ‘window’.
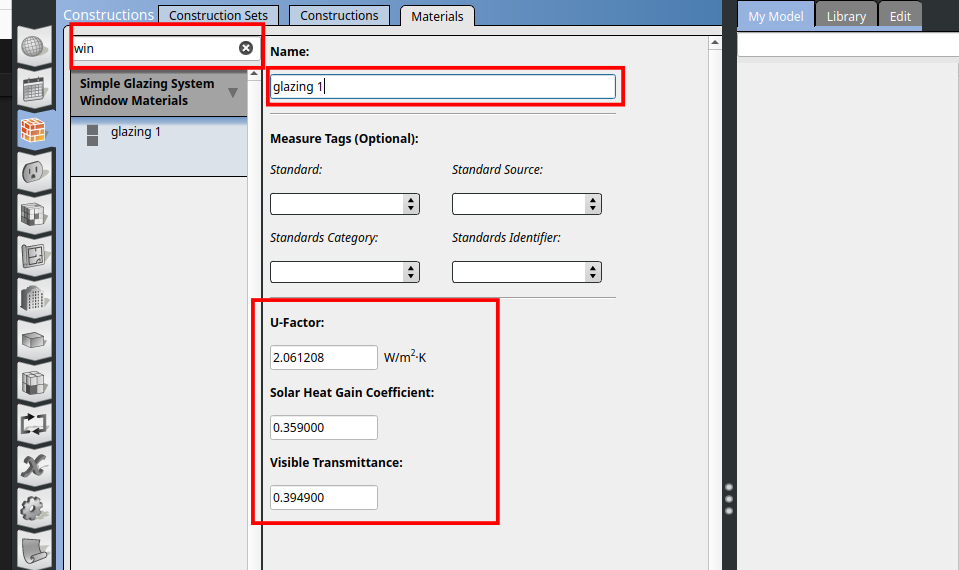
Go to the Materials tab. Search for ‘window’. Click on ‘Window Material Simple Glazing System 1’. Change the name to ‘glazing 1’. Make sure the material has the same property as shown.
2.6.5. Assign construction to the surfaces#
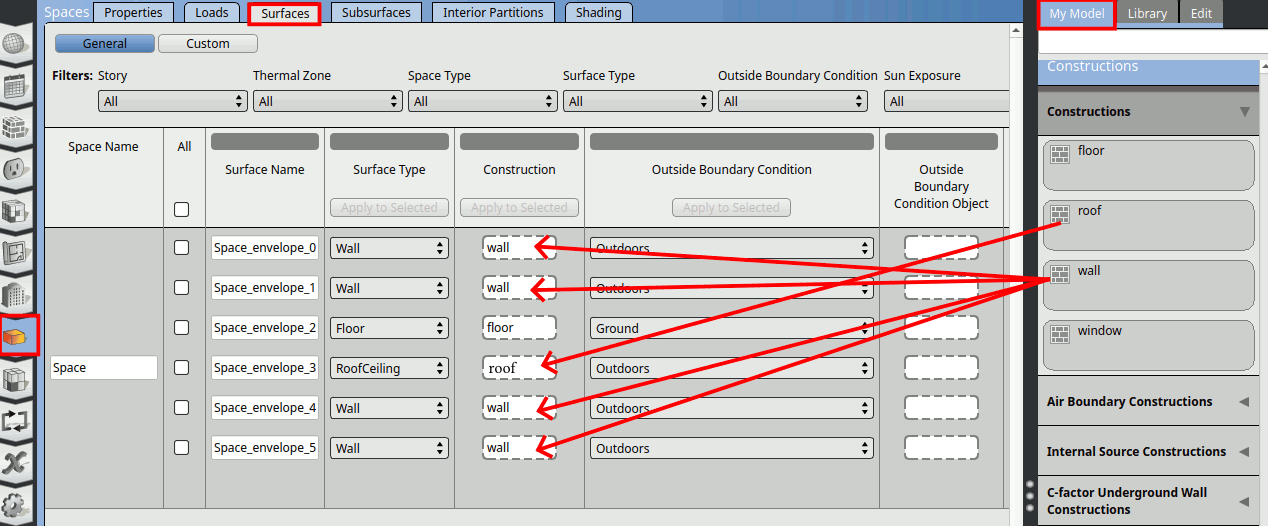
Go to the Spaces tab. In the Spaces window click on the Surfaces tab.
At the right window click on ‘My Model’. Search for ‘wall’ and ‘roof’ at the right window. Then drag and drop the wall construction to all the Wall surface type and roof to the Roof Ceiling surface type
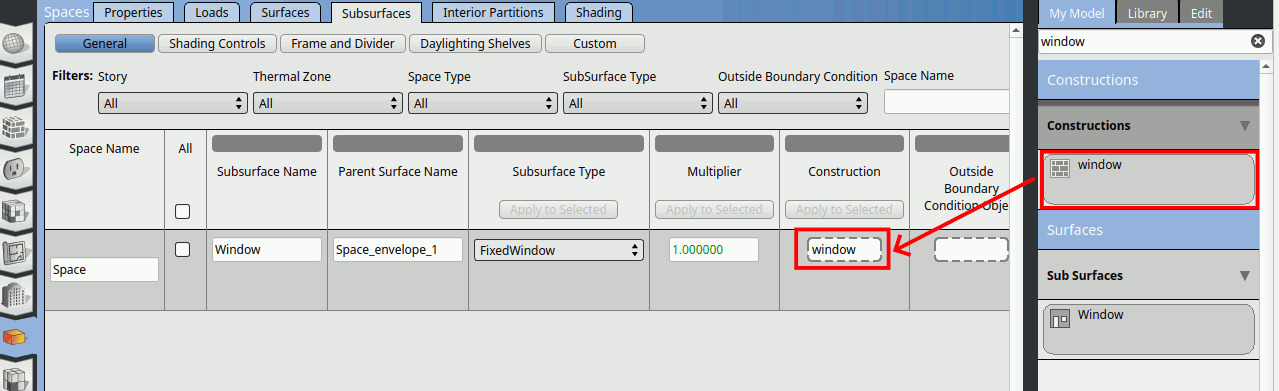
Click on the Subsurfaces tab. Check that the window subsurface has the right construction as shown below.
2.6.6. Add measure#
Download the .zip file of the common Measures from here. Unzip the zip file.
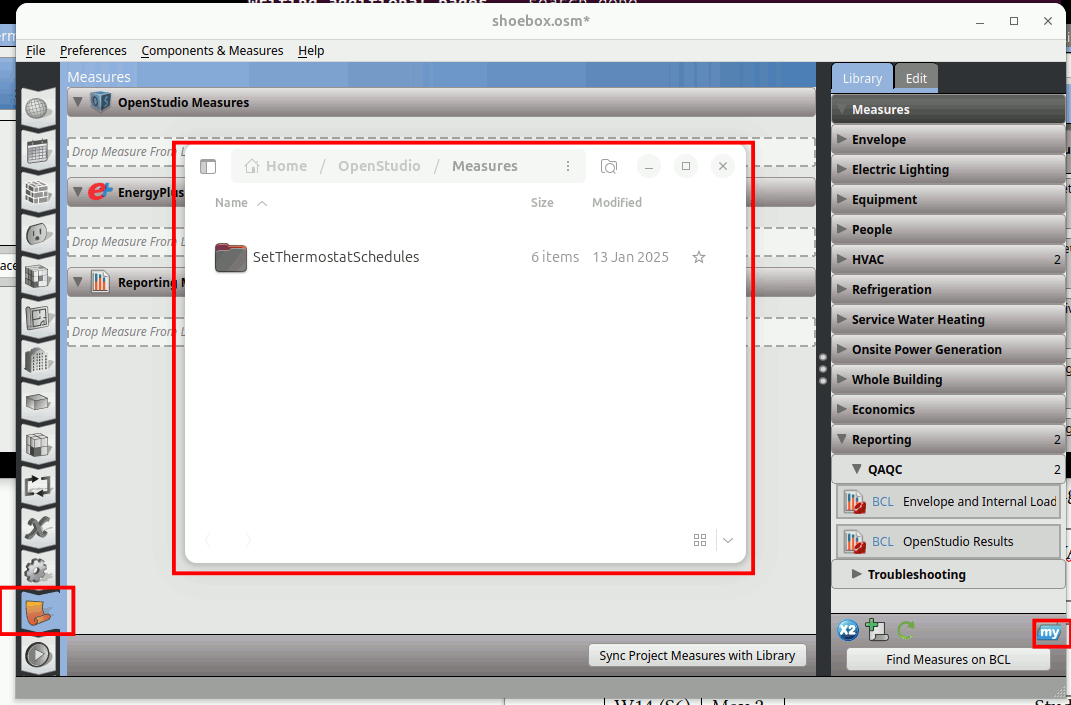
In the OpenStudio Application. Go to the Measures tab. Click on the ‘my’ icon at the bottom right of the right window. A folder window will pop out once you click it. This is the directory where you store all your Measures.
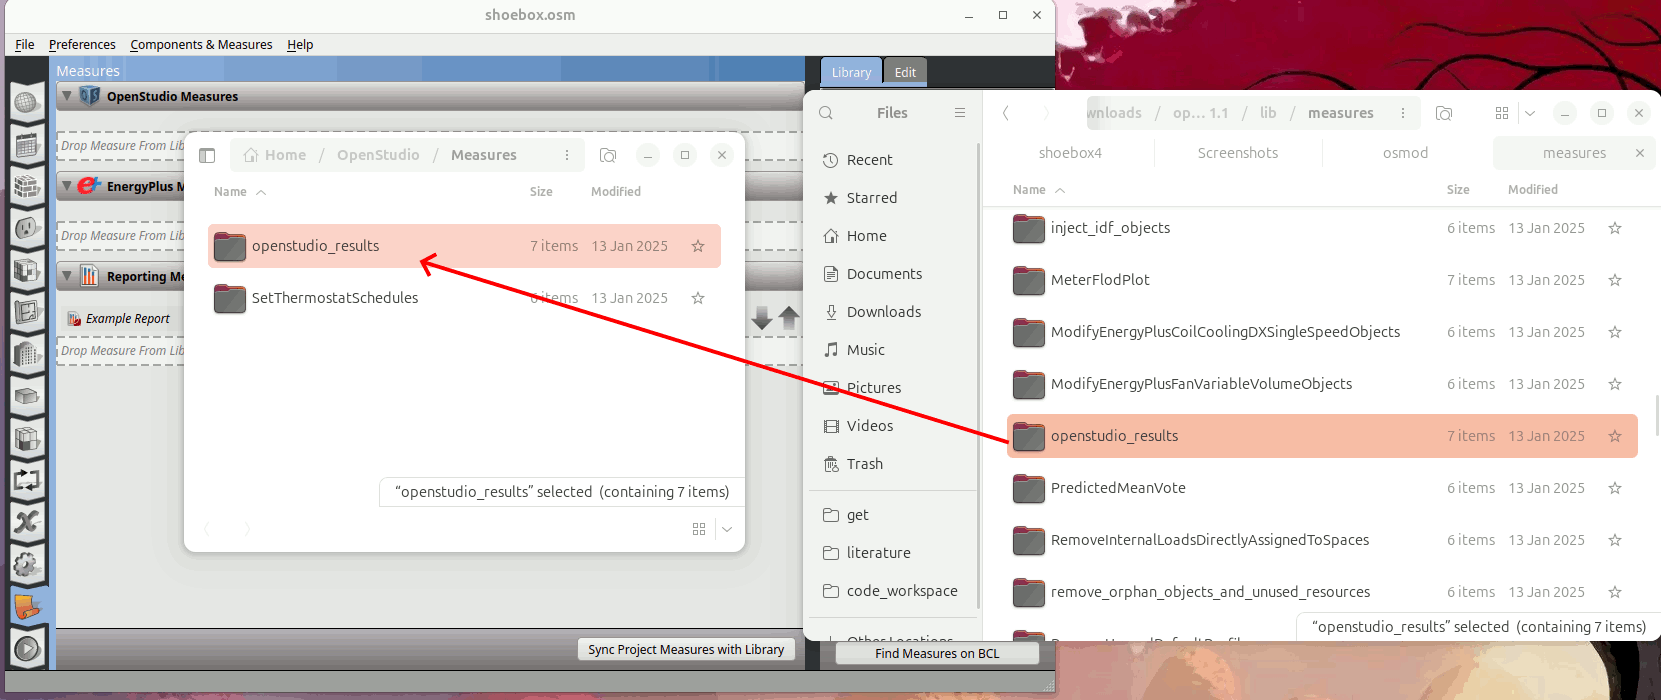
Unzip the common Measures zip file you downloaded. Go to openstudio-common-measures-gem-0.11.1 -> lib -> measures -> openstudio_results. Copy and paste the folder ‘openstudio_results’ into the my measure directory.
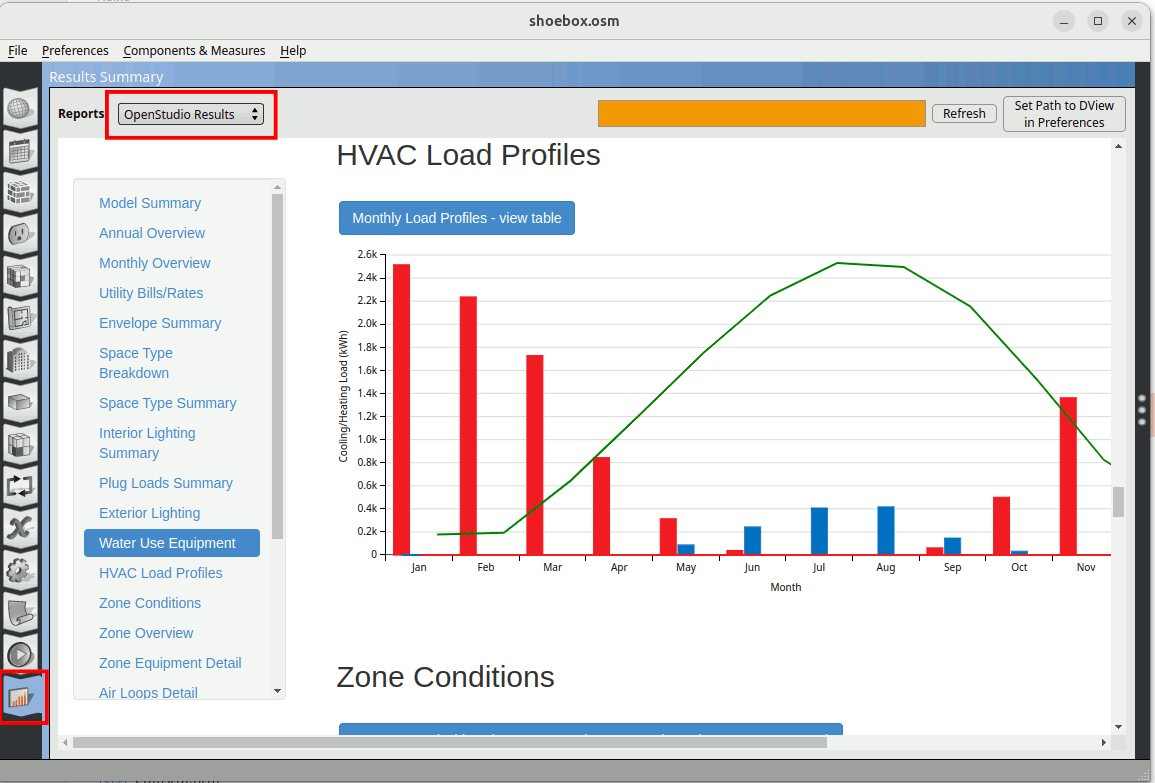
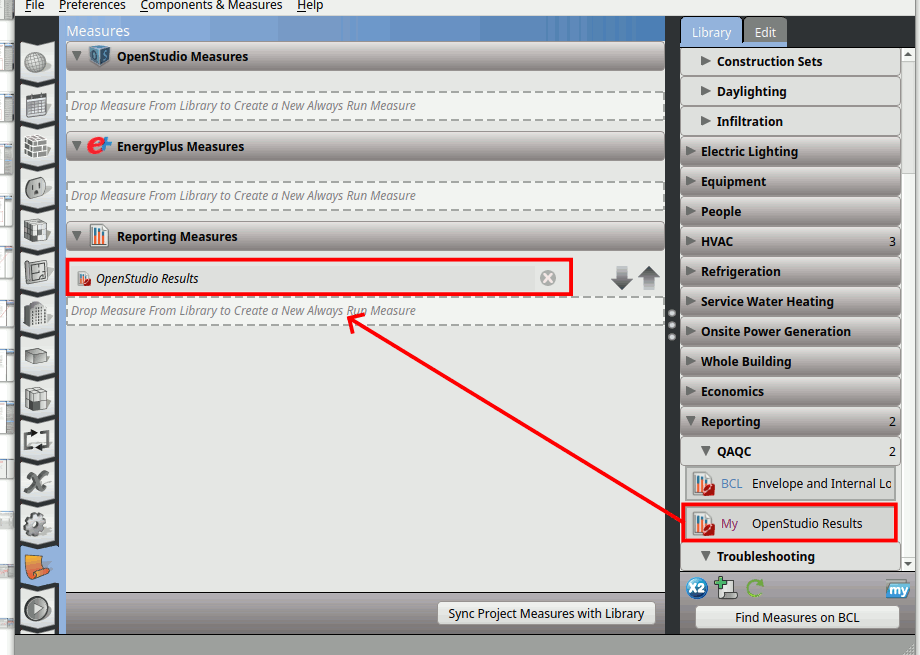
Click on ‘Sync Project Measures with Library’ -> Update. You should now be able to see the OpenStudio Results with a My infront of it.
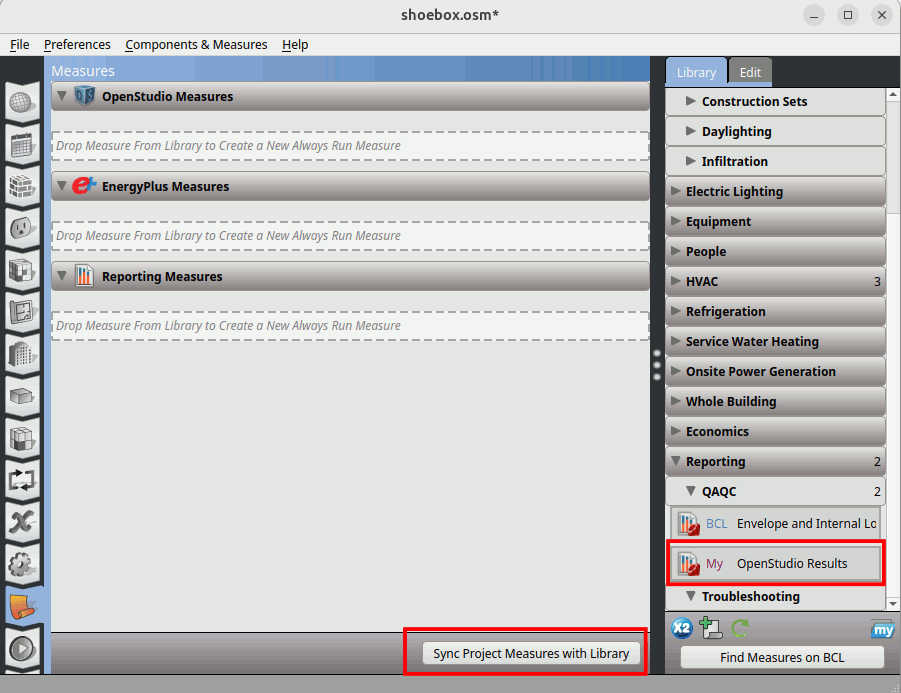
Apply the OpenStudio Results measure by dragging and dropping it to the Reporting Measures.
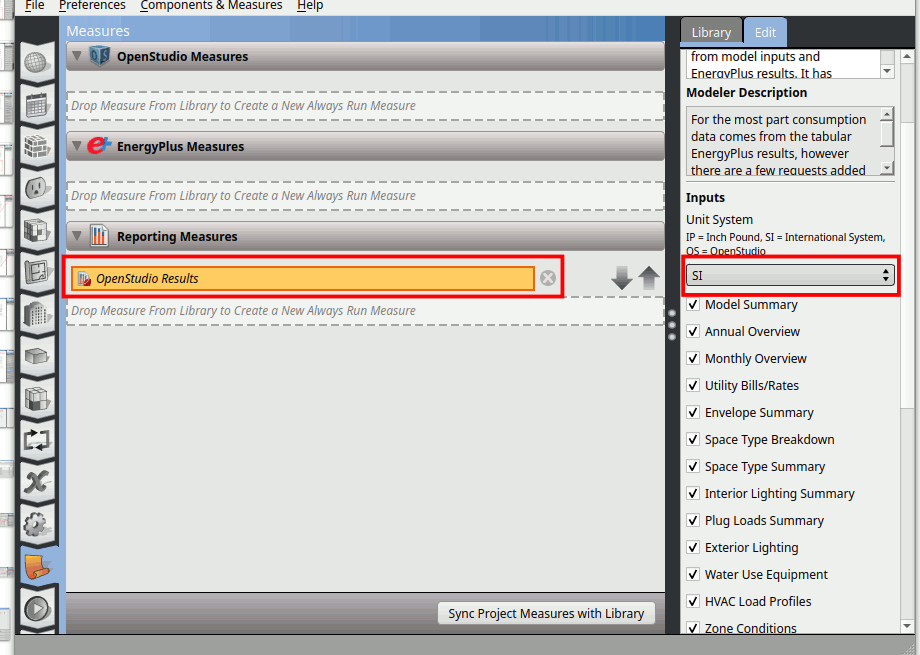
Click on the Openstudio Results measure. Choose SI unit for the input.
2.6.7. Run the simulation#
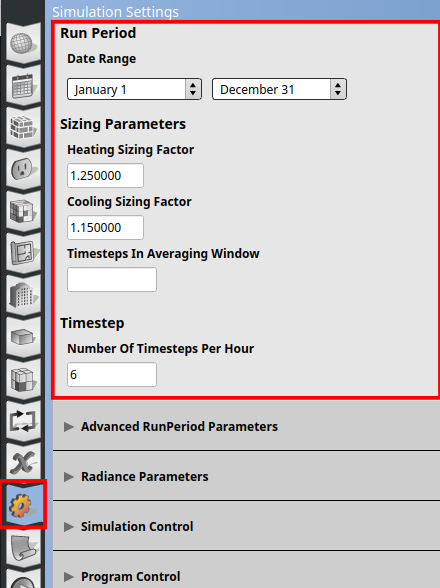
Go to Simulation Settings tab and check the simulation settings is as follows.
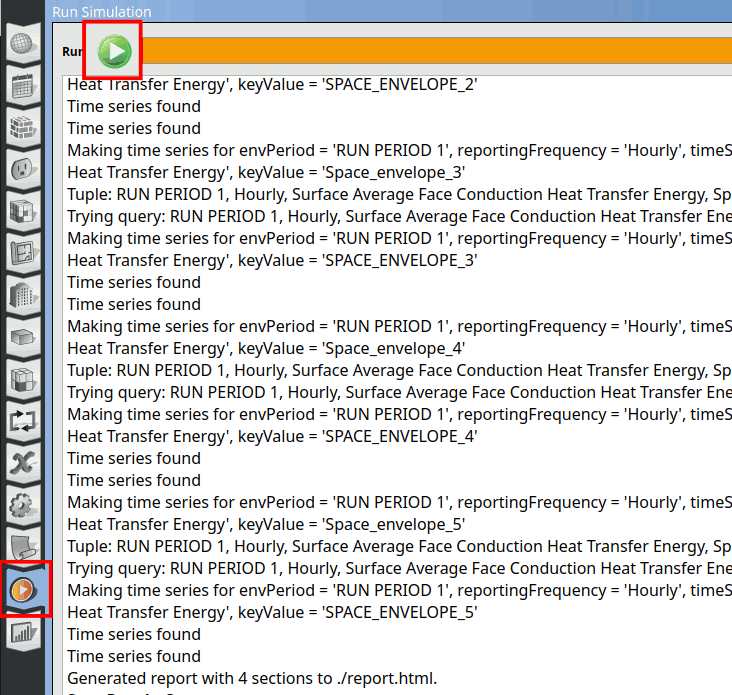
Go to Run Simulations tab and click on Run to start the simulation.
Go to the result section and look at the results of the simulation and choose OpenStudio Results to look at the simulation results.