3.2. Shoebox Model with OpenStudio-Part 2: Weather Files and Model Schedules#
3.2.1. Specify the weatherfile#
We will simulate the shoebox model in New York City. Download the weatherfile here.
You can get updated weatherfiles around the world here.
Download and unzip the folder.
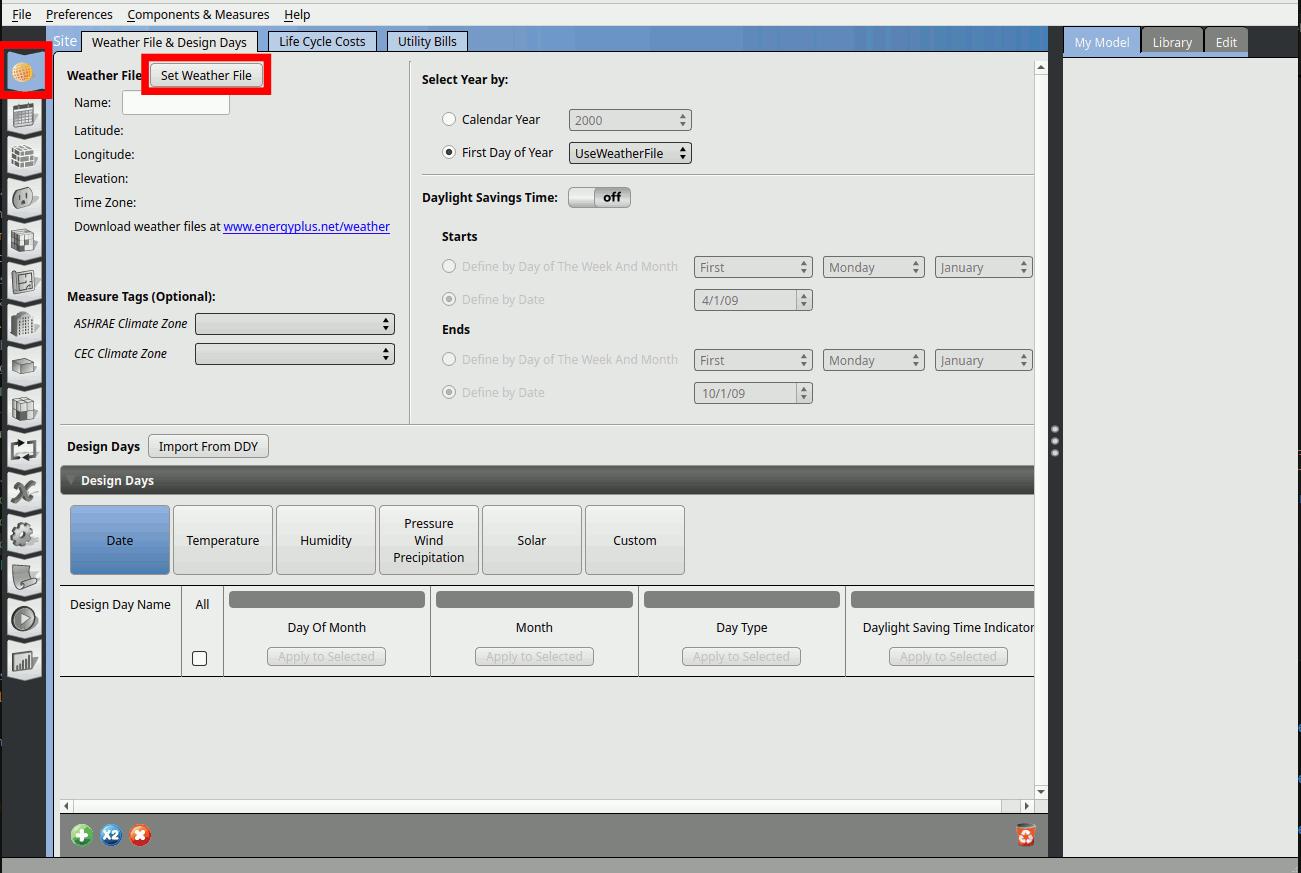
Go to the Site tab and set the weatherfile as shown below.
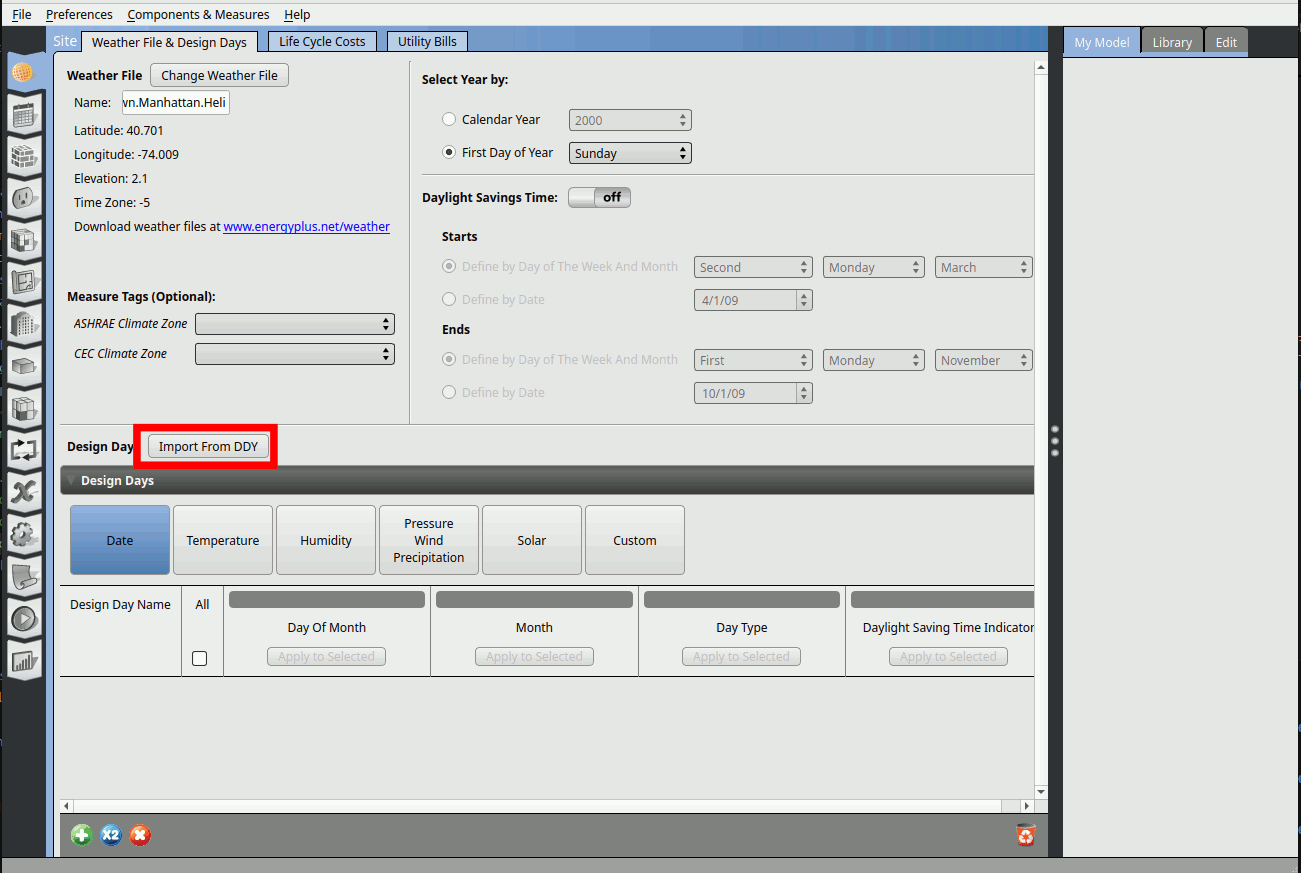
Set the design day information by clicking on Import From DDY.
3.2.2. Specify the load definitions#
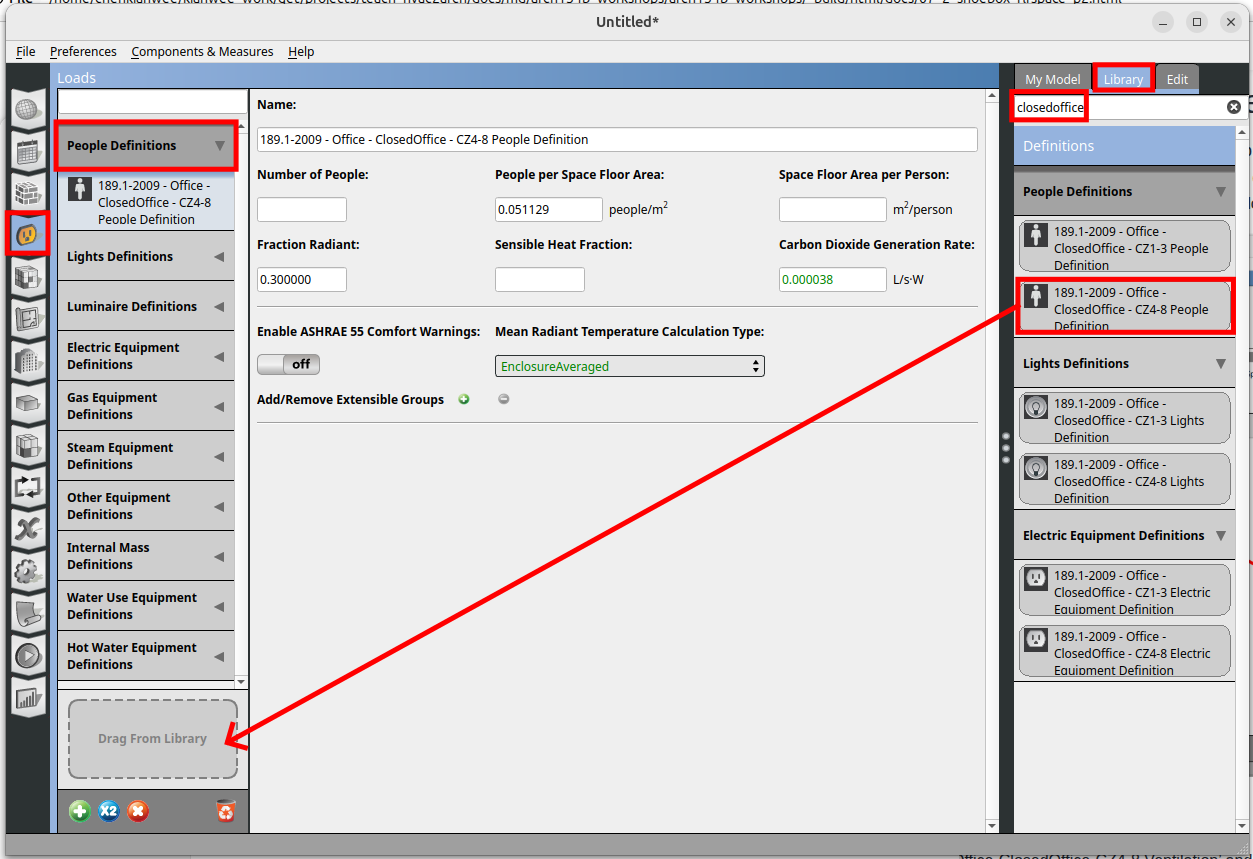
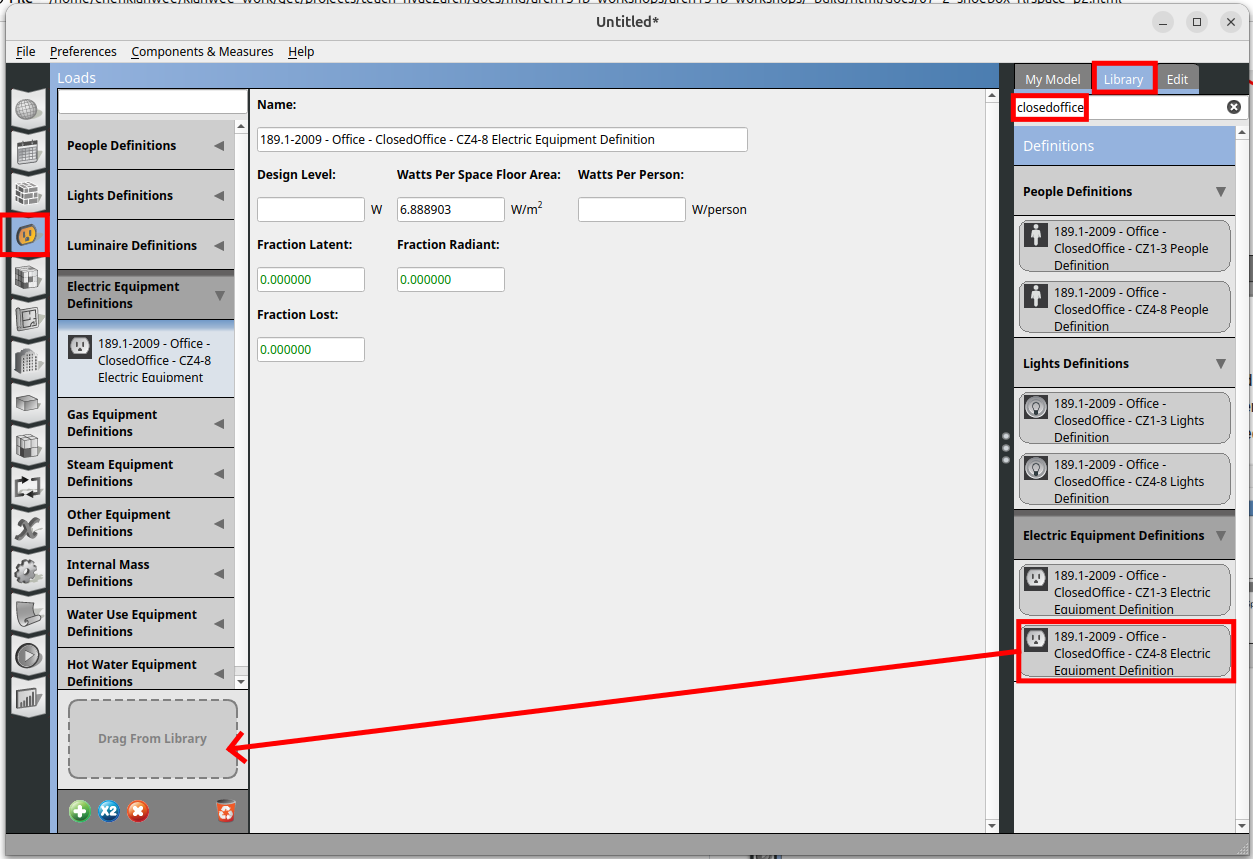
Go to the Loads tab. On the right window click on the ‘Library’ tab. Search for ‘closedoffice’. Drag and drop ‘189.1-2009-Office-ClosedOffice-CZ4-8 People Definition’ onto the ‘Drag From Library’.
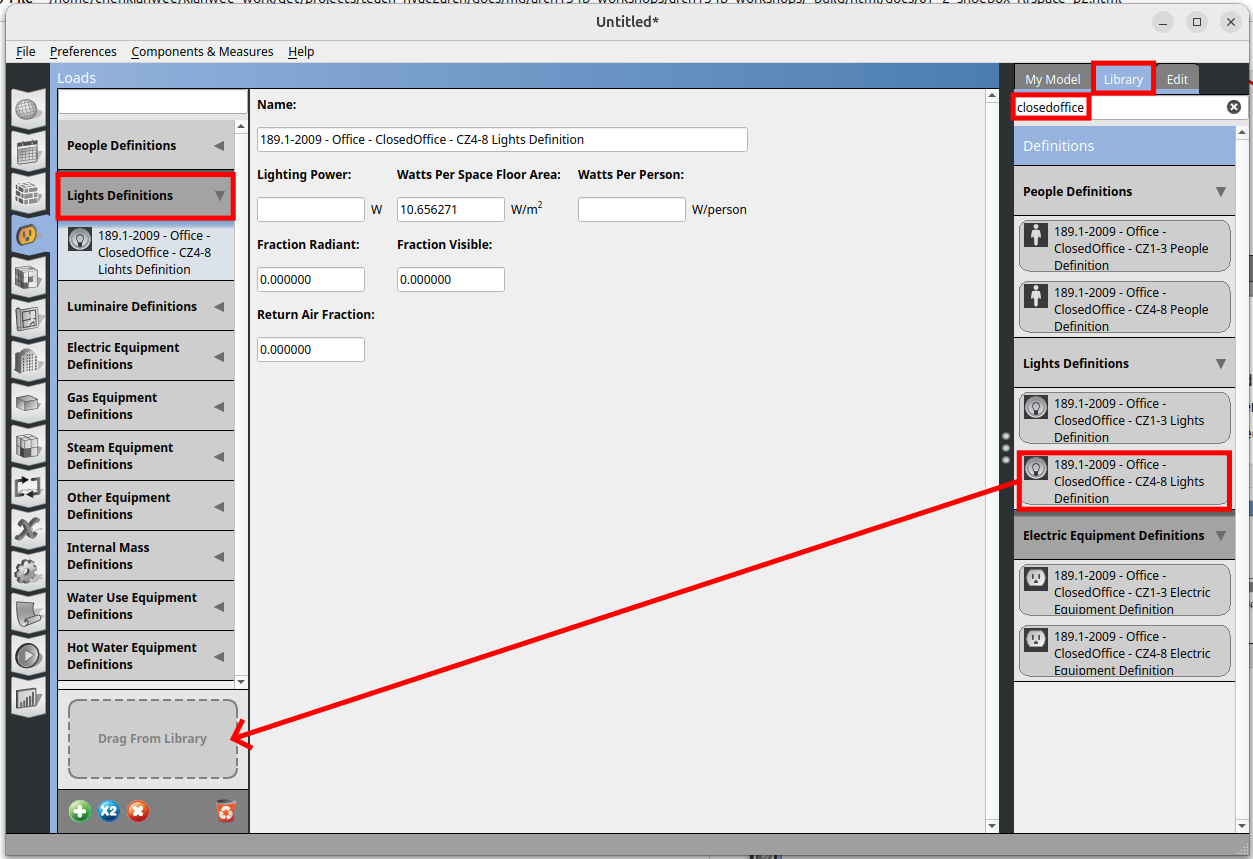
On the right window click on the ‘Library’ tab. Search for ‘closedoffice’. Drag and drop ‘189.1-2009-Office-ClosedOffice-CZ4-8 Lights Definition’ onto the ‘Drag From Library’.
On the right window click on the ‘Library’ tab. Search for ‘closedoffice’. Drag and drop ‘189.1-2009-Office-ClosedOffice-CZ4-8 Electric Equipment Definition’ onto the ‘Drag From Library’.
3.2.3. Specify the outdoor air ventilation#
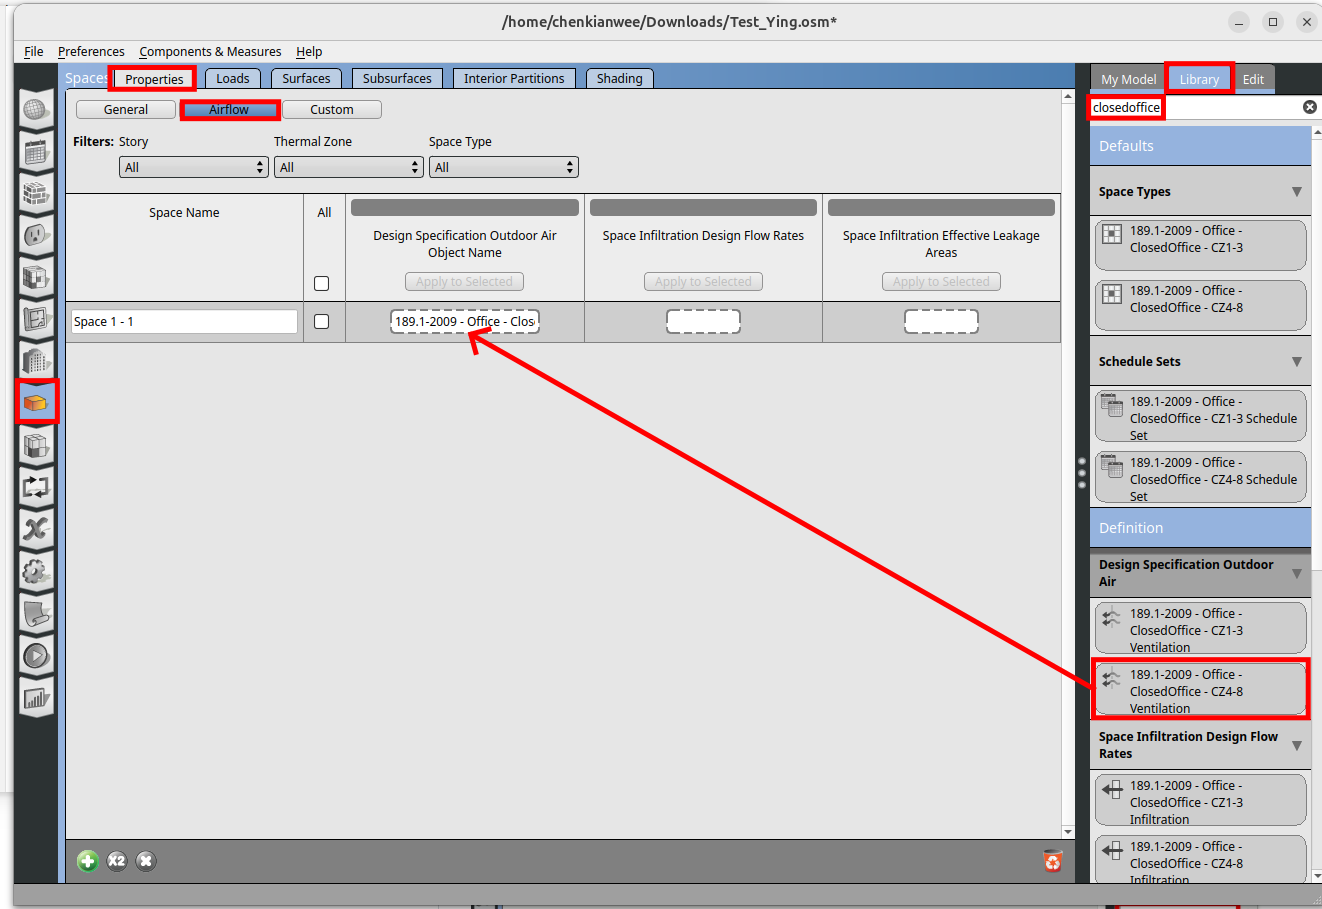
Go to the Spaces tab and click on the Airflow. Go to the ‘Library’ tab on the right window and search for ‘closedoffice’. Under the ‘Design Specification Outdoor Air’ heading drag and drop ‘189.1-2009-Office-ClosedOffice-CZ4-8 Ventilation’ onto the ‘Design Specification Outdoor Air Object Name’.
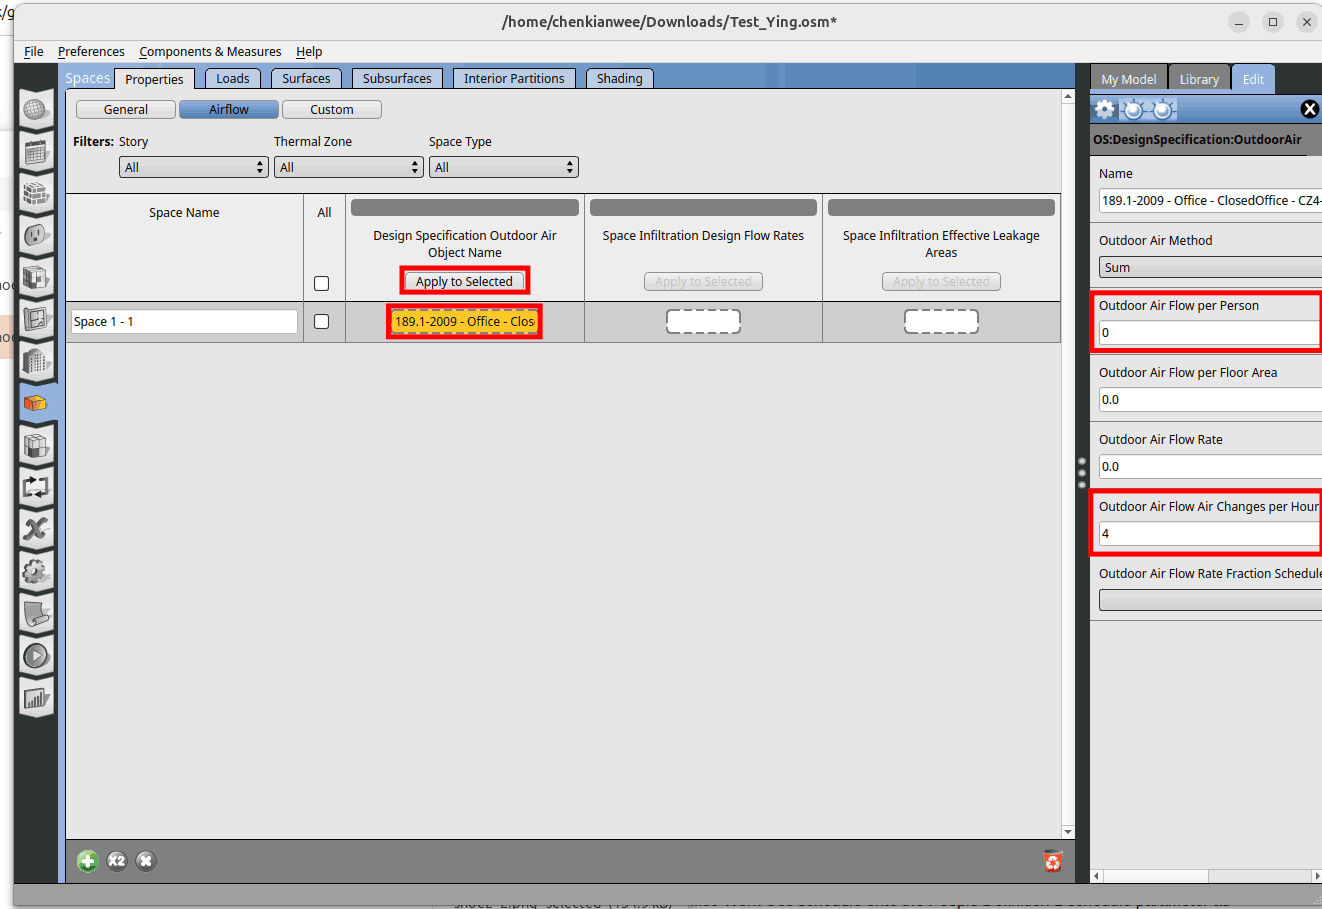
Click on the ‘189.1-2009-Office-ClosedOffice-CZ4-8 Ventilation’ and change the ‘Outdoor Air Flow per Person’ to 0, and ‘Outdoor Air Flow Air Changes per Hour’ to 4. Then while ‘189.1-2009-Office-ClosedOffice-CZ4-8 Ventilation’ is clicked, click on ‘Apply to Selected’.
3.2.4. Specify the load schedules#
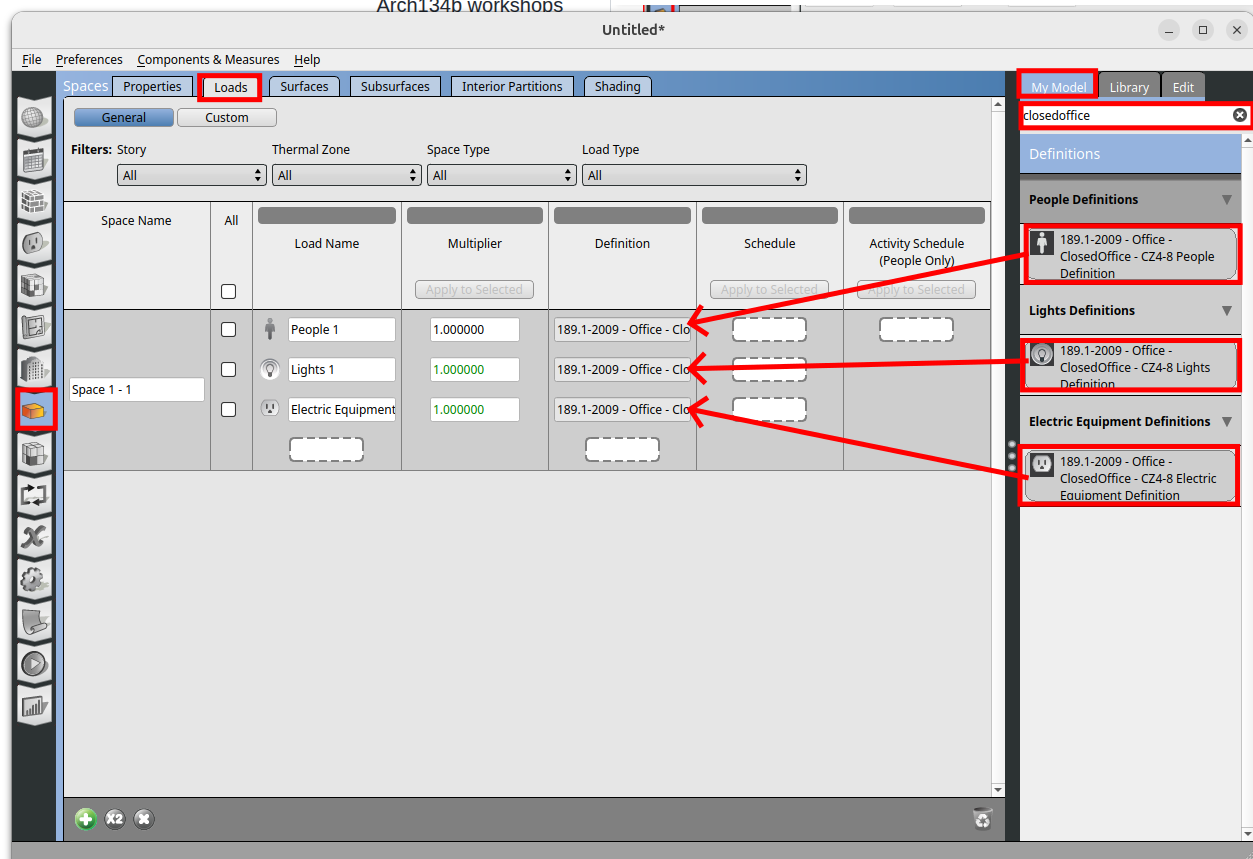
Go to ‘Spaces’. Click on the ‘Loads’ tab. On the right window click on the ‘My Model’ tab. Search for ‘closedoffice’. Drag and drop the people, lights and equipment definitions to the definition tab as shown below.
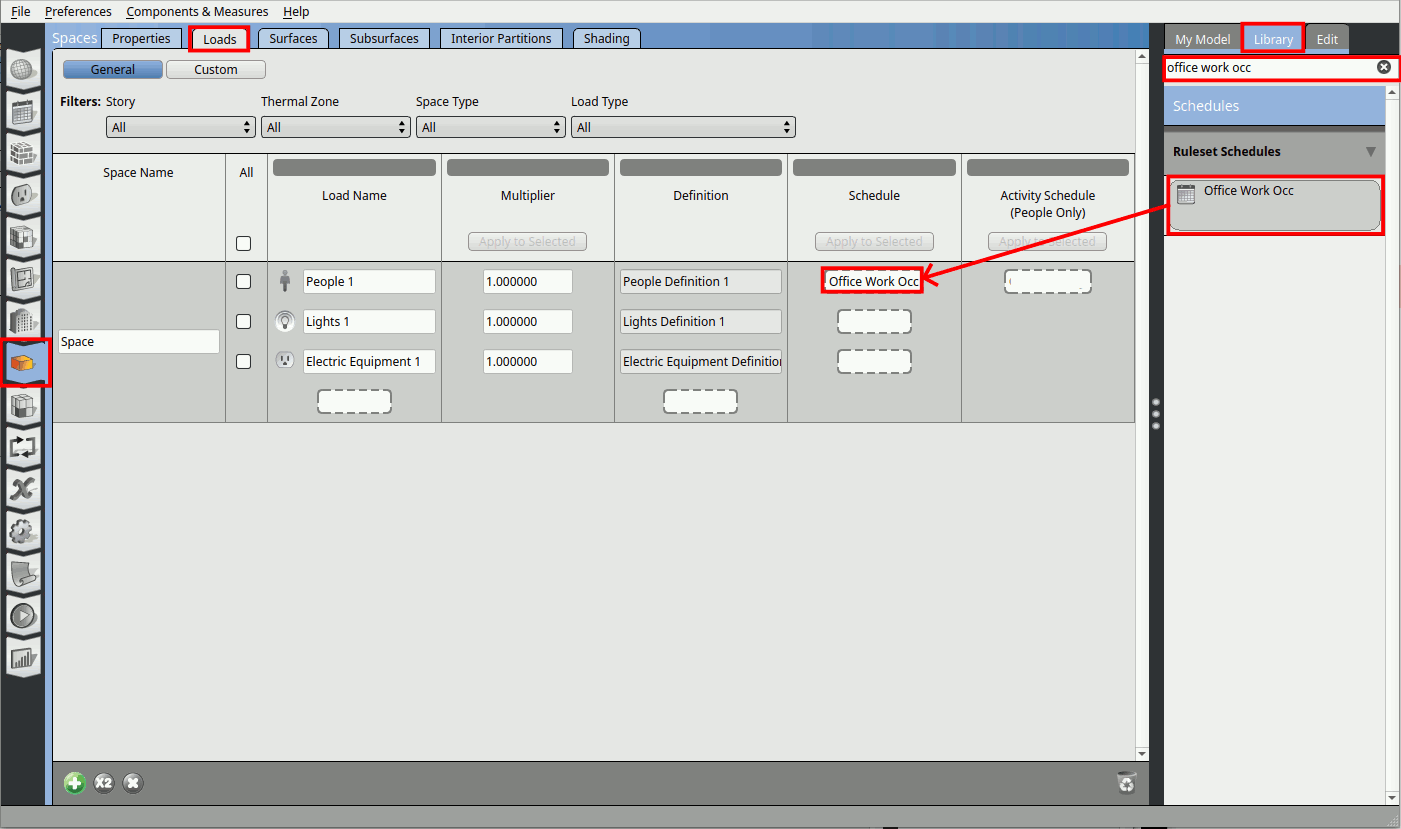
Go to the Loads tab. On the right window click on the Library tab, in the search bar type in ‘Office Work Occ’. Drag and drop the Office Work Occ schedule onto the People Definition 1 schedule parameter as shown below. Make sure the mouse shows a ‘+’ sign before you release the drag.
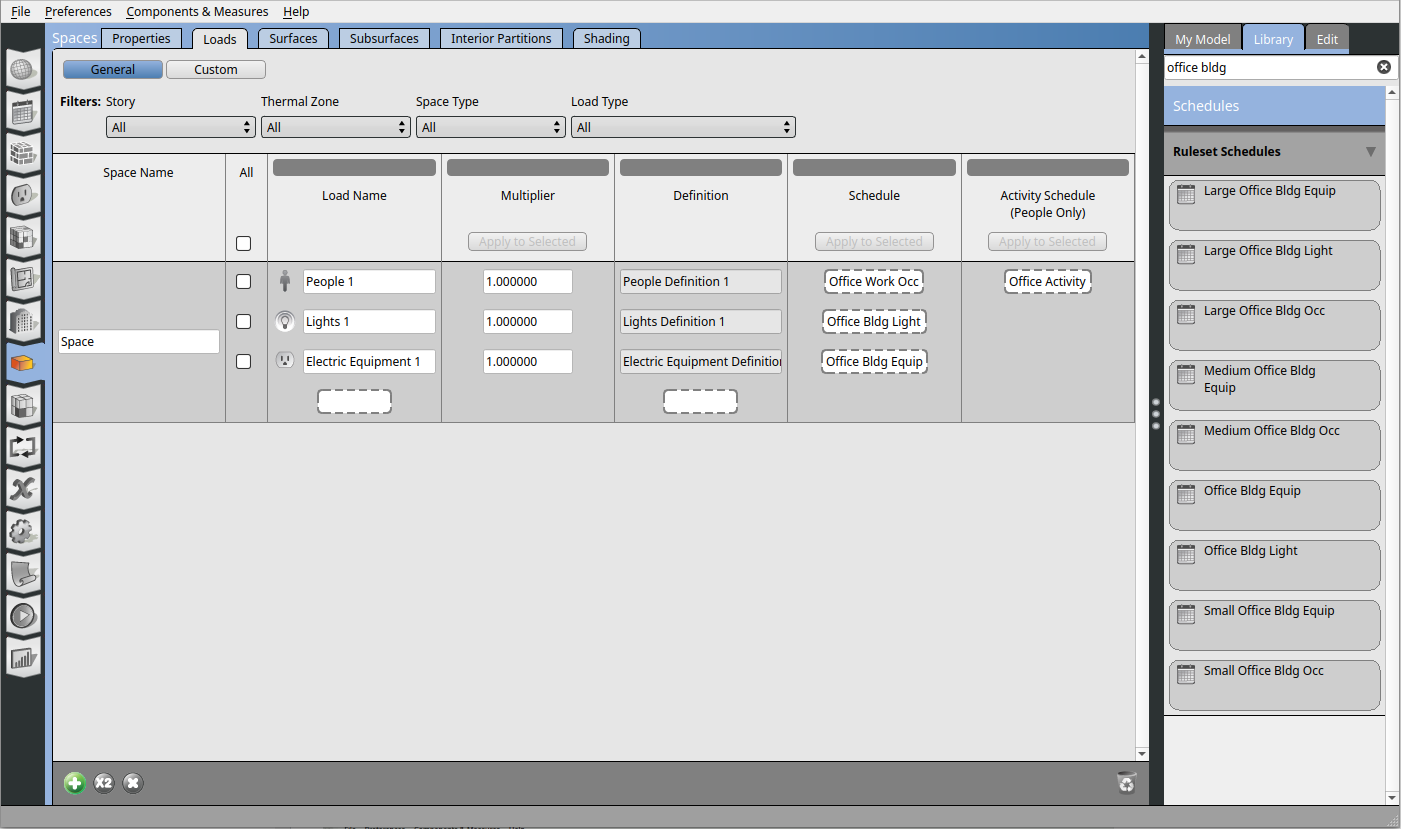
Do the same for Activity Schedule -> Office Activity, Lights -> Office Bldg Light, Electric Equipment -> Office Bldg Equip.
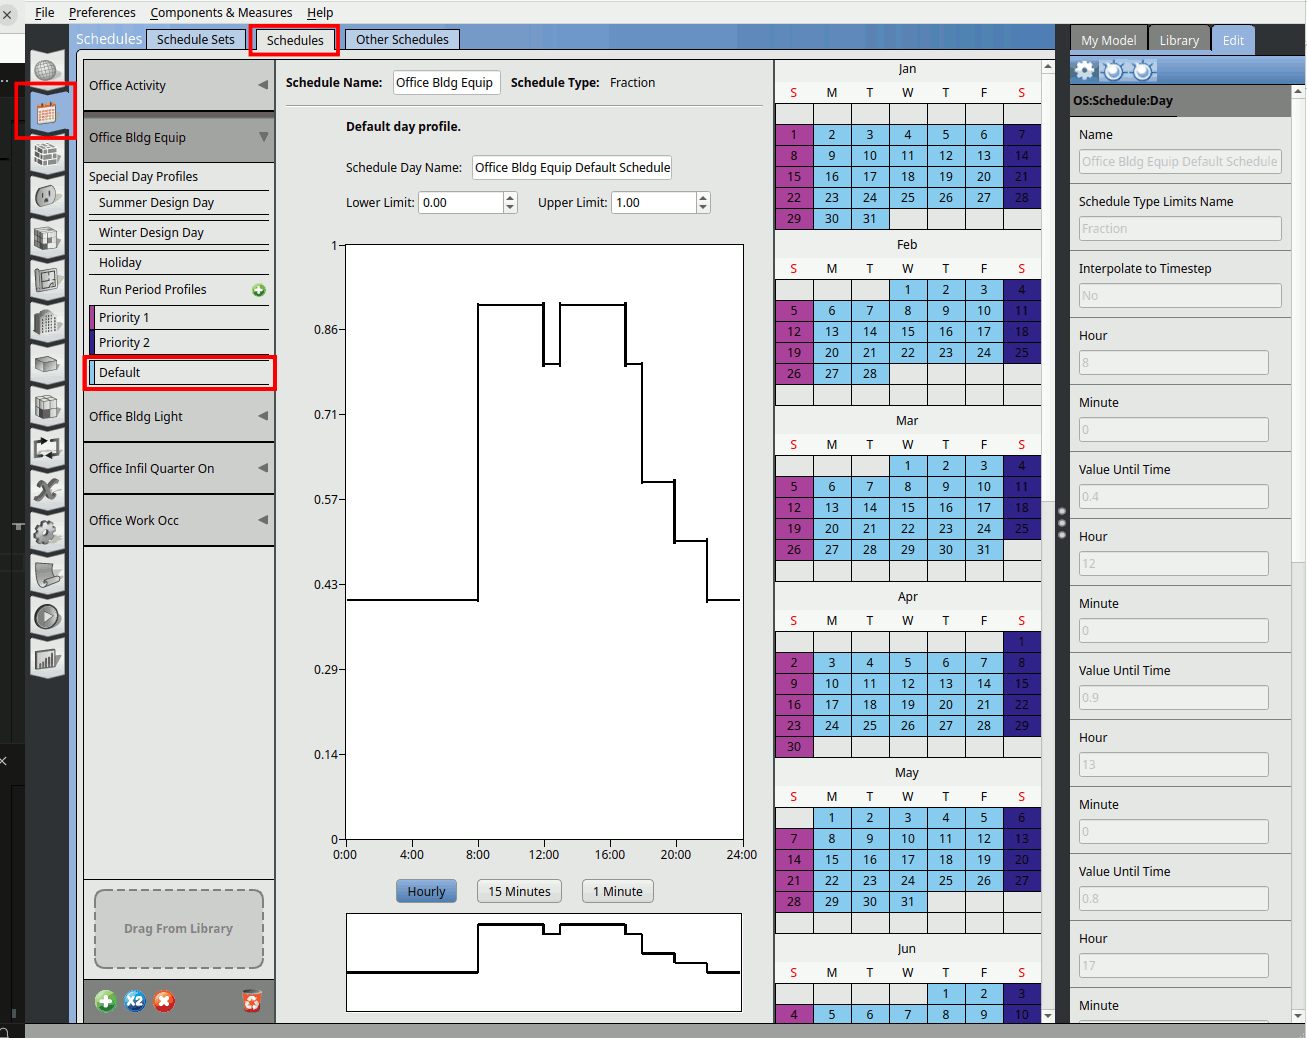
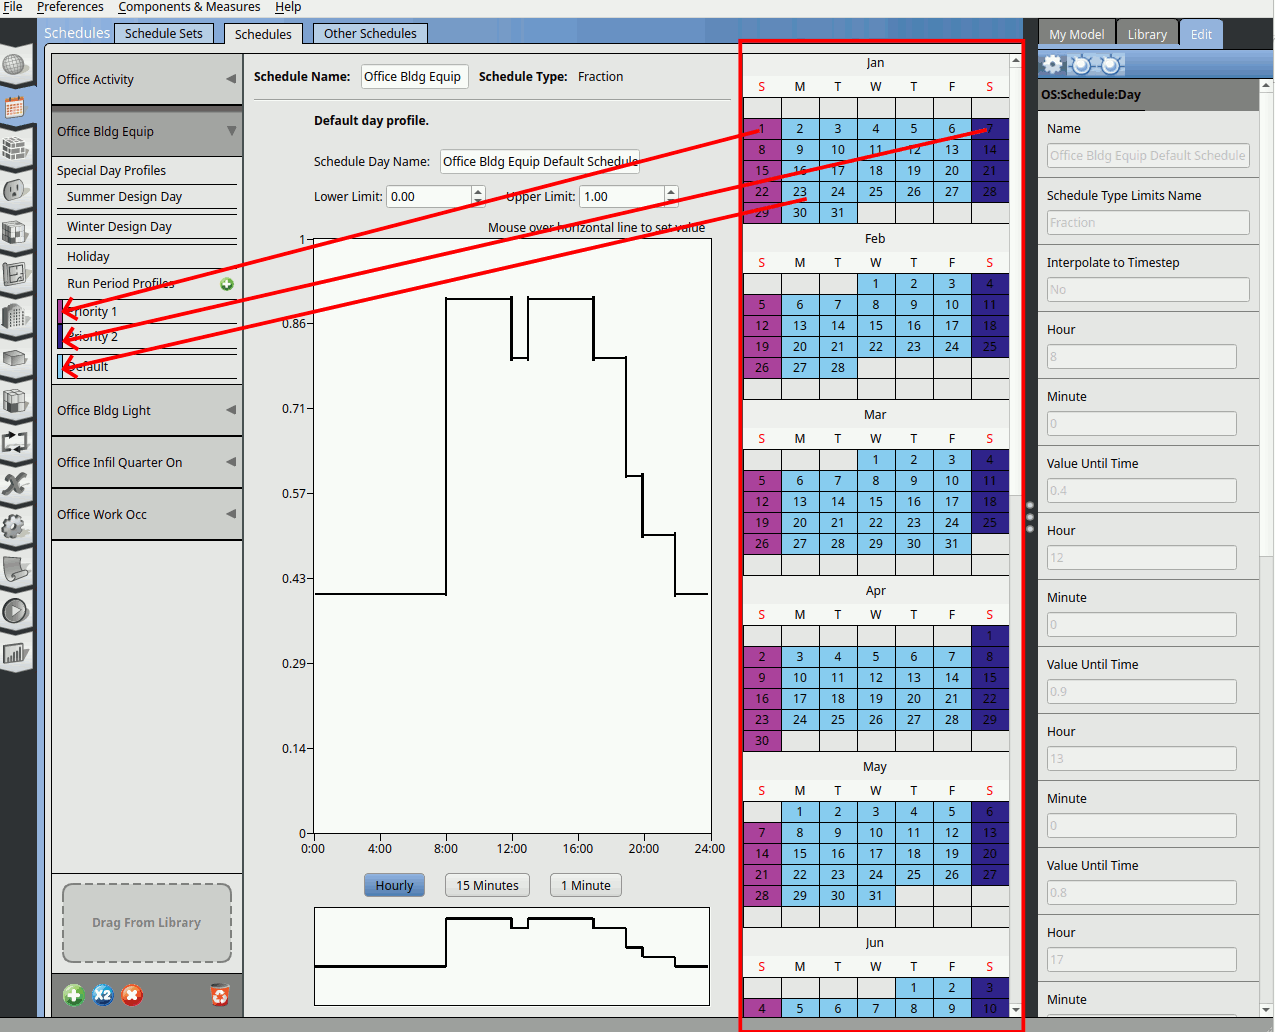
Go to the Schedules tab. In the schedules window click on the Schedules tab. Click on the Office Bldg Equip schedule and click on the Default.
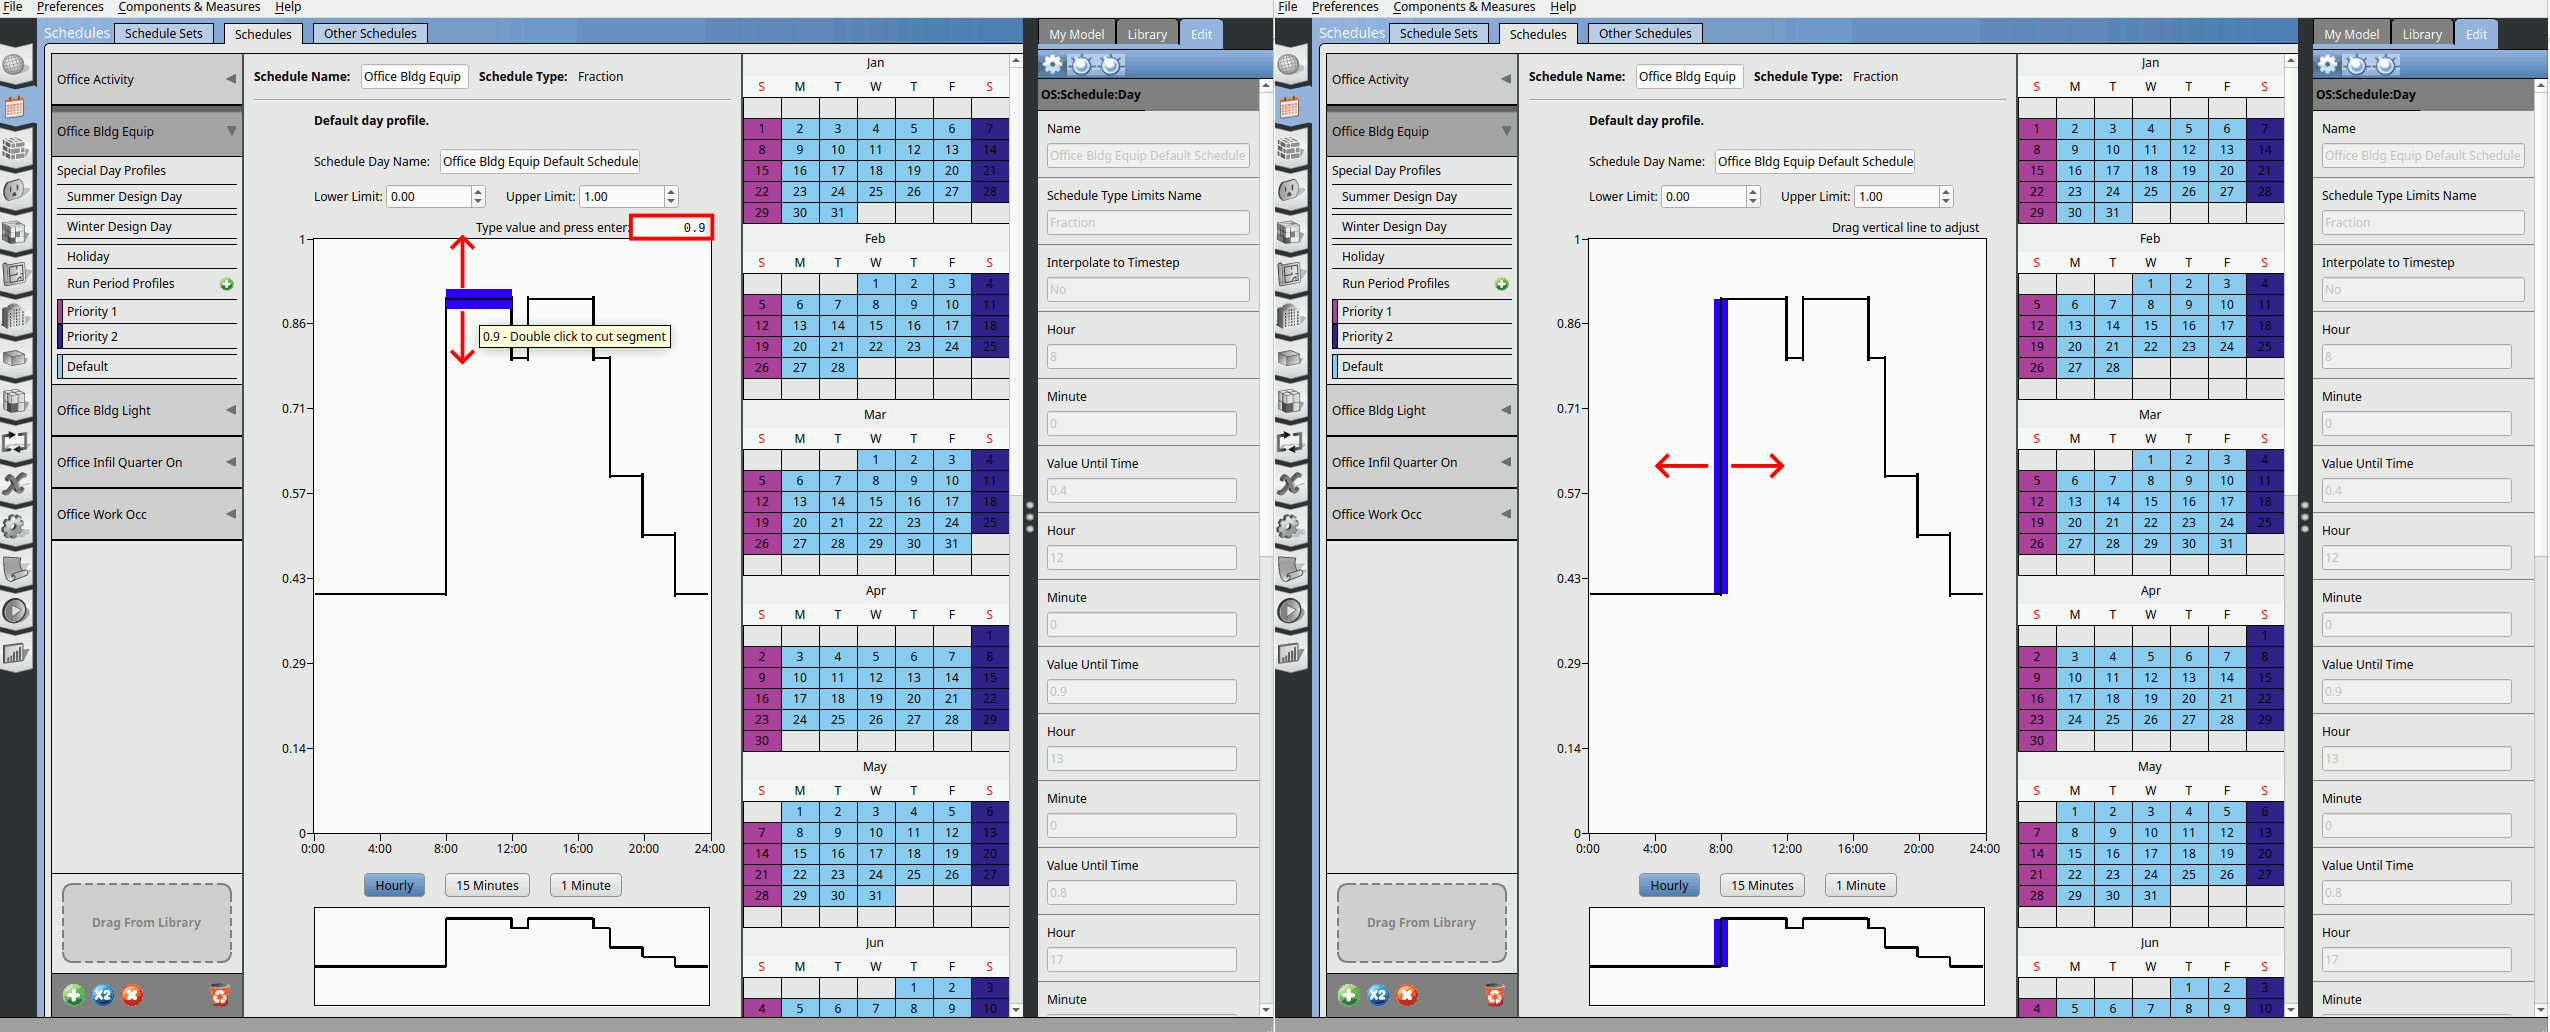
We can see on the middle window the line shows the schedule of a default day. You can double click on the line to cut a segment. Pull horizontal line up or down to adjust the schedule value, you can also type in the value. Pull the vertical line to adjust the timing.
On the right calendar window. We can see that the days colored in light blue are assigned the Default schedule. The purple colored days are assigned Priority 1 and dark blue are assigned Priority 2.
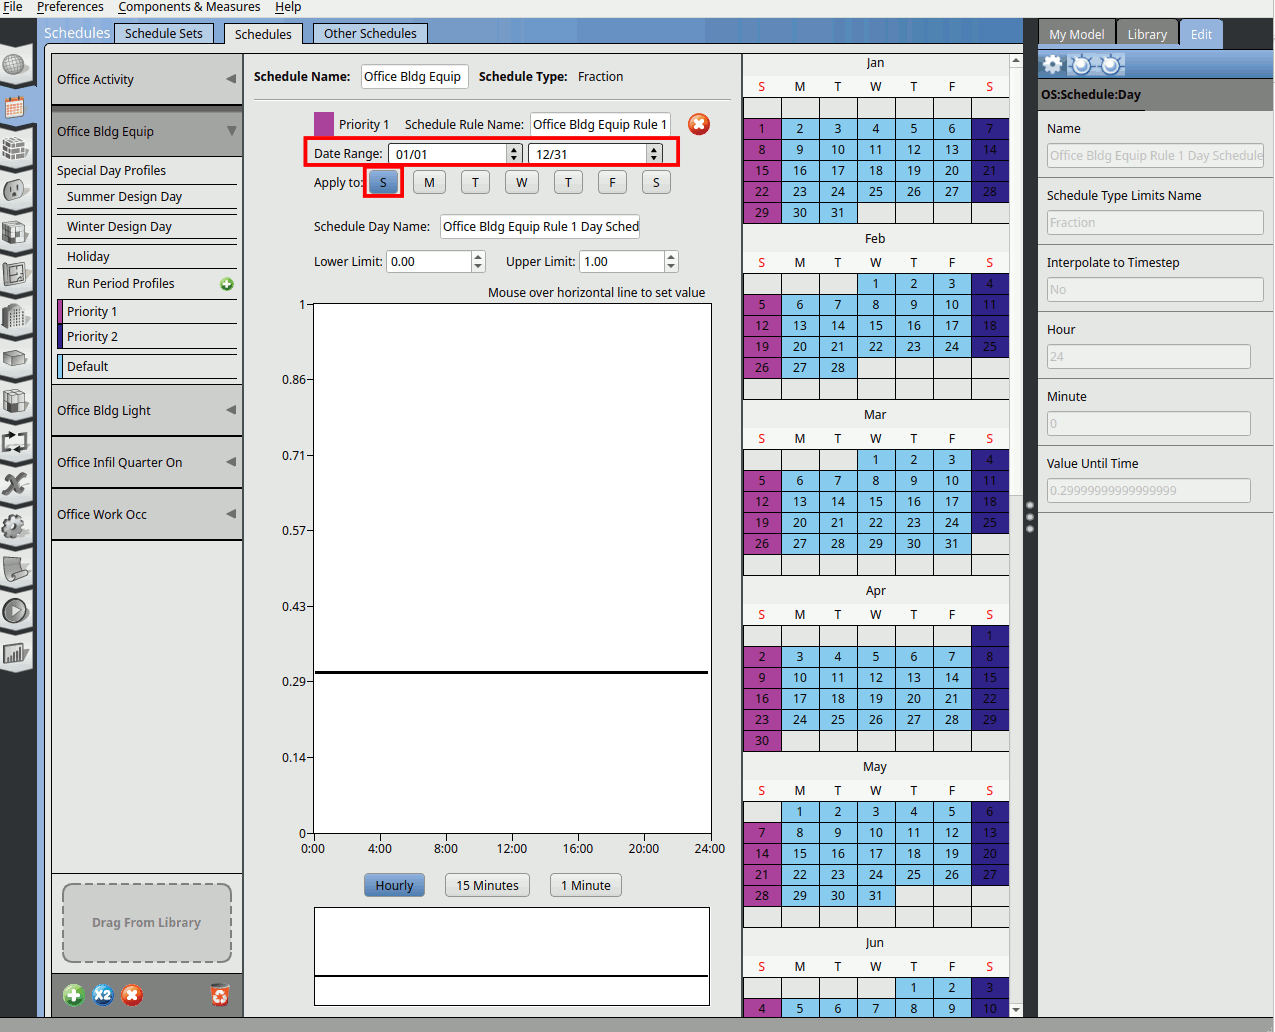
Click on the Priority 1 schedule. You can see that the schedule is for the whole year and only apply to Sundays.
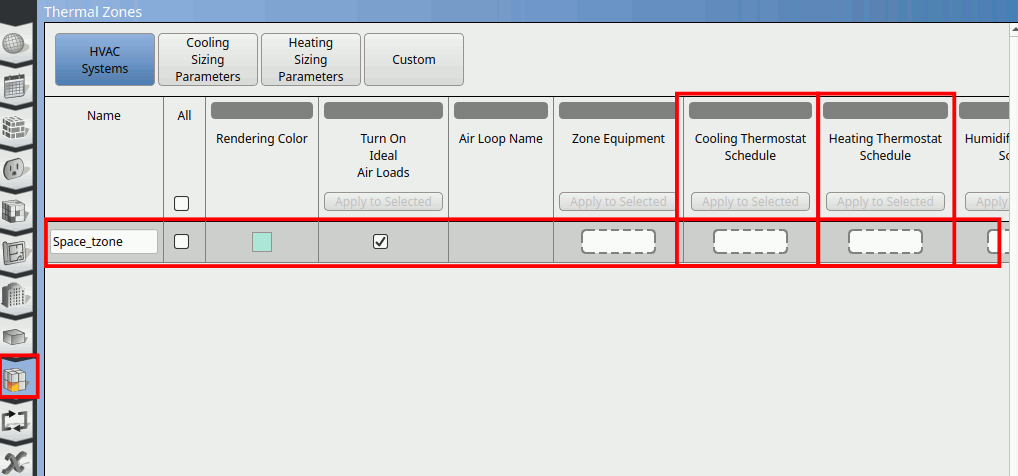
3.2.5. Cooling thermostats schedules#
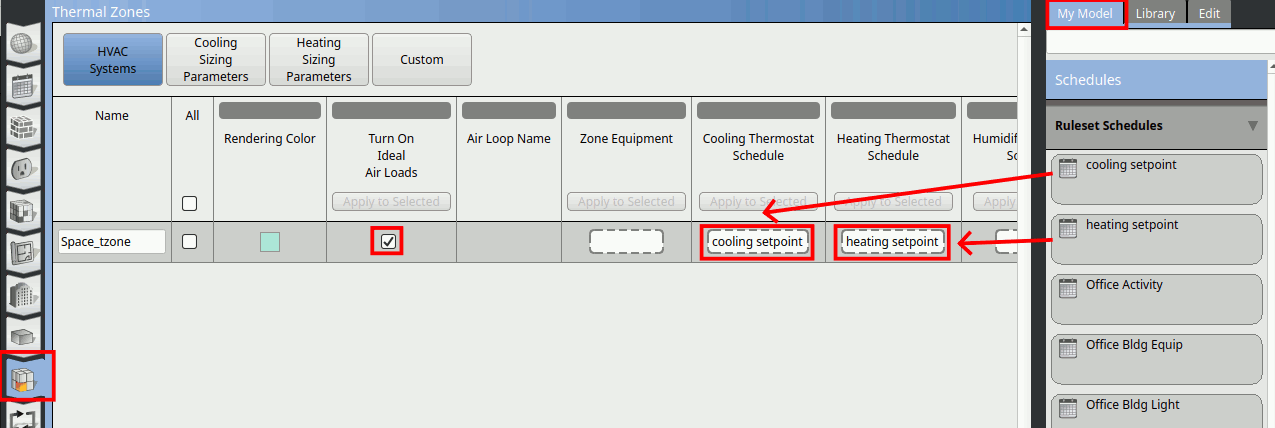
Go to the ‘Thermal Zones’ tab. We only have one zone in this model. The ‘Cooling Thermostat Schedule’ and ‘Heating Thermostat Schedule’ are empty. So we need to create a schedule for it.
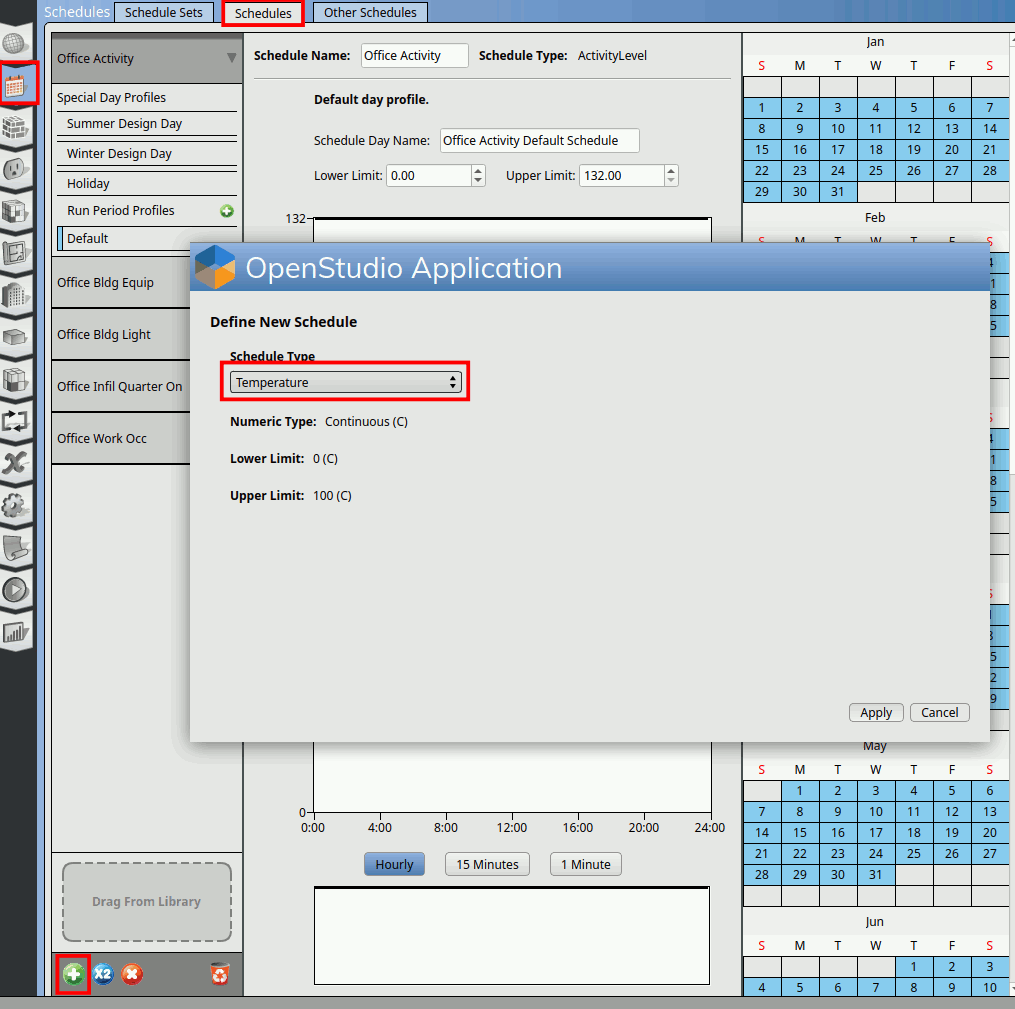
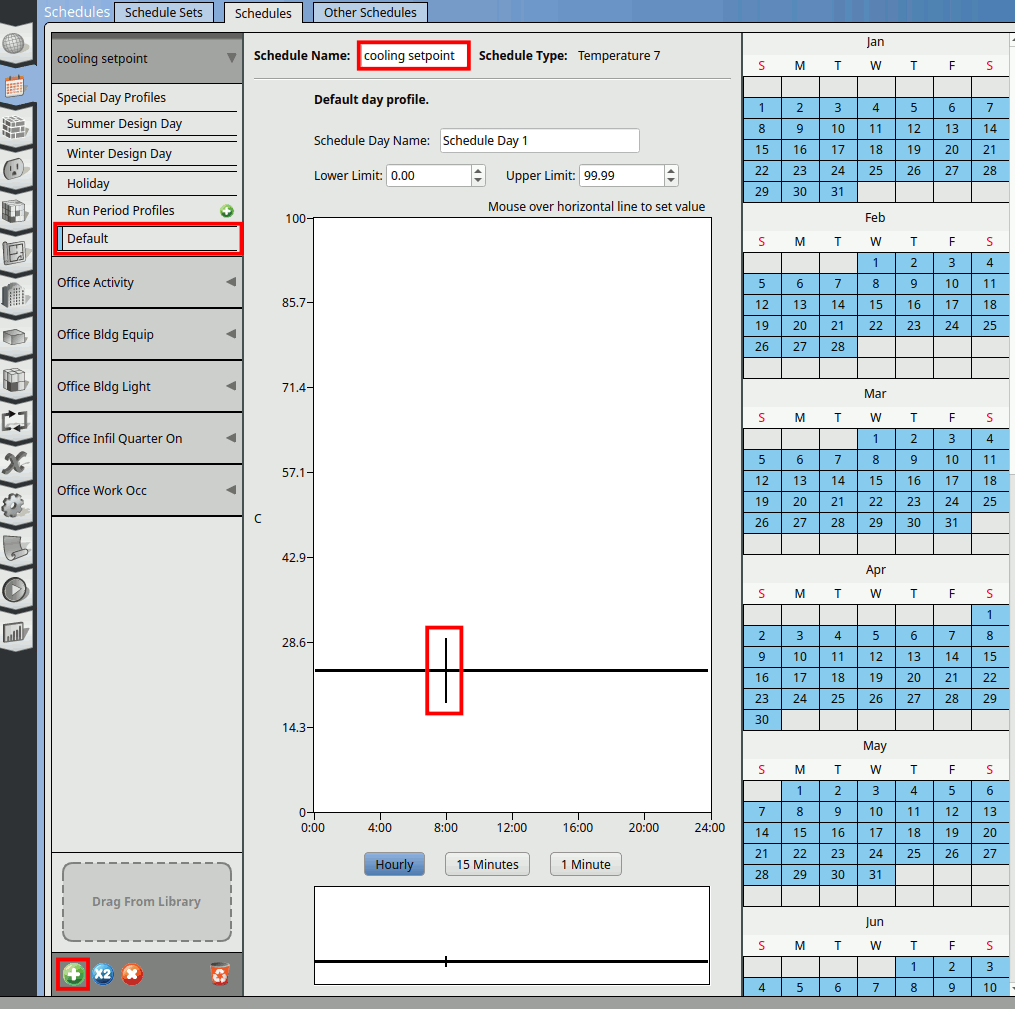
Go to the ‘Schedules’ tab. Click on ‘Schedules’ in the window. Click on the ‘+’ button at the bottom. A window will pop up. At the ‘Schedule Type’ parameter choose ‘Temperature’. There are many temperature schedule, choose the last one that has a lower limit of 0degC and upper limit of 100degC.
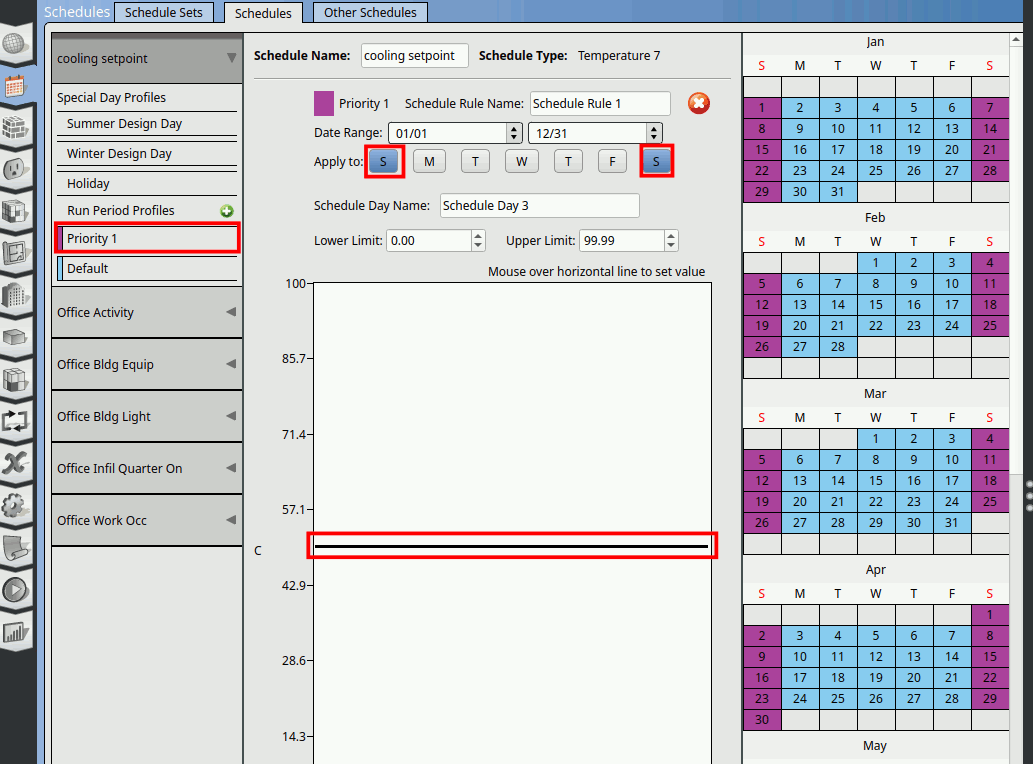
Change the name of the schedule to ‘cooling setpoint’. Click on the Default. Double click on the schedule line to create a cut as shown below. Pull it and place it at 8am.
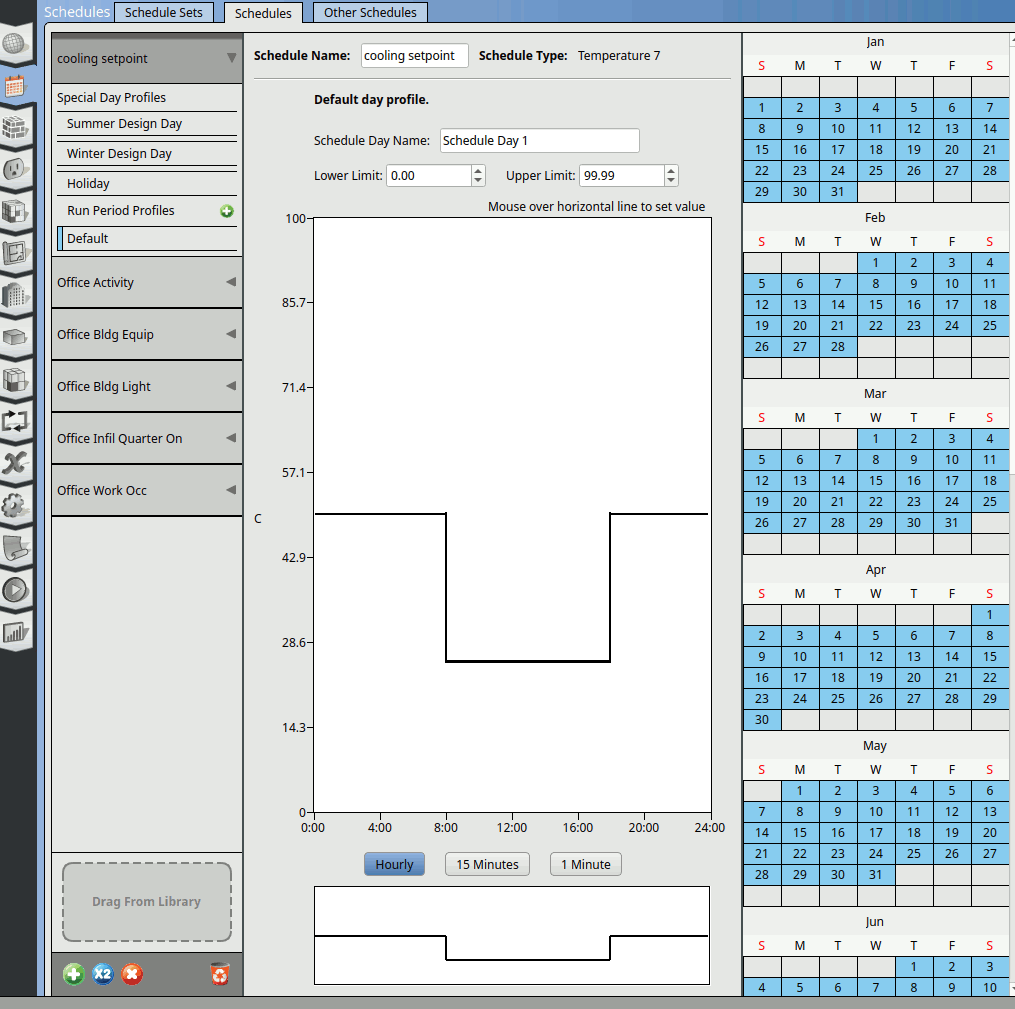
Double click on the line again to create another cut at 18:00. Hover on the first segment and input the value 50.
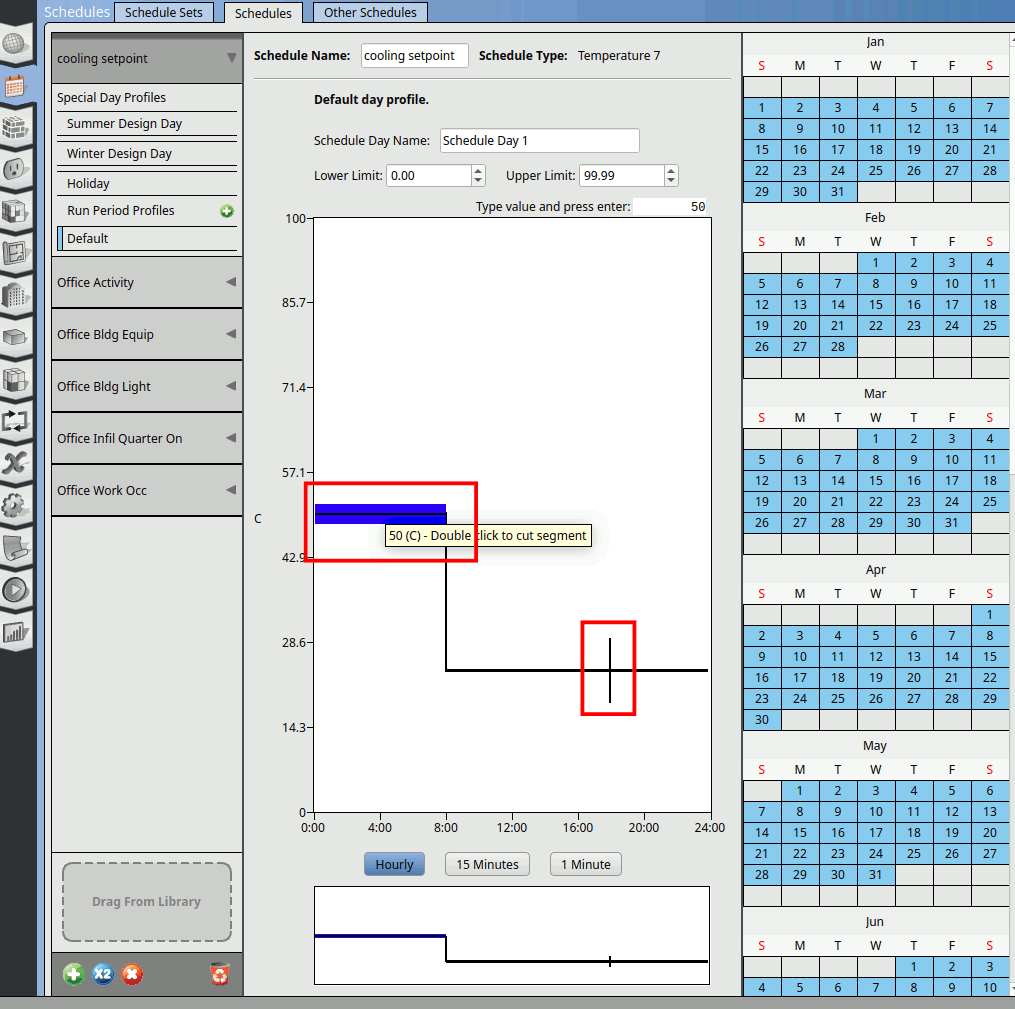
Hover on the second segment and put in value 25 degC. Hover on the third segment and put in 50 degC. This schedule means the HVAC will cool the space to 25C from 8:00 to 18:00. From 0:00 to 8:00 and 18:00 to 24:00, it will turn on cooling only if the air temperature rise above 50degC, which will not happen. It is essentially setting cooling to not turn on.
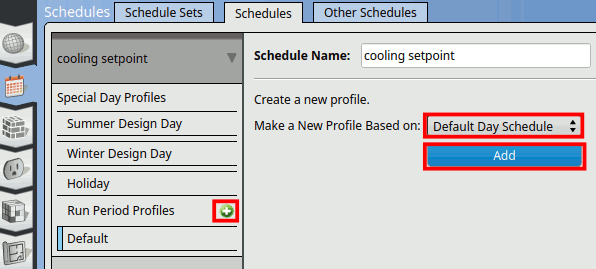
Click on the ‘Run Period Profiles +’. Make a New Profile Based on: ‘Default Day Schedule’ and click Add. A ‘Priority 1’ schedule tab will appear.
Click on ‘Priority 1’ schedule. Apply to Saturday and Sunday. Click on the 2nd segment and enter the value 50. Double click on the cut lines to remove them.
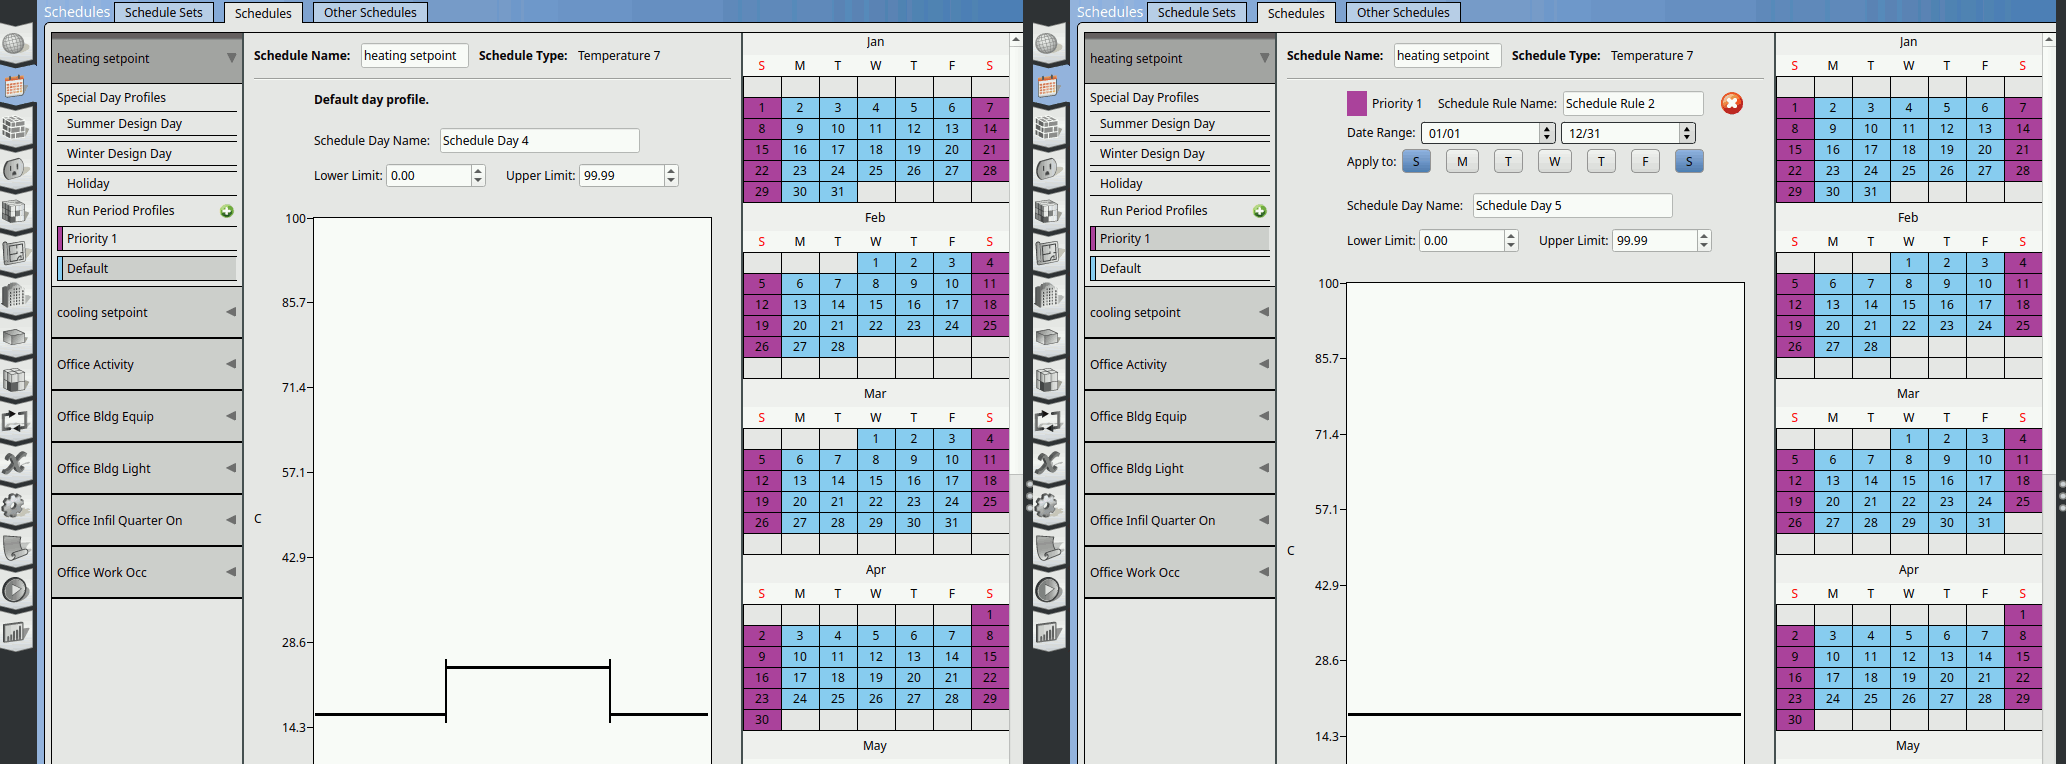
Repeat steps 2-7 to create a ‘heating setpoint’ schedule. For heating, from 0:00-8:00 set to 18degC, from 8:00-18:00 set to 24degC, and 18:00-24:00 set to 18degC. For Priority 1 the saturday and sunday schedule, set it to 18 degC.
Go to Thermal Zones tab. Assign the cooling setpoint schedule to the Cooling Thermostat Schedule and heating setpoint schedule to Heating Thermostat Schedule. Tick the Turn On Ideal Air Loads.
Next we will move on to define the construction of the building envelope.