2.4. Shoebox Model-Part 2: Defining the Thermal Properties of the Model#
2.4.1. Create thermal spatial zone#
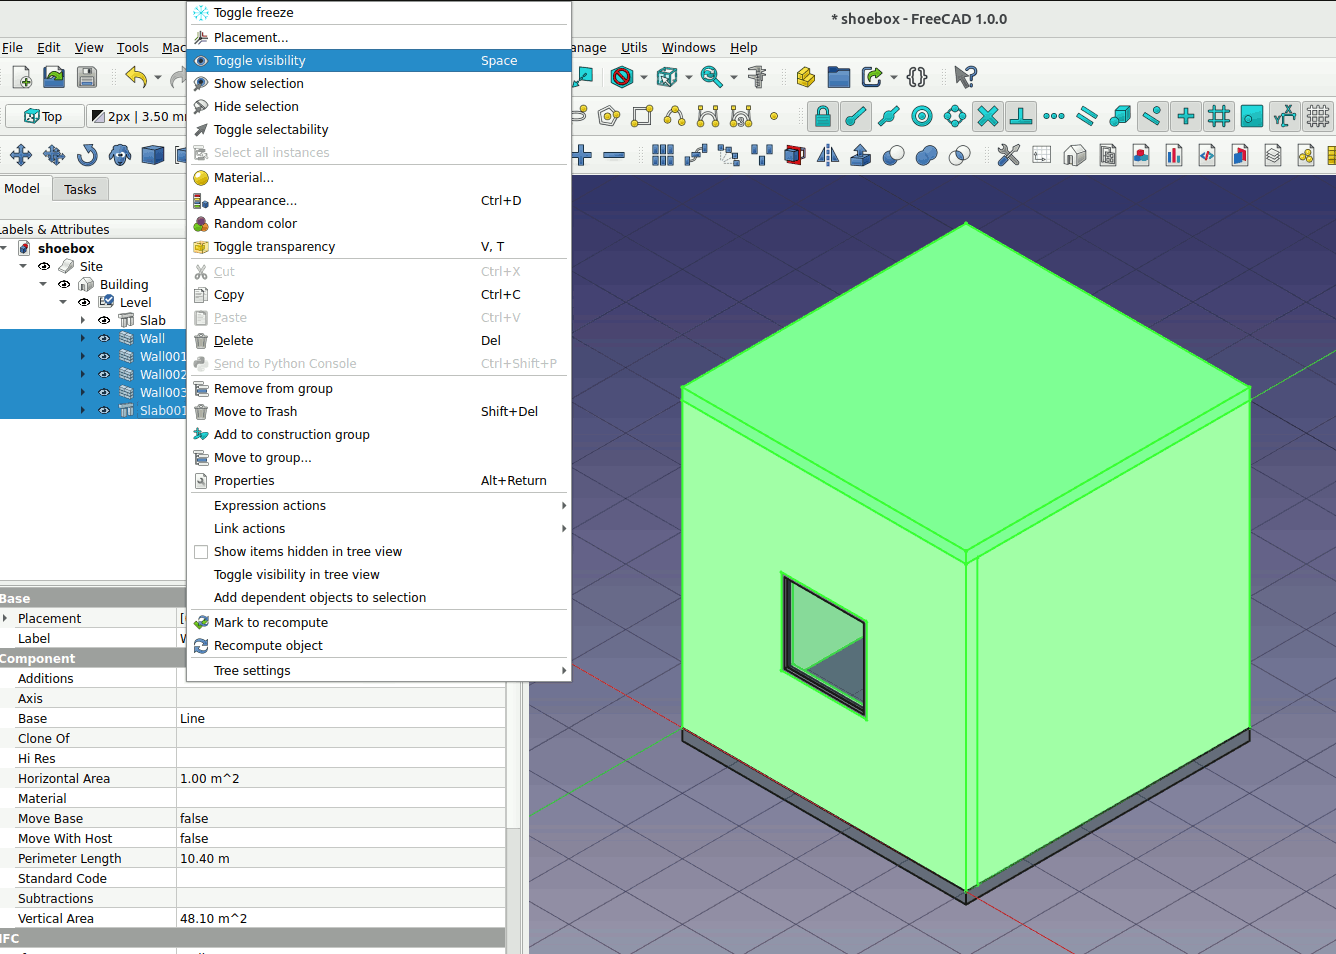
Next we will try to draw the thermal zone for the shoebox. First hide the walls and roof of the shoebox. Shift+select all the walls and the slab as shown in the image below. Right click -> Toggle visibility. You can also use the keyboard shortcut key Space to turn on/off the visibility.
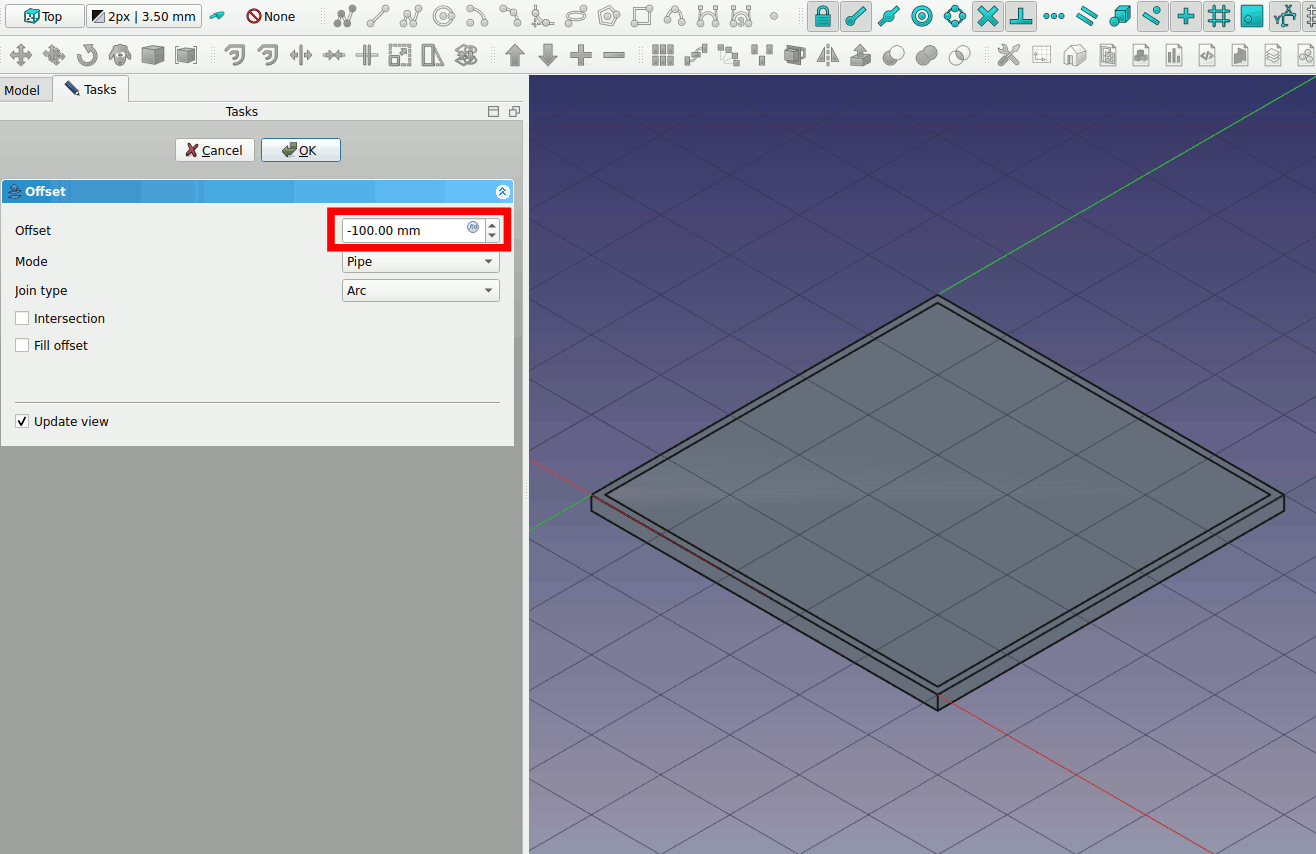
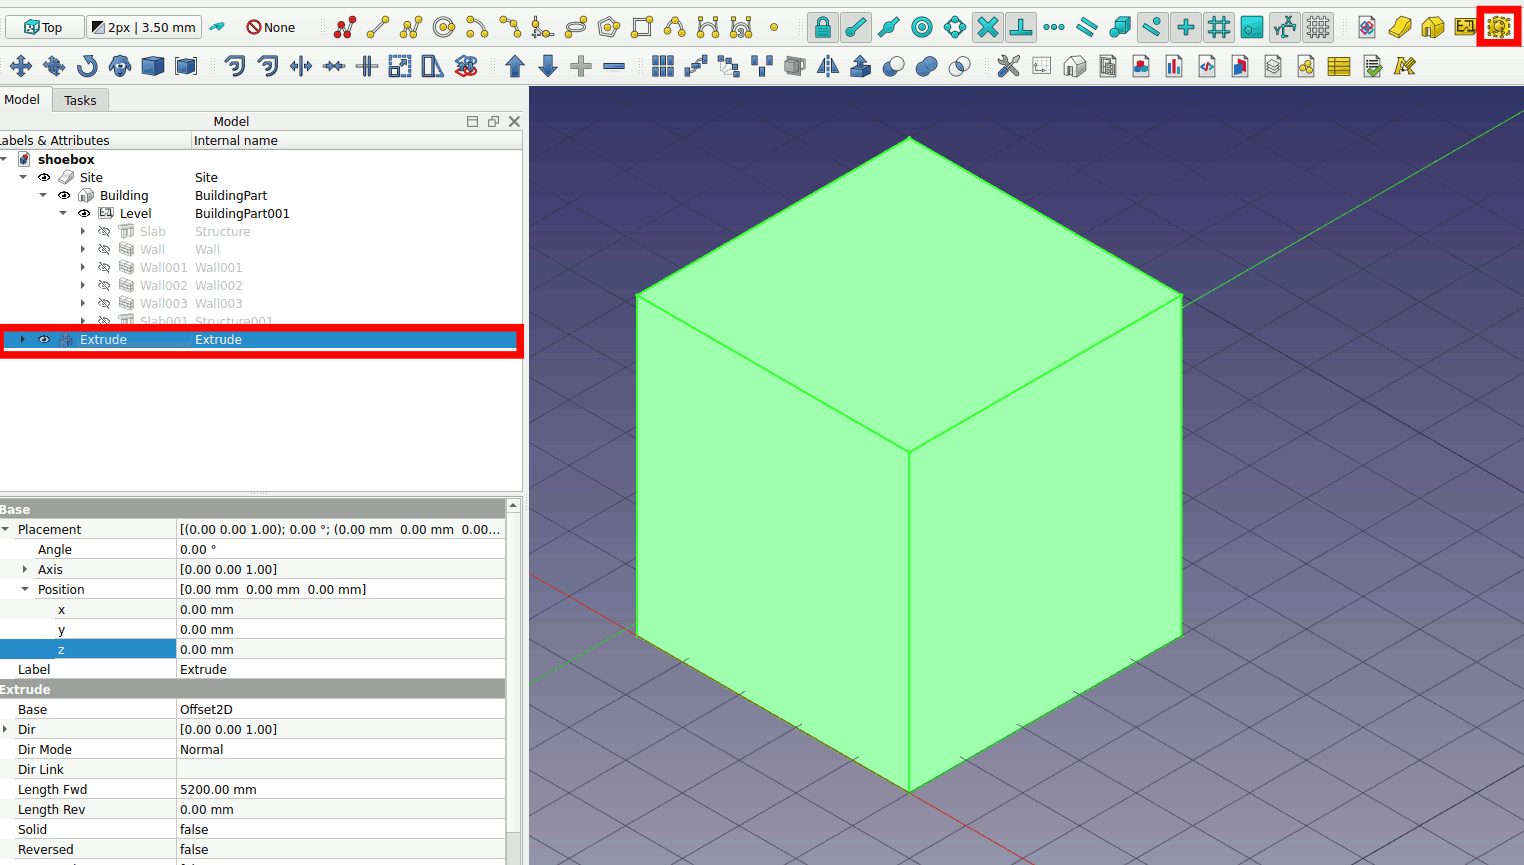
2. Draw a square on the slab. Use the 2d offset function to offset -100mm to the square. We want to create a zone that coincides with the centerline of each wall. Each wall is 200mm thick.
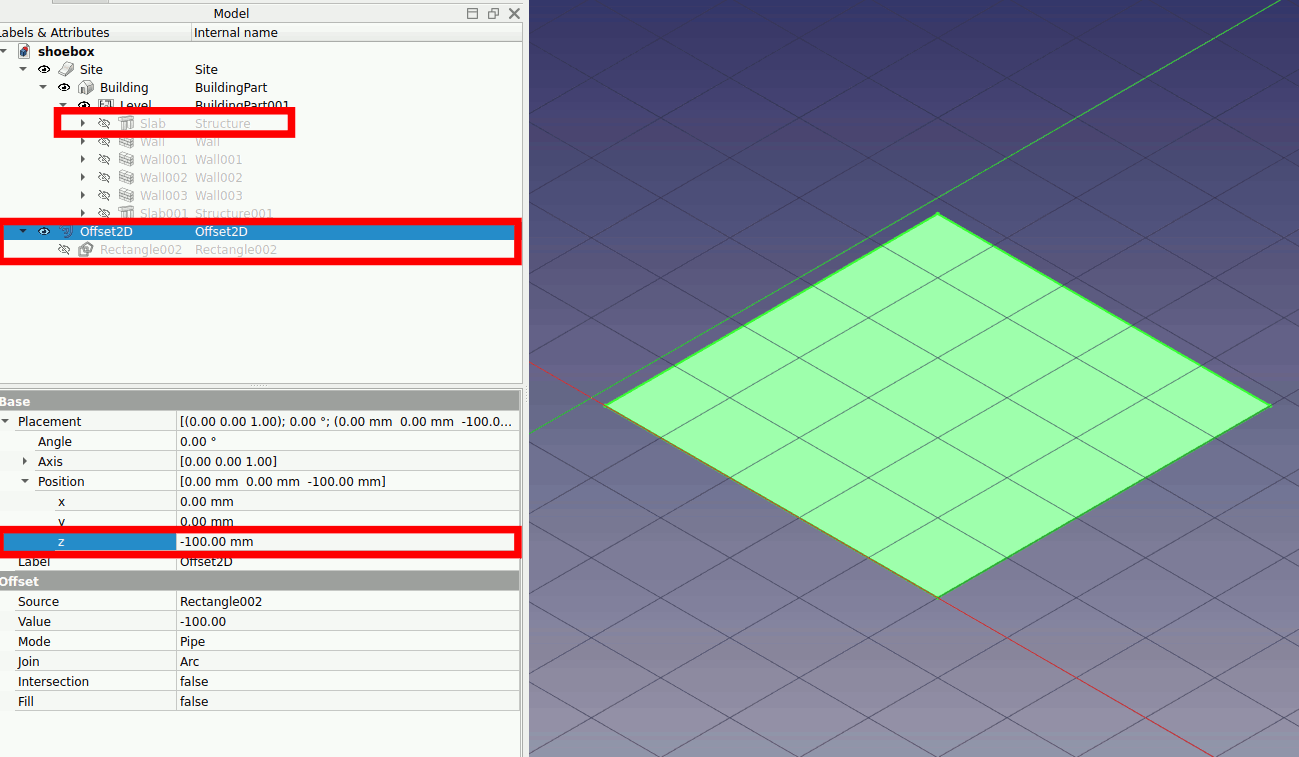
3. Select the floor slab and toggle visibility (press space to toggle visibility). Click on the arrow on the offset2d and also toggle visibility of Rectangle002. Select Offset2d and adjust the z position to -100mm. The floor slab like the wall slab is also 200mm thick. For the zone to be in the centerline you need the z-position to be -100mm.
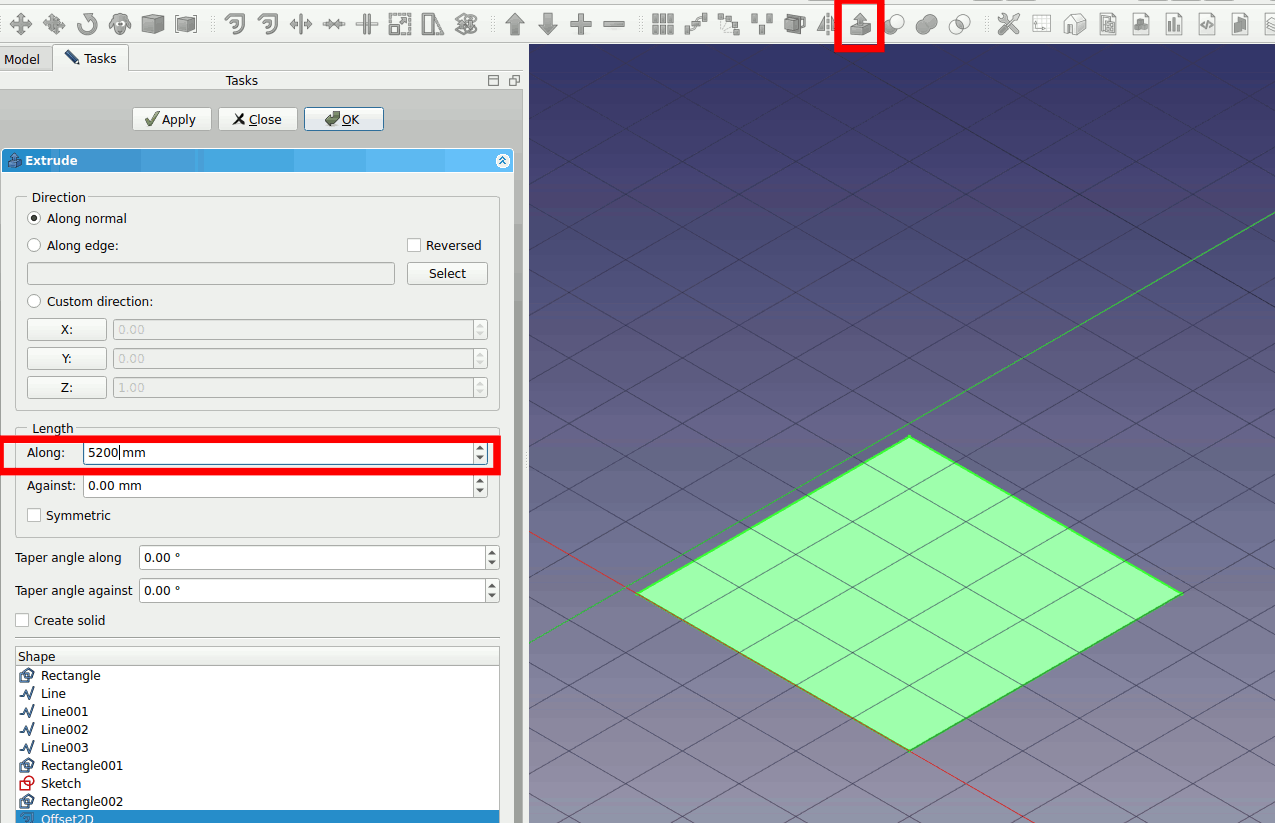
4. Select the Offset2D and click extrude. Extrude along 5200mm and click on OK.
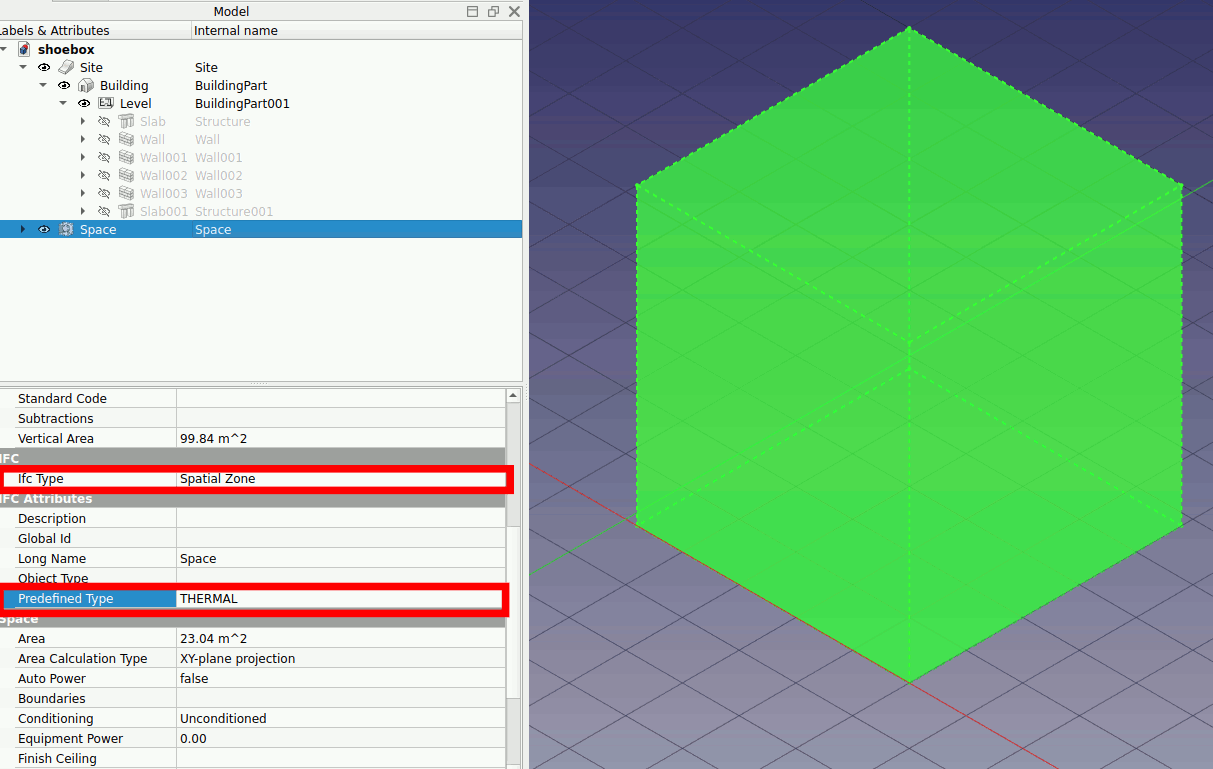
5. Select the extrude and click on Space icon.
6. Select the Space. In the data view, change the Ifc Type to ‘Spatial Zone’ and the Predefined Type to ‘THERMAL’
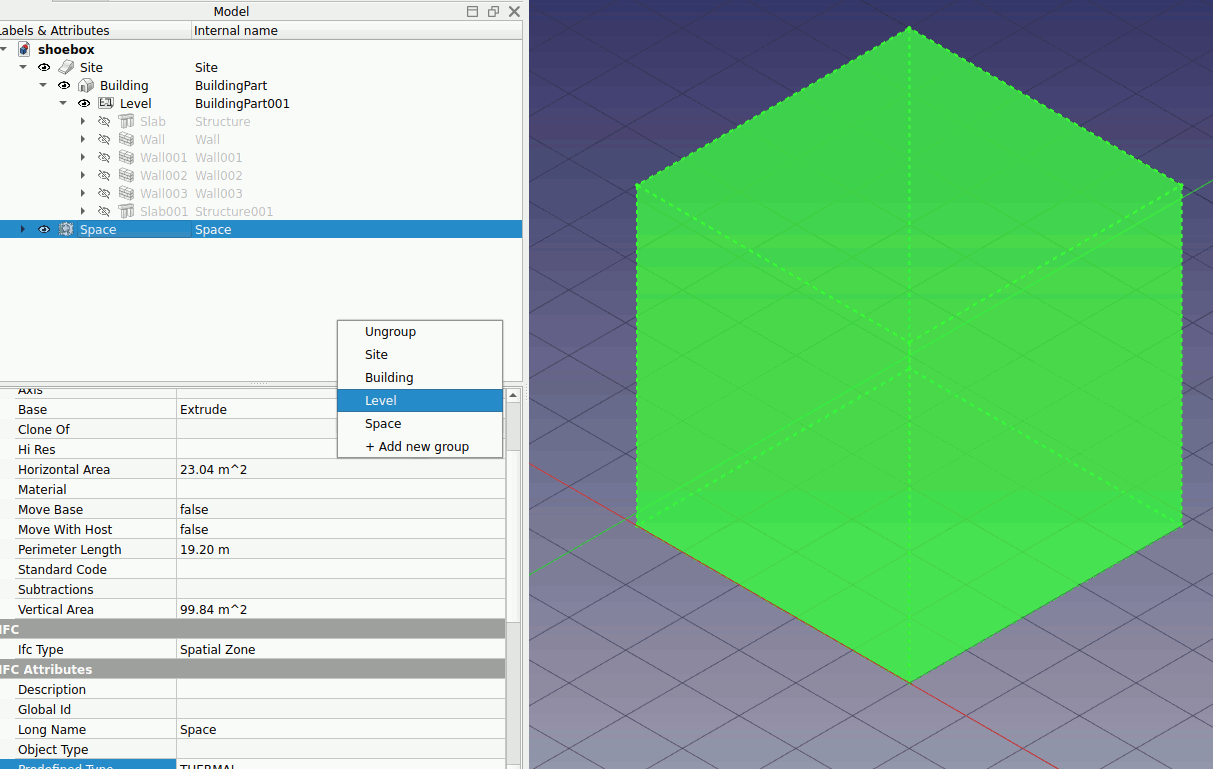
7.Right click -> Space -> Move to group … Move the Space into the Level object.
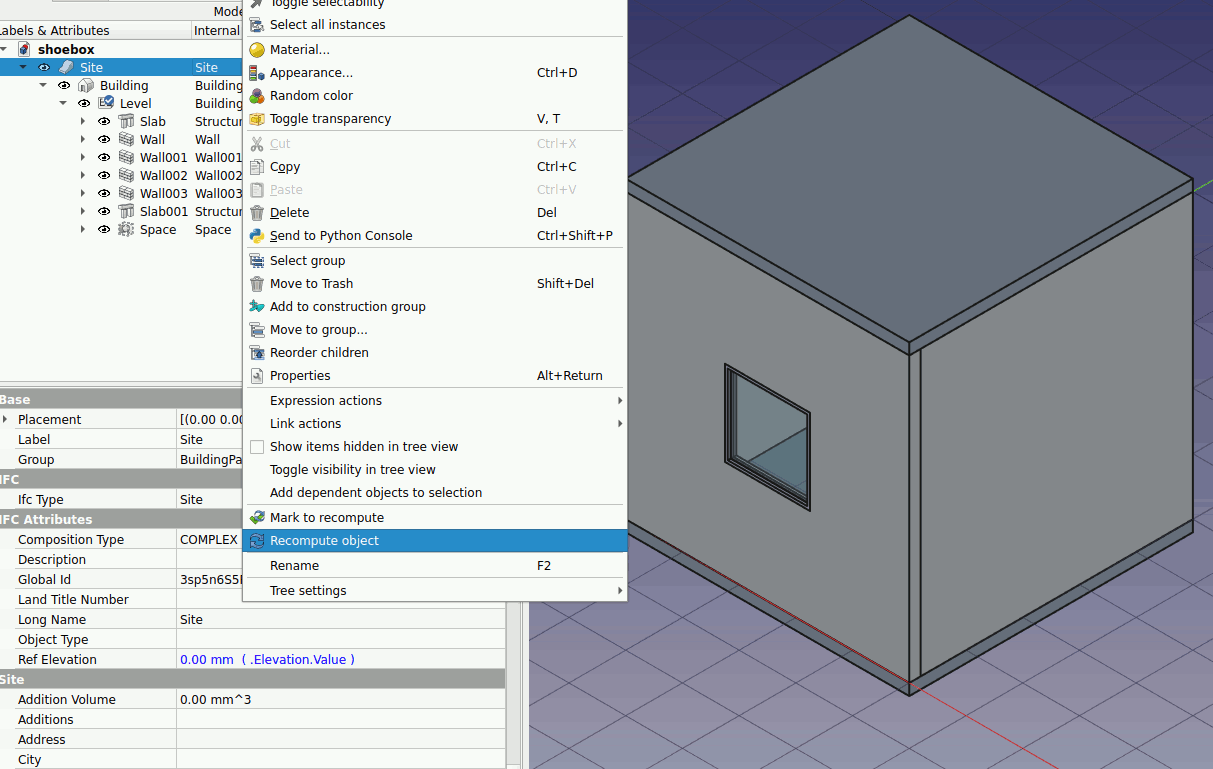
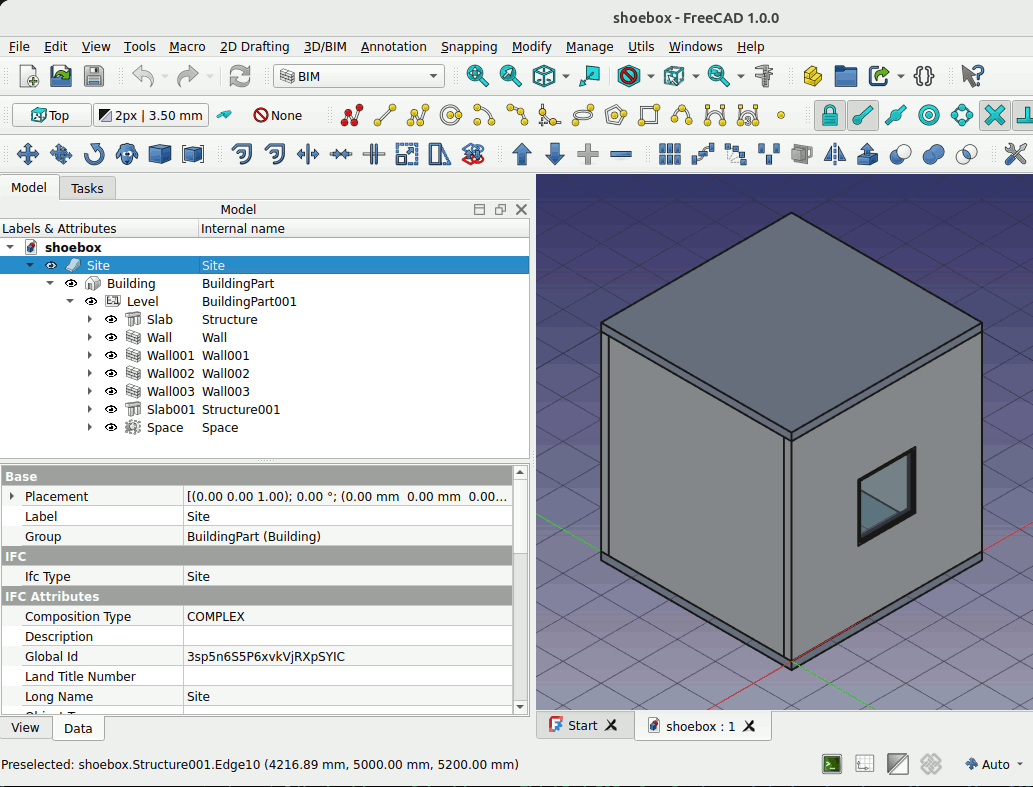
8.Right click -> Site -> Recompute object. Turn on the visibility of all the object. Your model should look like this
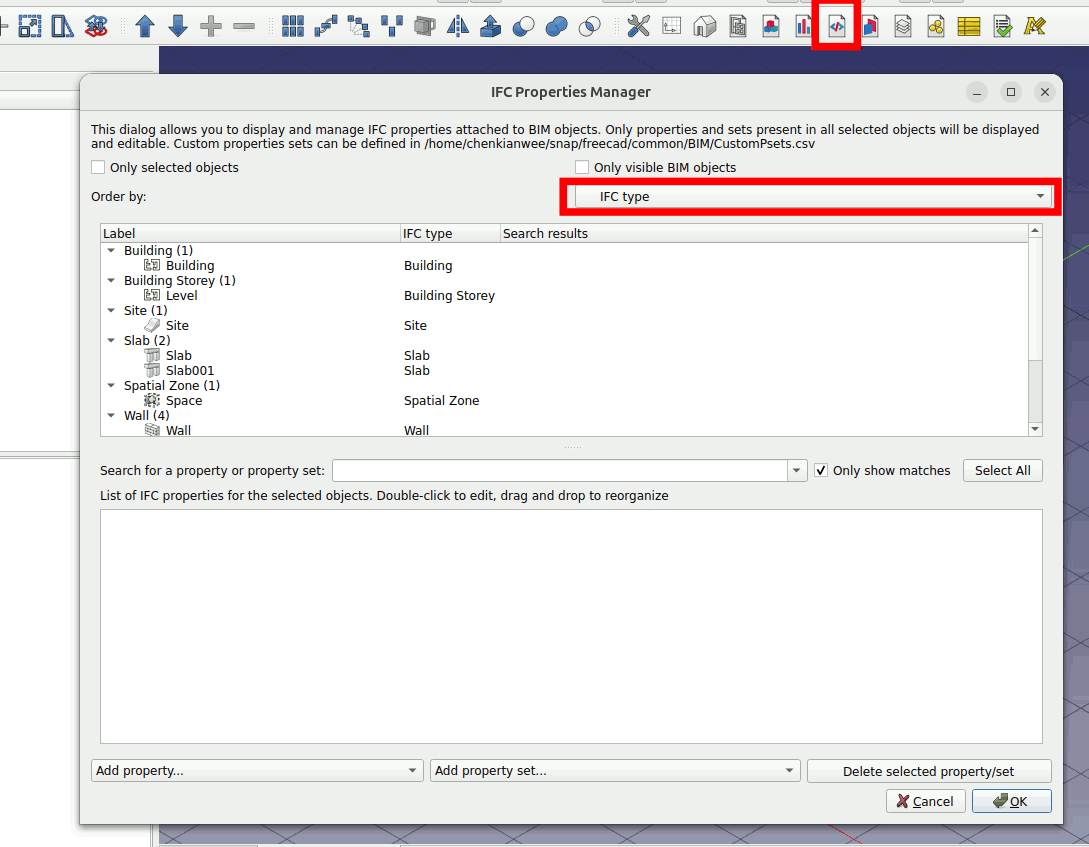
2.4.2. Add custom thermal psets to the objects#
Make sure you have added the CustomPset.csv file into the FreeCAD folder. Refer to Getting Started Steps 7-8 for instructions.
Click on Manage IFC Properties … At the window choose the Order by to IFC type.
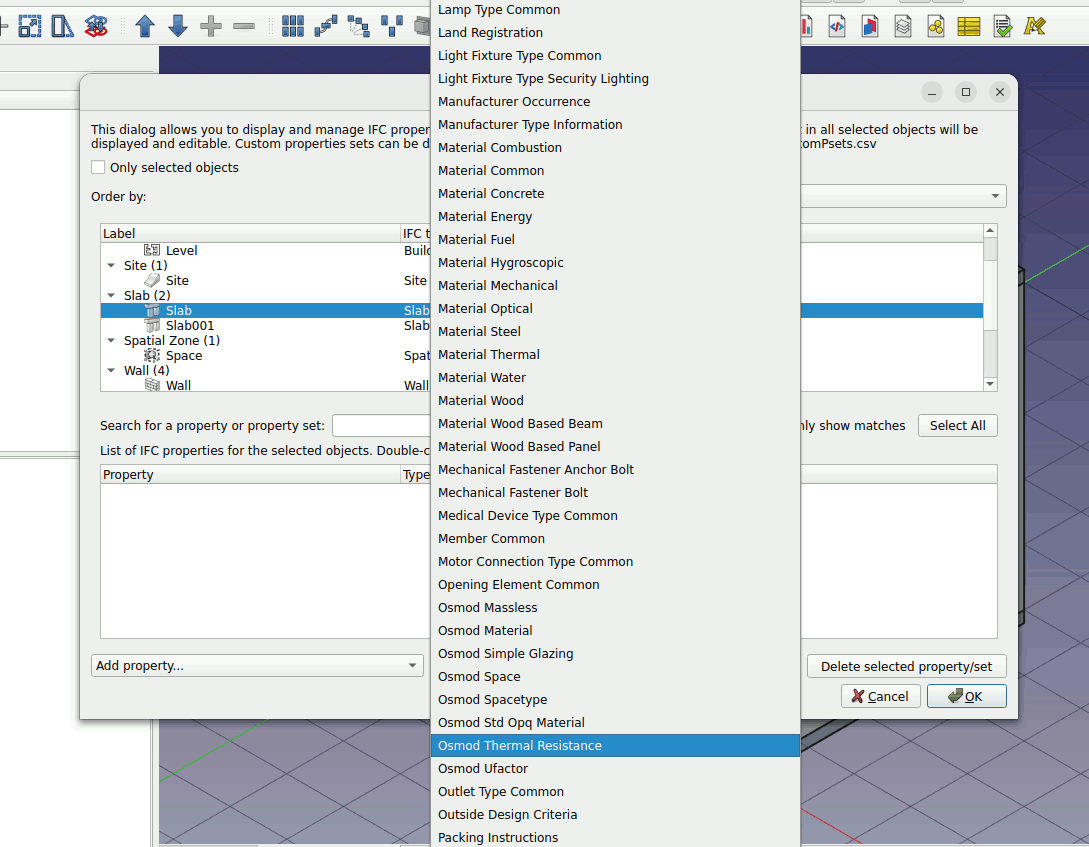
3. Select the slab object. Left click on the Add property set… parameter. Press O on the keyboard and choose ‘Osmod Thermal Resistance’. Do this for the roof, floor and walls.
Enter the following values for the slab and walls.
Floor slab = 0.00
Roof slab = 0.00
Walls = 0.00
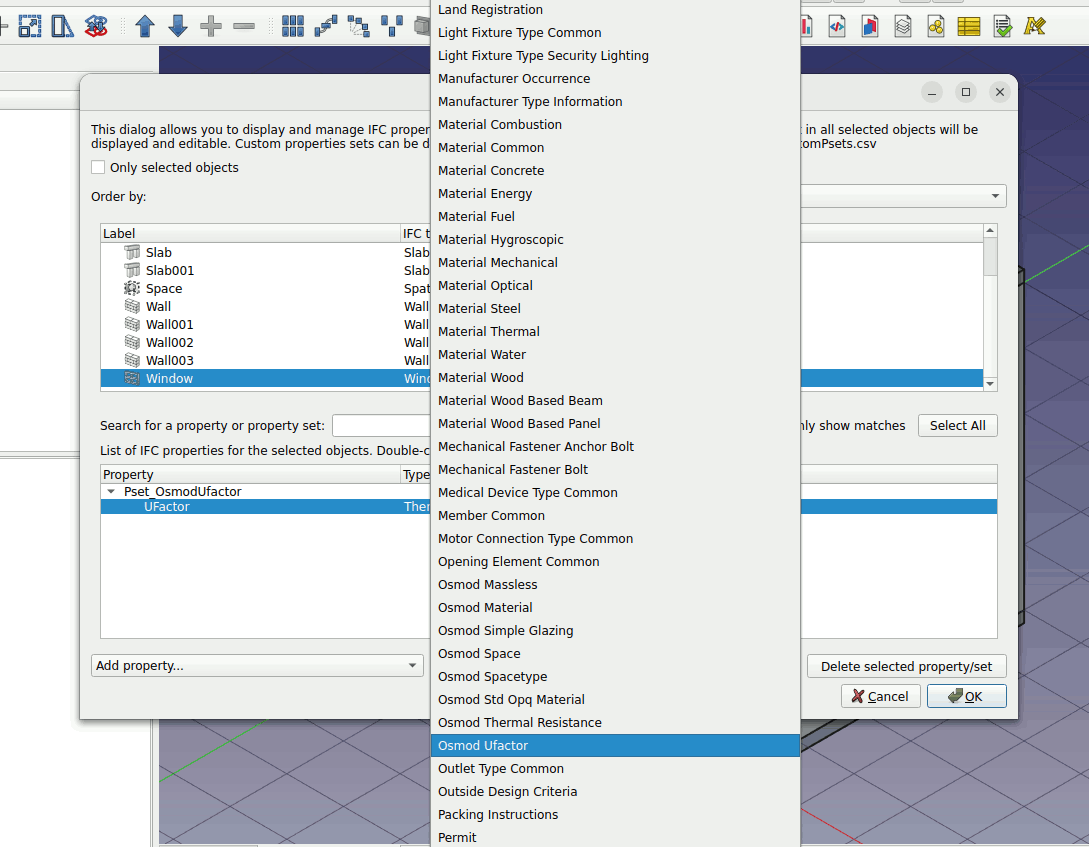
Select the window object. Left click on the Add property set… parameter. Press O on the keyboard and choose ‘Osmod Ufactor’.
Enter the following values for the window.
Window = 0.00
Select the space object. Left click on the Add property set… parameter. Press O on the keyboard and choose ‘Osmod Space’. Key in the values for the space.
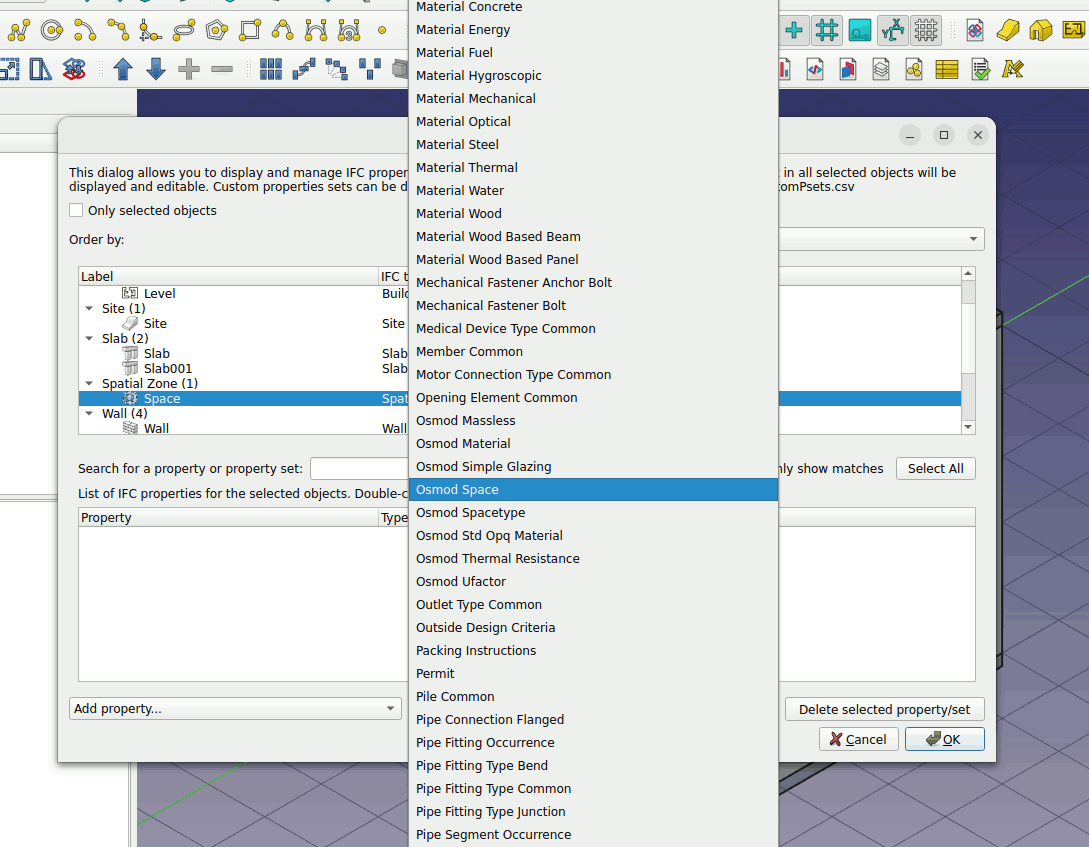
Key in the following values
FloorAreaPerPerson = 18.6
LightingPowerPerFloorArea = 6.18
ElectricEquipmentPowerPerFloorArea = 6.78
OutdoorAirFlowPerFloorArea = 0.0
2.4.3. Export to IFC#
Select the Site. Go to File -> Export.
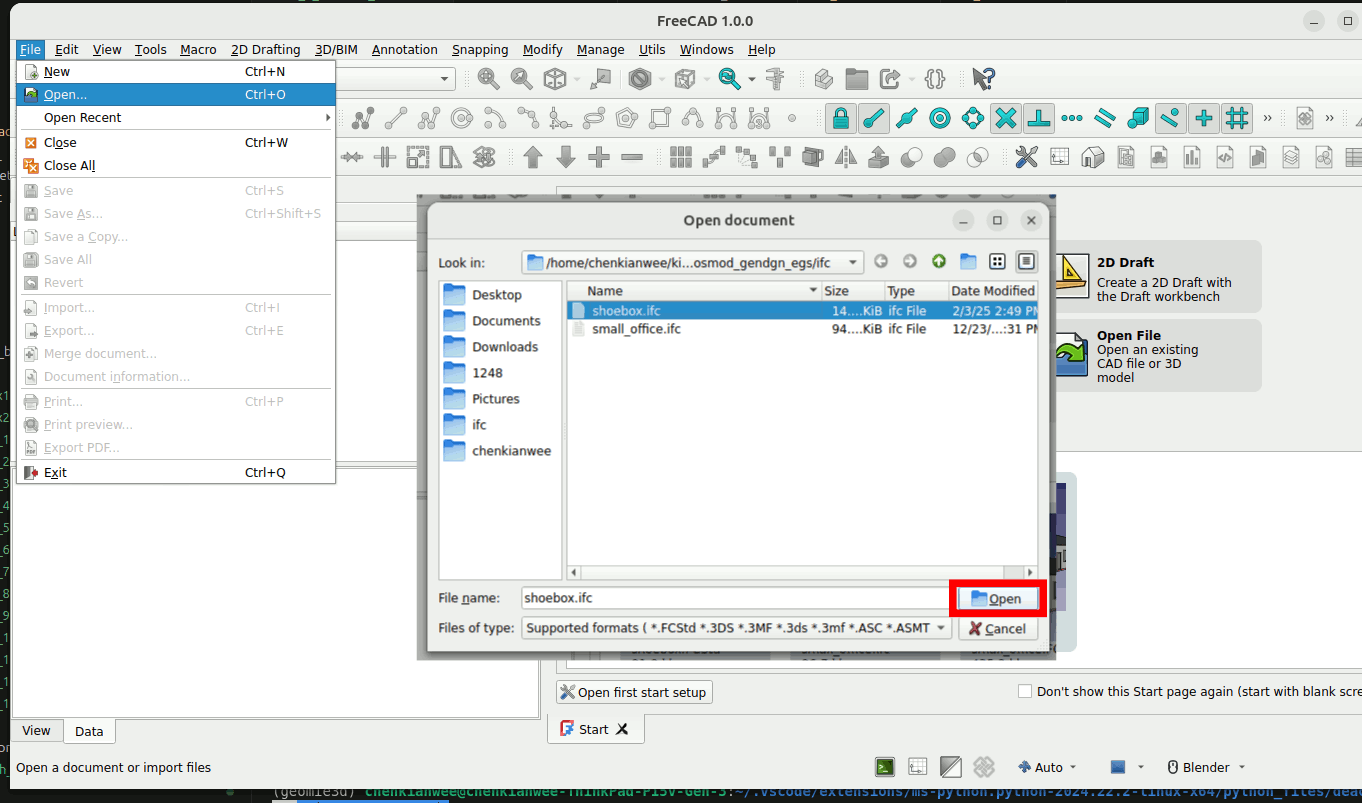
2. Check the exported file by opening it in FreeCAD again. Go to File -> Open
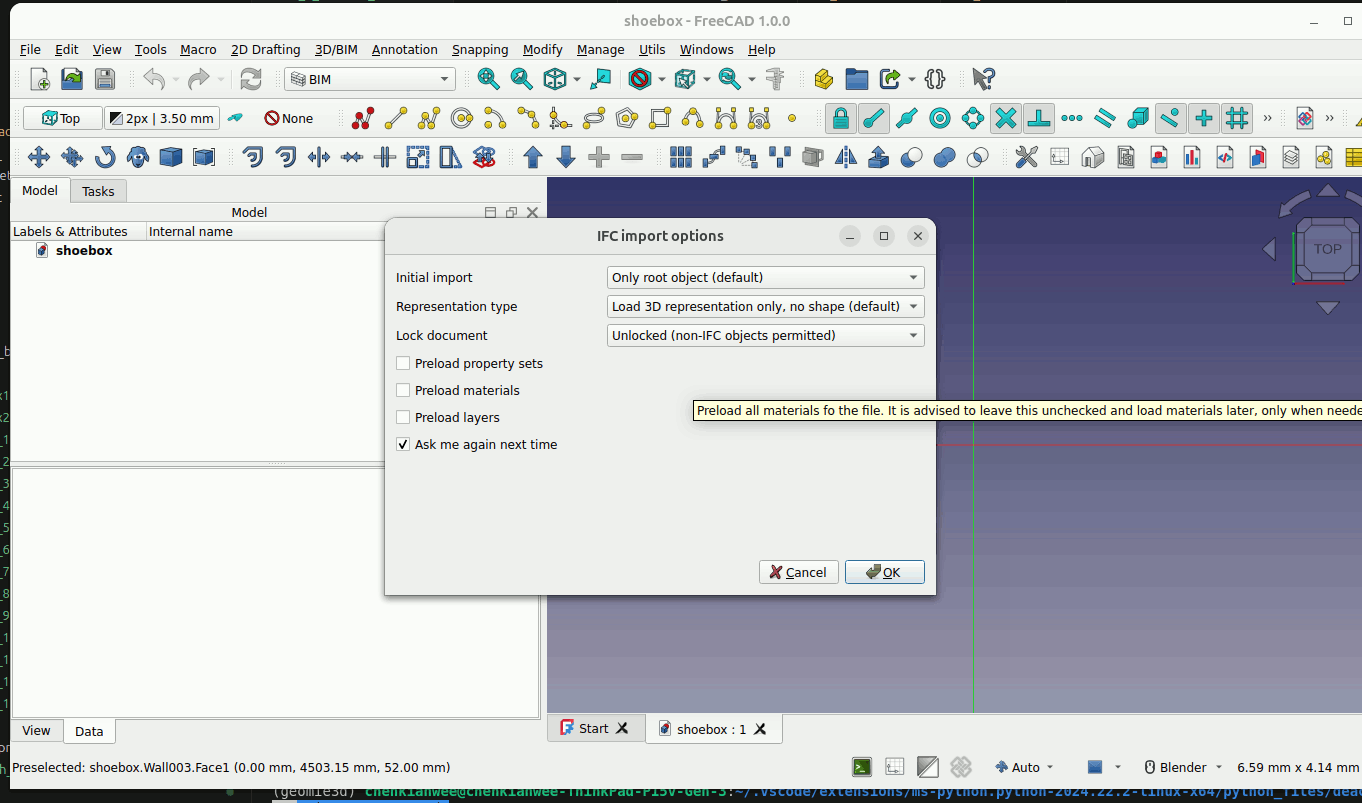
3. In the import window just click ok and stick with the default settings.
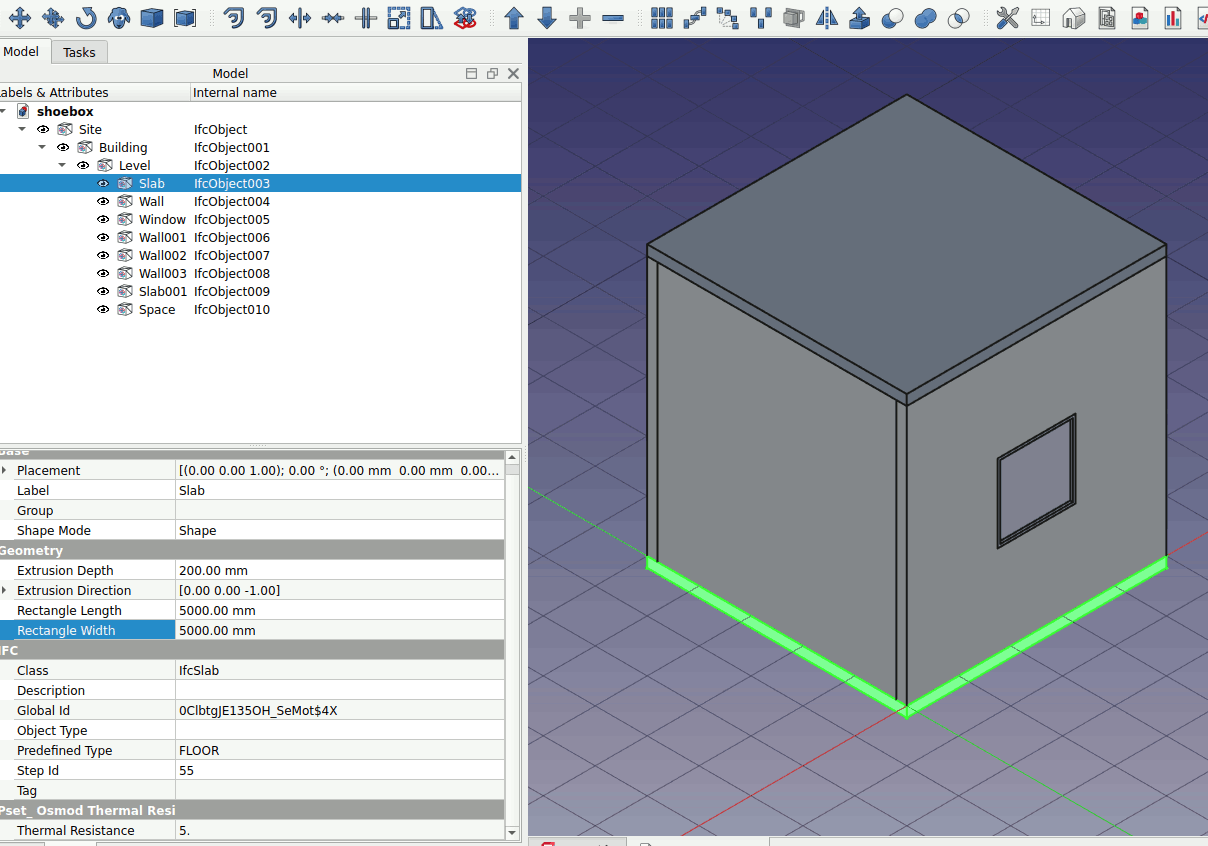
4. Double click on the IFC objects to fully load the properties and information of the object.
Now that we have exported the model to IFC. We will convert the model to OpenStudio Model in part 3 of this tutorial.