3.1. Shoebox Model with OpenStudio-Part 1: Building the 3D Model#
3.1.1. Creating the 3D model#
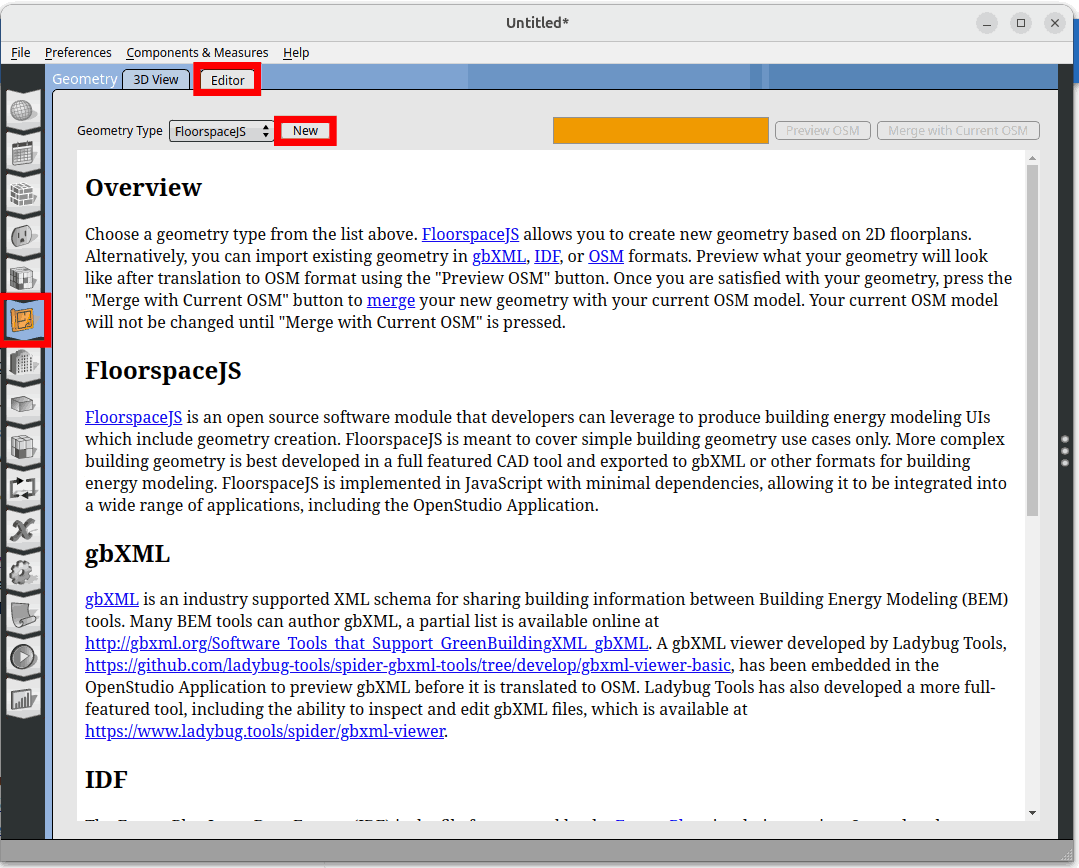
Model a 5mx5mx5m shoebox in OpenStudio. In OpenStudio go to the ‘Geometry’ Tab. In the Geometry window click on the ‘Editor’ tab. Then click on ‘New’
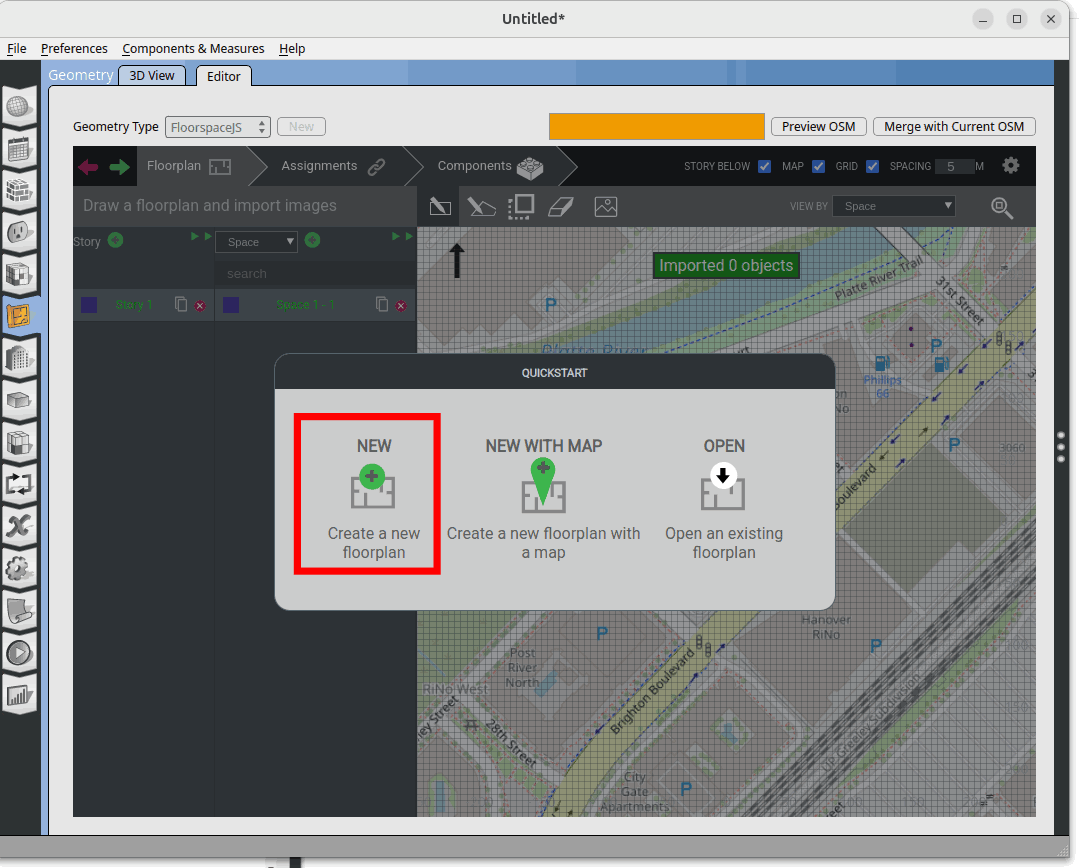
In the next window click on ‘New Create a new floorplan’.
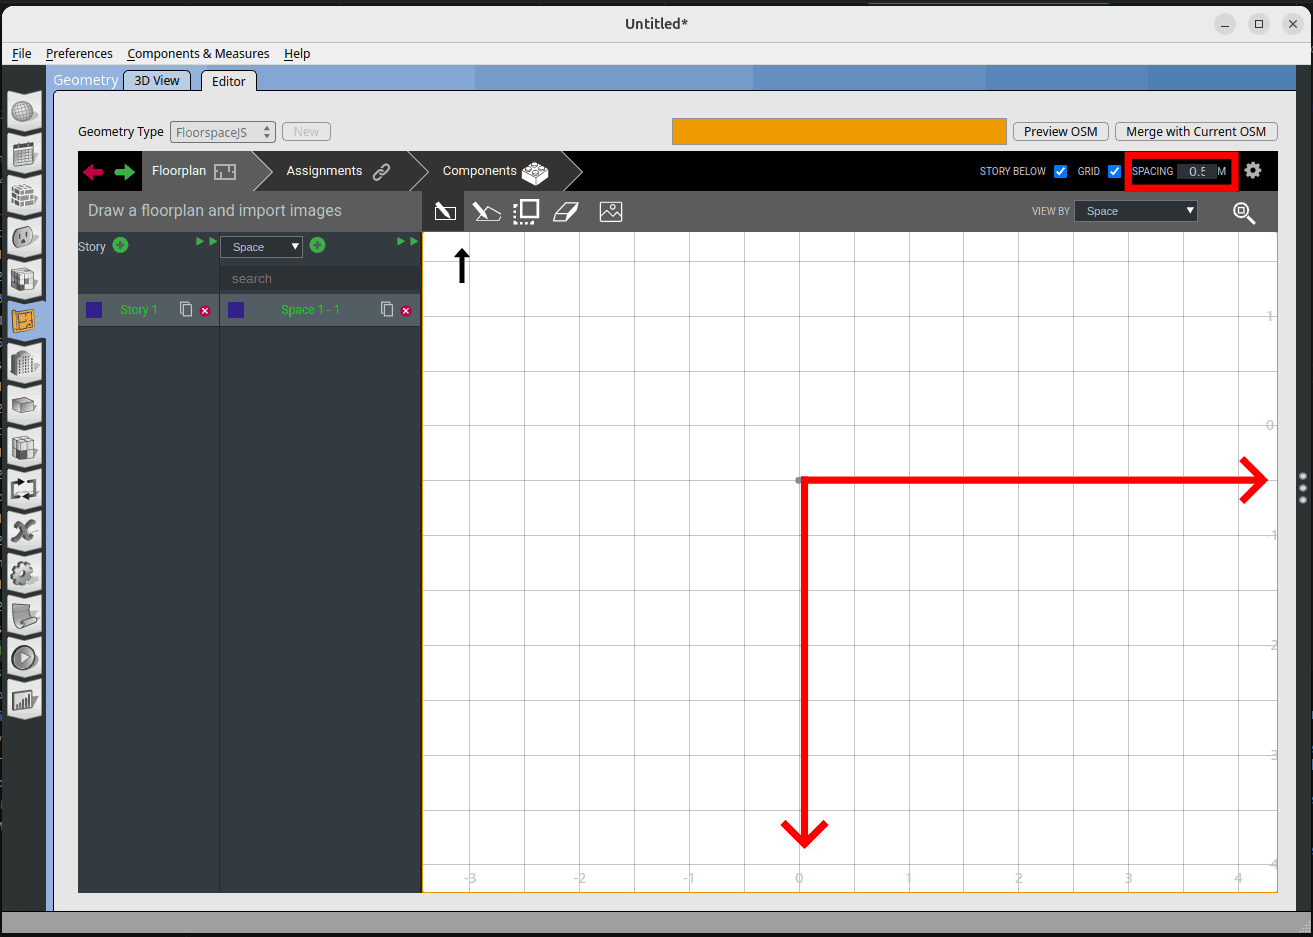
Change the spacing to 0.5m as we are only building a 5x5x5m shoebox model. Zoom (middle mouse scroll) and pan (left click and drag) to the center of the view port.
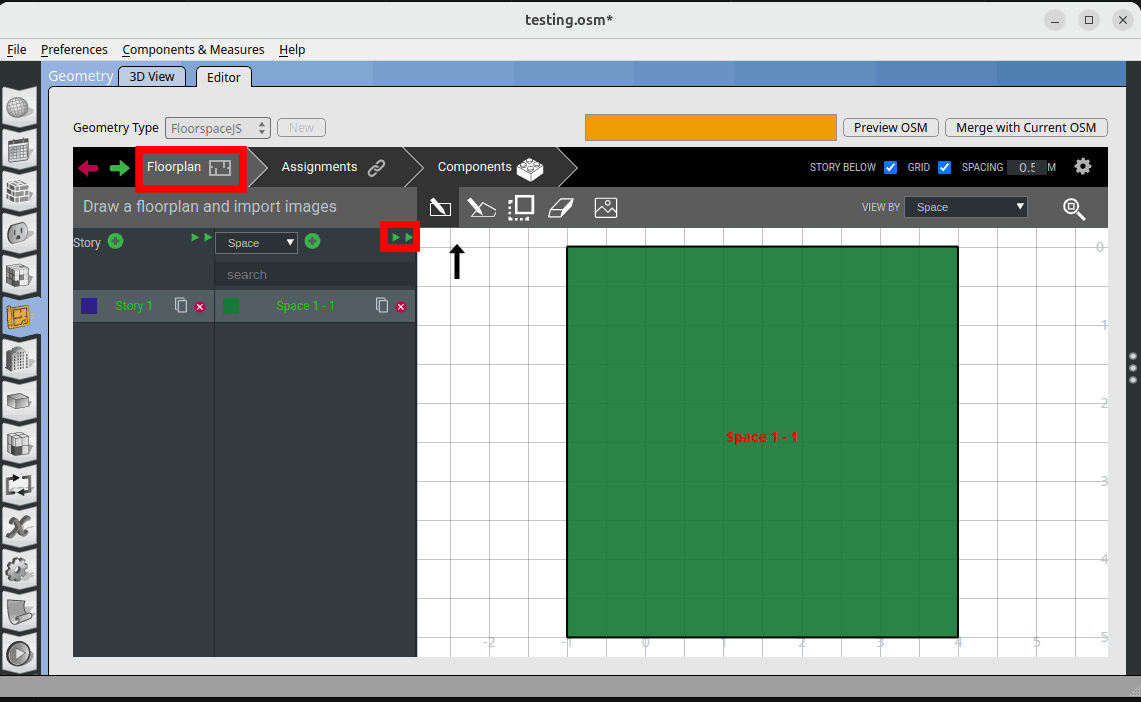
Make sure the rectangular tool icon is selected. Click on the grid and draw a 5m x 5m square.
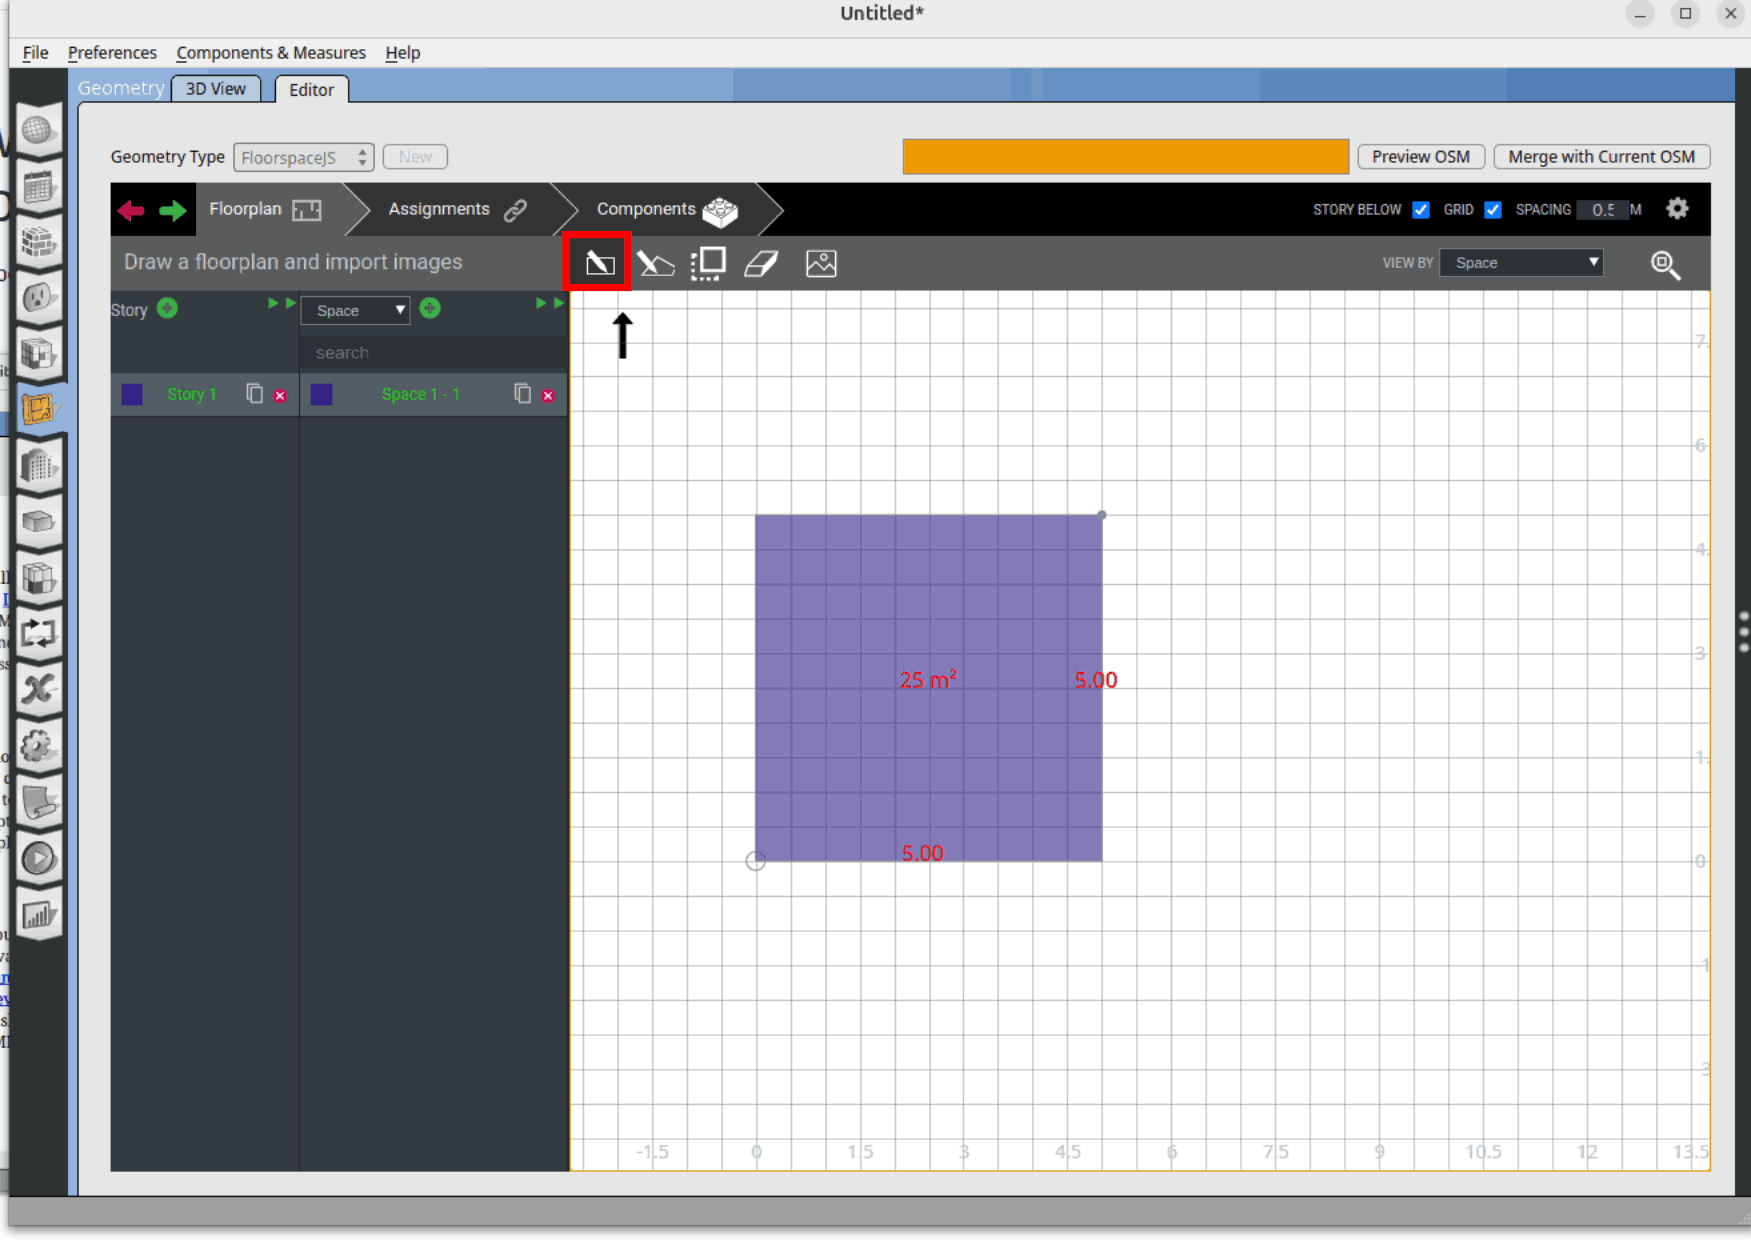
Click on the ‘Expand’ icon at the Space tab.

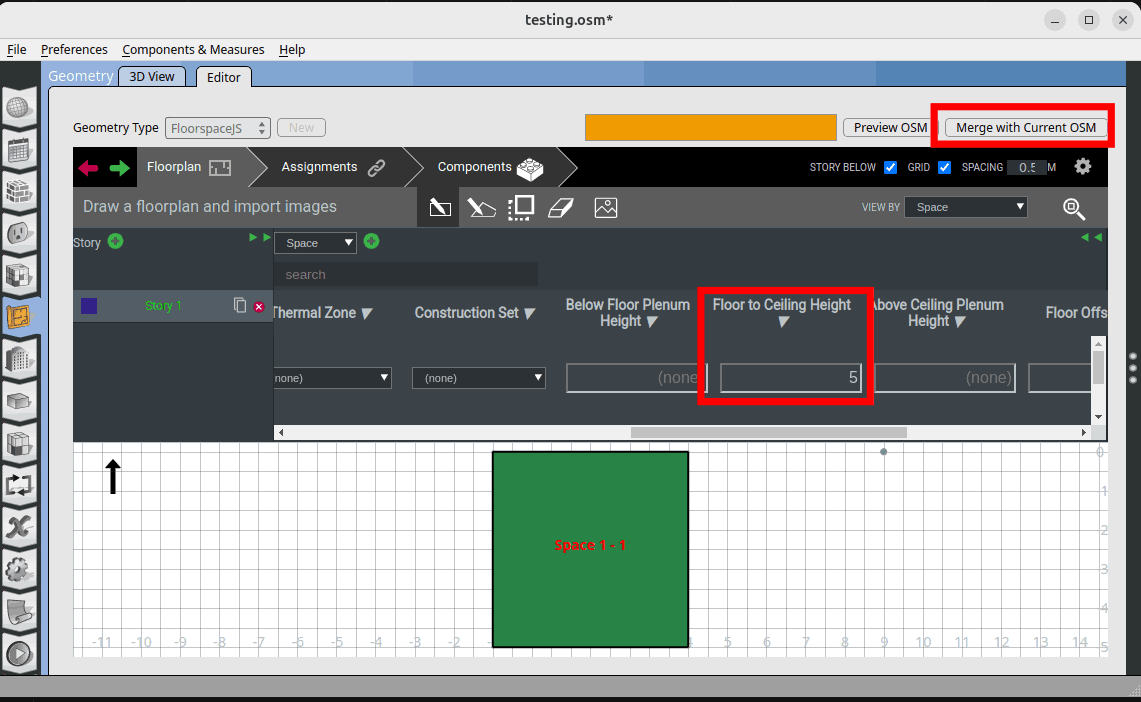
At the expanded tab, enter 5 for the ‘Floor to Ceiling Height’. Clicked on ‘Merged with Current OSM’ register the modeling changes.
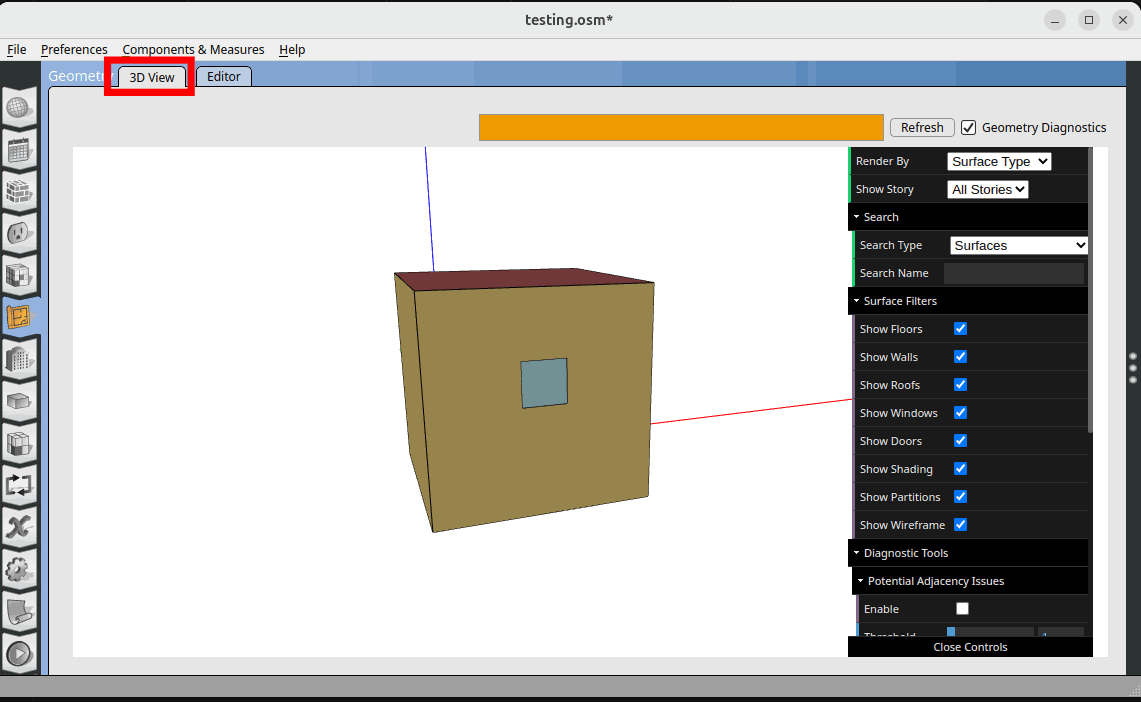
Click on the ‘3D View’ tab to see the 3D model.

3.1.2. Assign thermal zones#
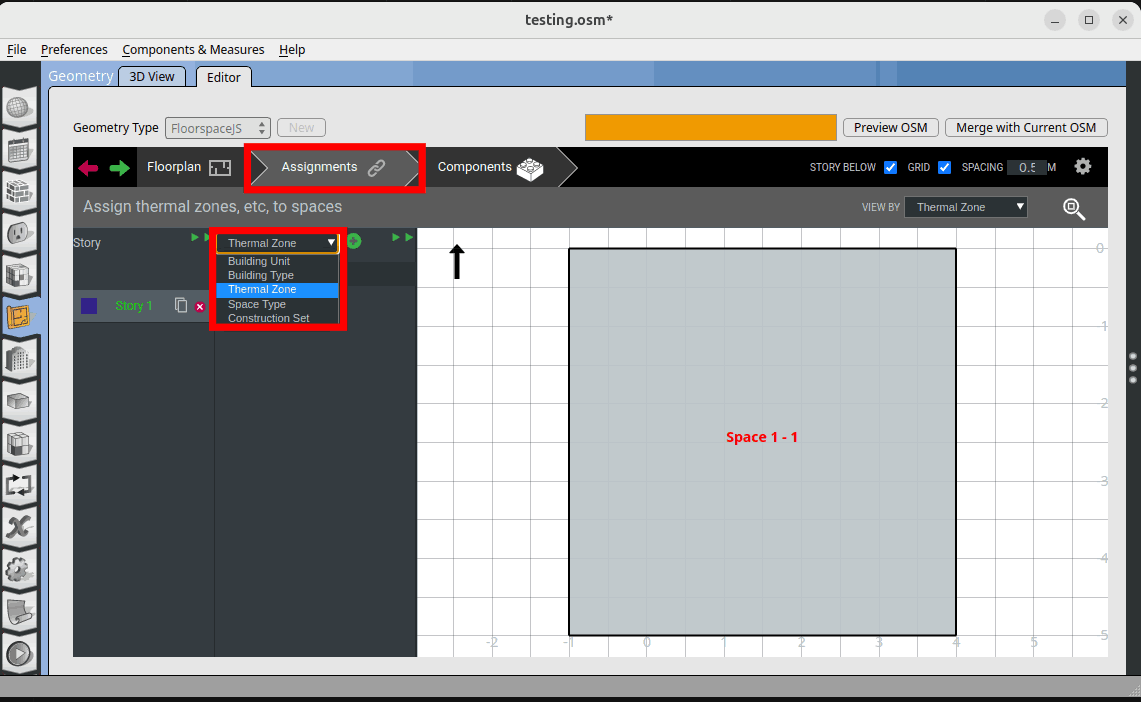
Click on the ‘Assignments’ tab. At the dropdown list choose ‘Thermal Zone’.
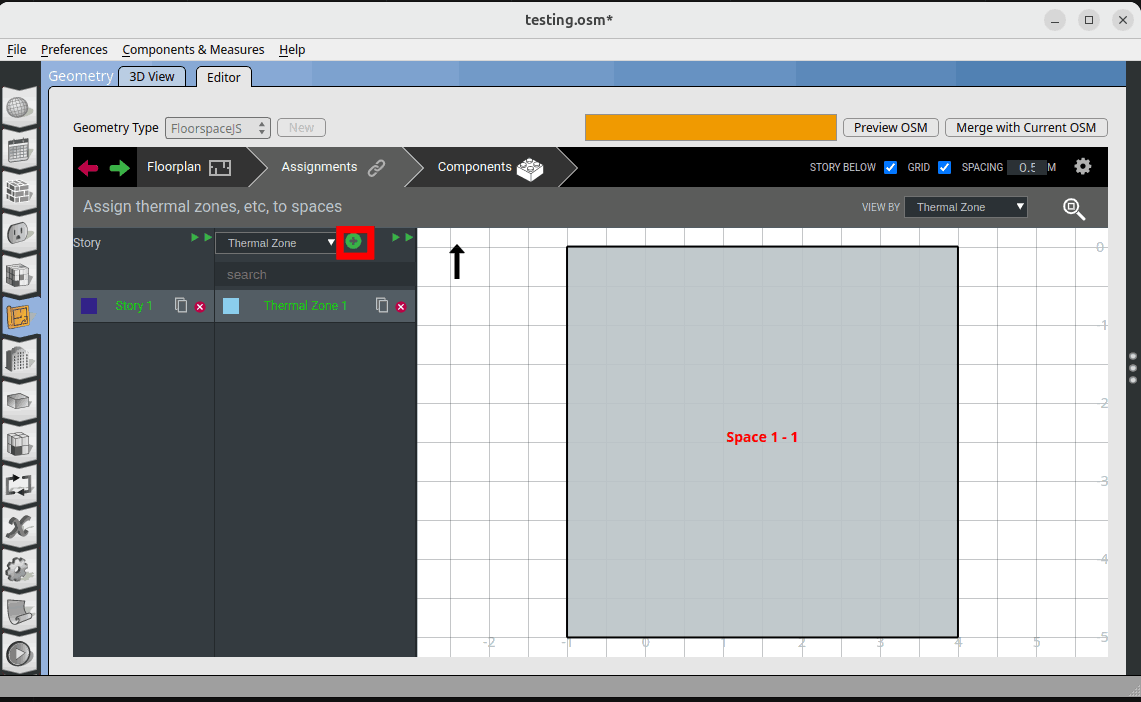
Click on the ‘+’ sign to add a thermal zone.
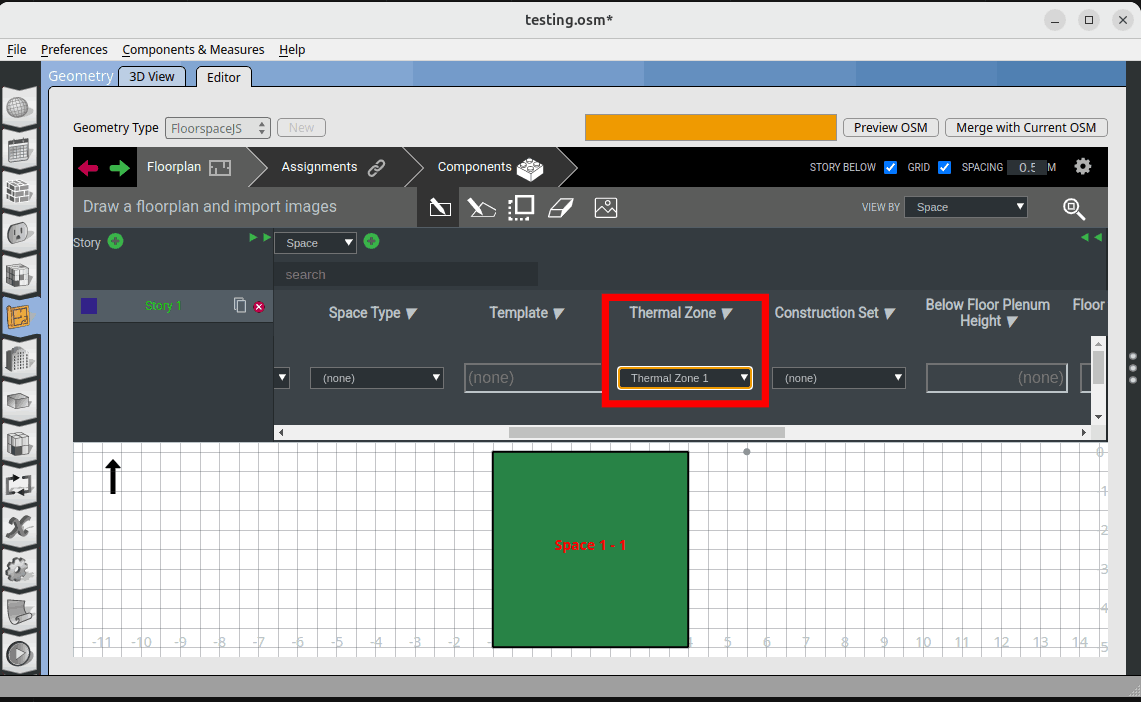
Now go back to the ‘Floorplan’ tab and click on the expand icon.
In the expanded tab go to the ‘Thermal Zone’ parameter and select the thermal zone you just created, in this case ‘Thermal Zone 1’.
3.1.3. Model the window#
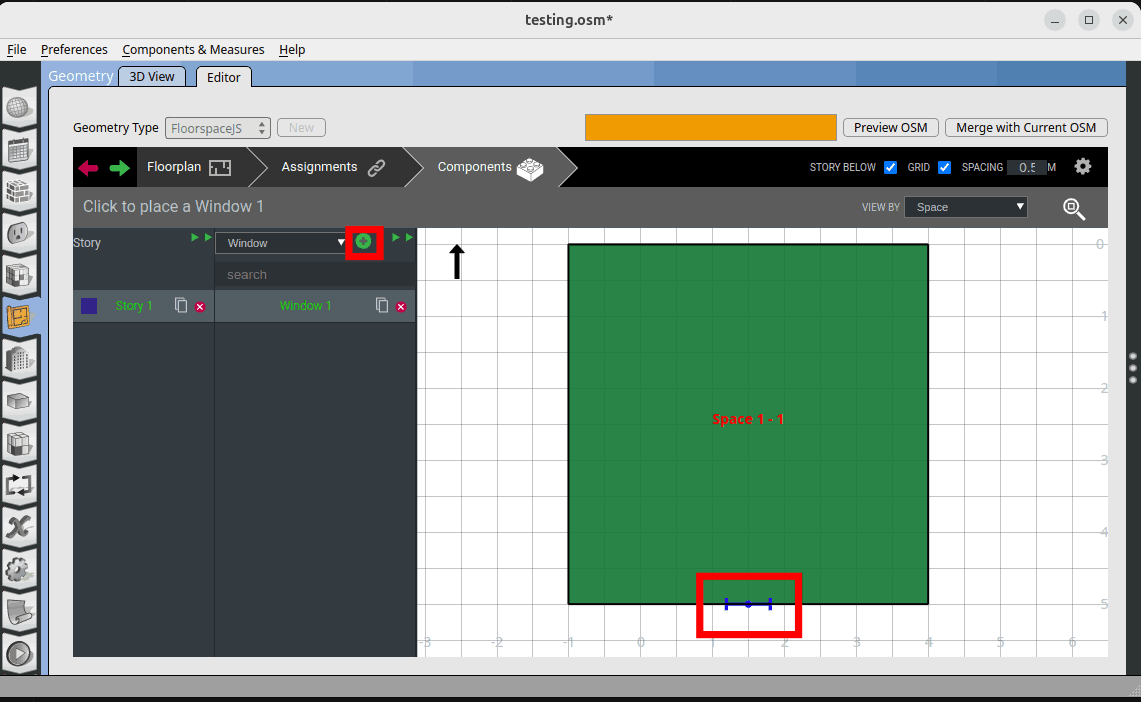
Now go to the ‘Component’ tab. At the dropdown list choose ‘Window’.

Click on the ‘+’ icon and add a window at the middle of the south wall as shown.
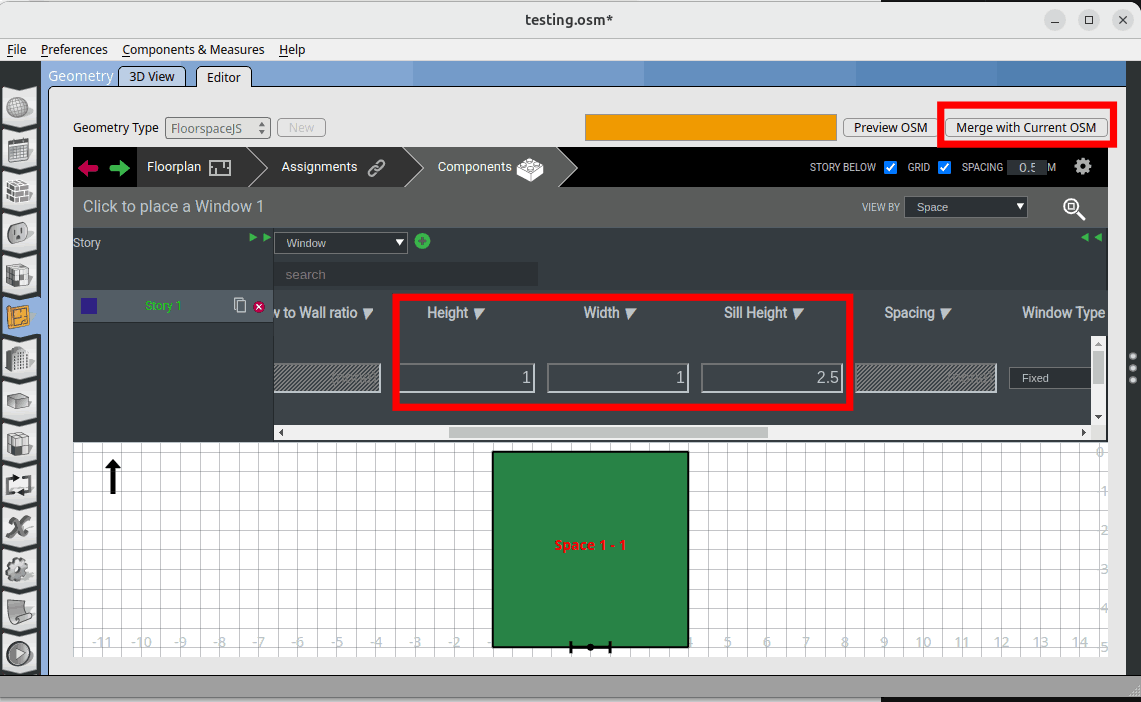
Click on the expand button.
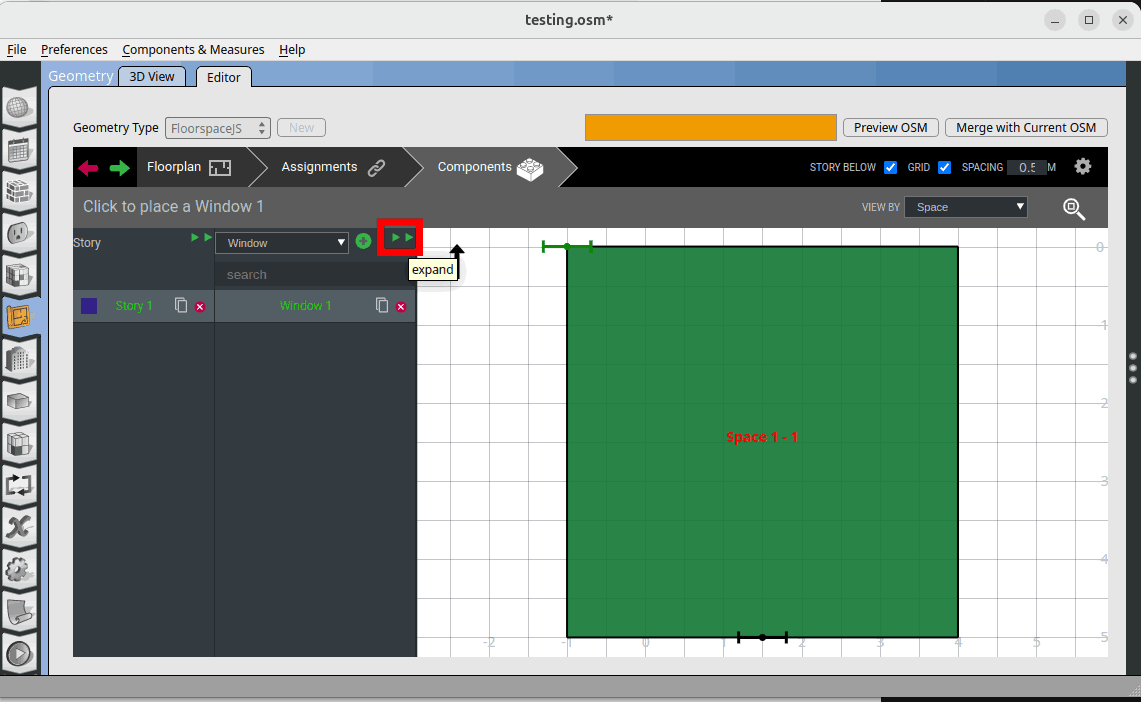
Change the window ‘Height’, ‘Width’ and ‘Sill Height’ to 1, 1, 2.5 accordingly. Then click on ‘Merge with Current OSM’
Go to 3D view and see the model.