2. Shoebox Model#
A shoebox model is a simplified, usually rectangular building used for pre-design to early design performance evaluation. With a simplified model, you can adjust different architectural parameters, e.g. windows size, constructions orientation, to understand how the performance changes with these adjustments. In this tutorial, we will model a 5m x 5m x 5m box in FreeCAD and perform an ideal air load simulation using Openstudio.
2.1. FreeCAD#
Install FreeCAD==1.0.0. Follow the instructions here according to you OS here.
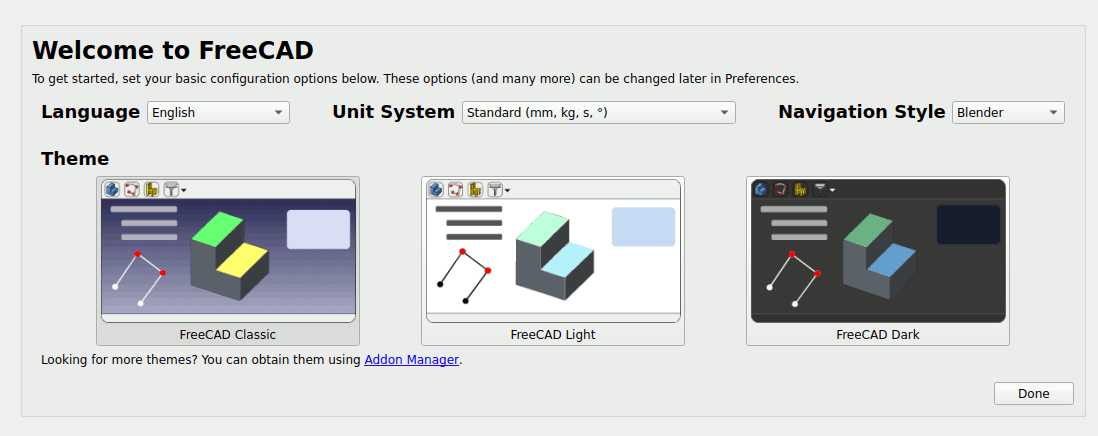
Open FreeCAD. At the startup screen you can choose any of the themes. The tutorial series will use the FreeCAD classic theme.
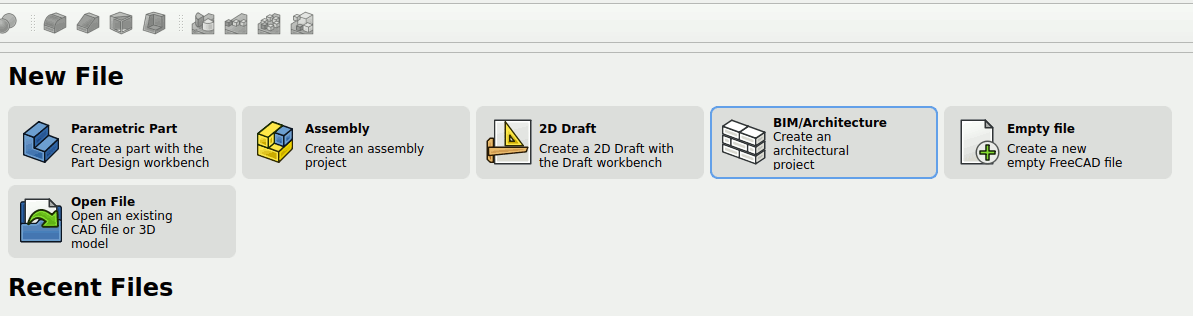
3. In the next screen, under the New File section choose the BIM/Architecture workbench.
4. Right click on your screen and choose your navigation style. The tutorial series uses the blender navigation style.

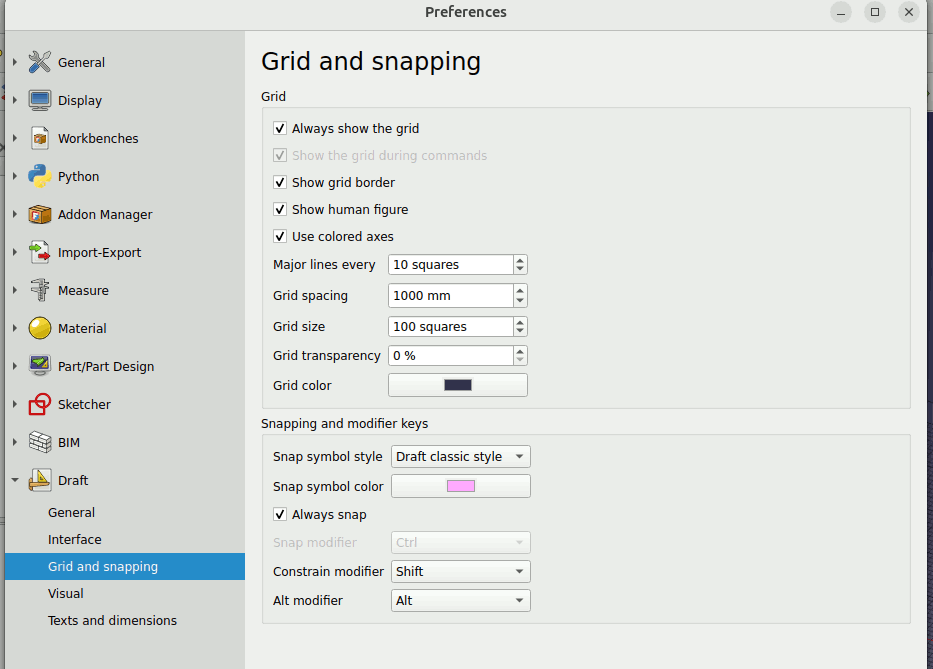
5. Go to the menu on top Edit -> Preferences … -> Draft -> Grid and snapping. We are using FreeCAD for architecture modeling. We will change the grid spacing to 1000mm.
6. Turn on the Grid Snap and Snap Dimension snapping toggle on the BIM workbench as shown below.
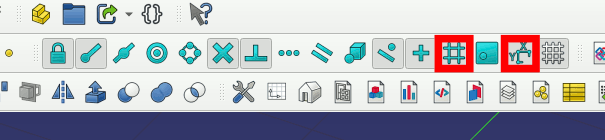
7. In the BIM workbench, click on the Manage Ifc Properties icon. In the window you will be able to see a file path to put custom Psets csv.

Download the zip file. Unzip the file. Go to csv -> CustomPsets.csv, copy and paste this file into the file path shown in the previous step.
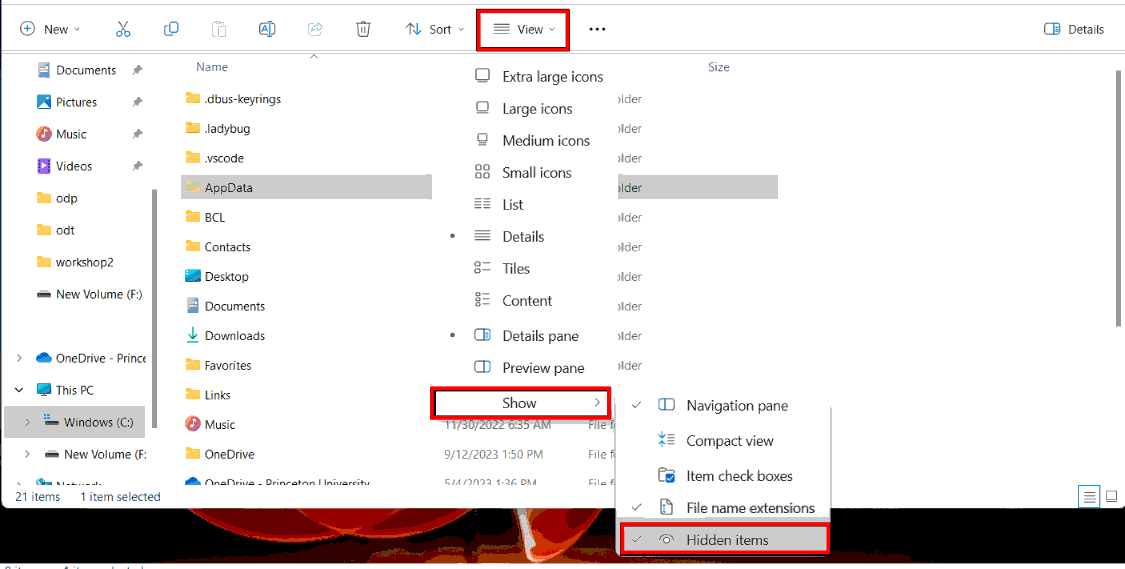
for windows users, your file path is probably something like this ‘C:\Users\some_user_name\AppData\Roaming\FreeCAD\BIM’. If you go to the path you will not be able to see the ‘AppData’ as it is a hidden folder. You would want to turn on you ‘Hidden items’ in order for you to find the ‘AppData’ as shown in the image below.
if the ‘BIM’ folder is not there create a new folder called ‘BIM’ and copy and paste the csv file into the folder.
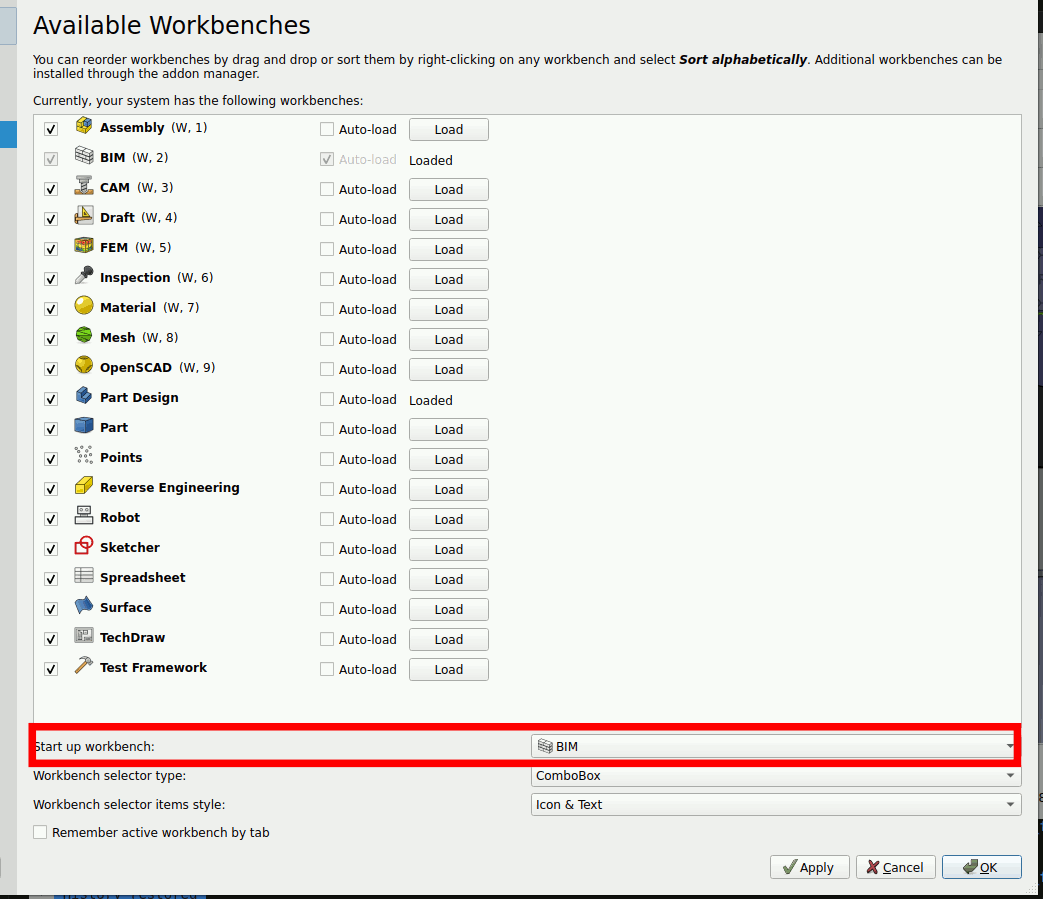
Change the Start up workbench to BIM. Go to Edit -> Preferences -> Workbenches -> Available Workbenches
2.1.1. Install the Architecture Engineering Workbench#
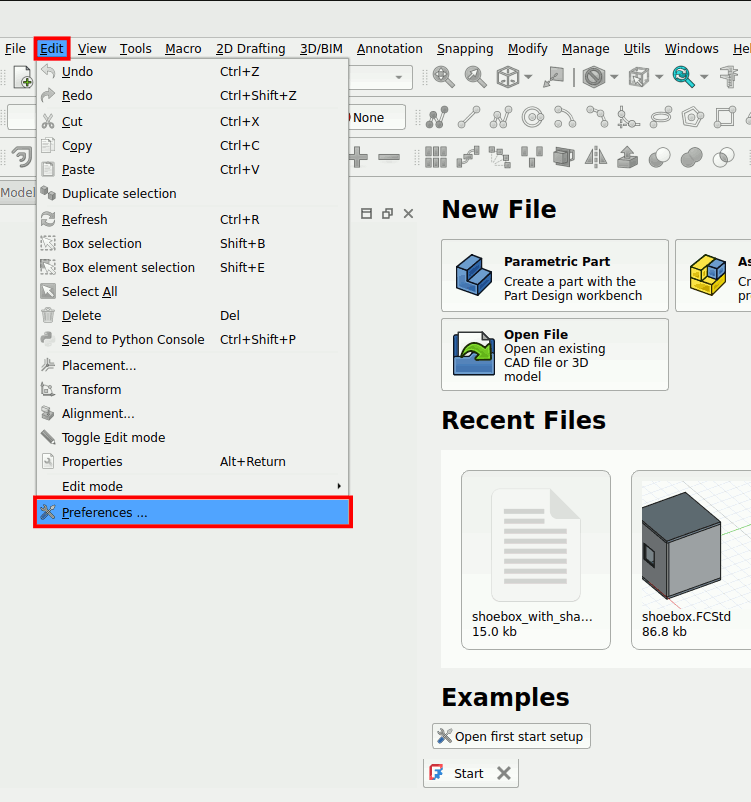
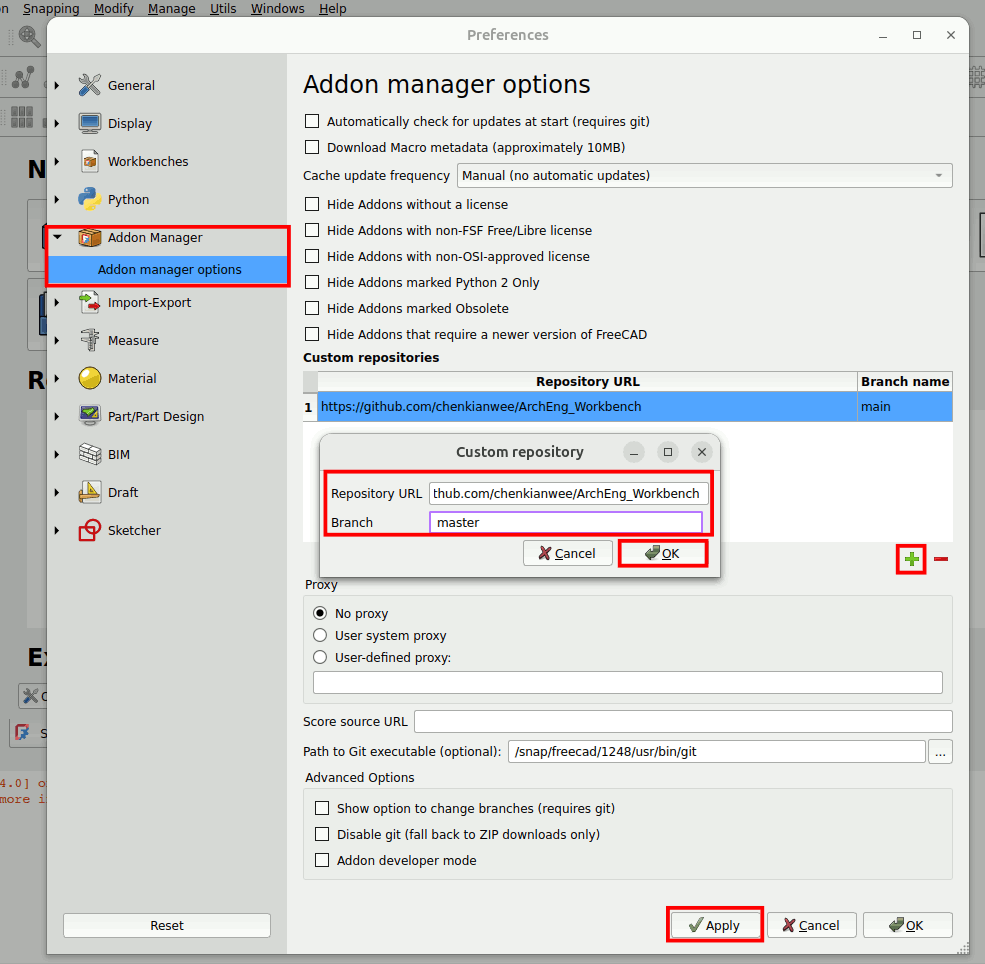
In FreeCAD go to Edit -> Preferences.
In the preferences window select Addon Manager -> Addon manager options. Under the Custom repositories click on the ‘+’ sign. Fill in the following details and press apply:
- Repository URL: https://github.com/chenkianwee/ArchEng_Workbench
- Branch: master
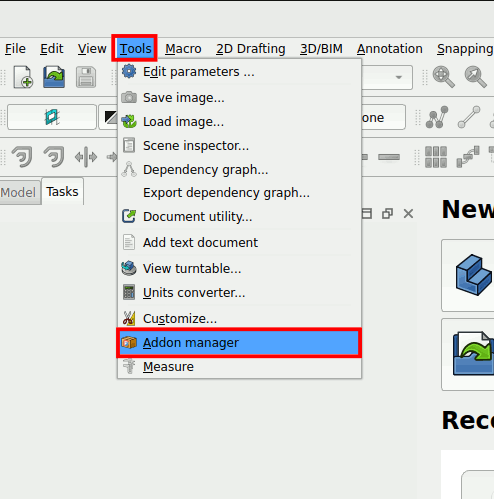
Go to Tools -> Addon manager.
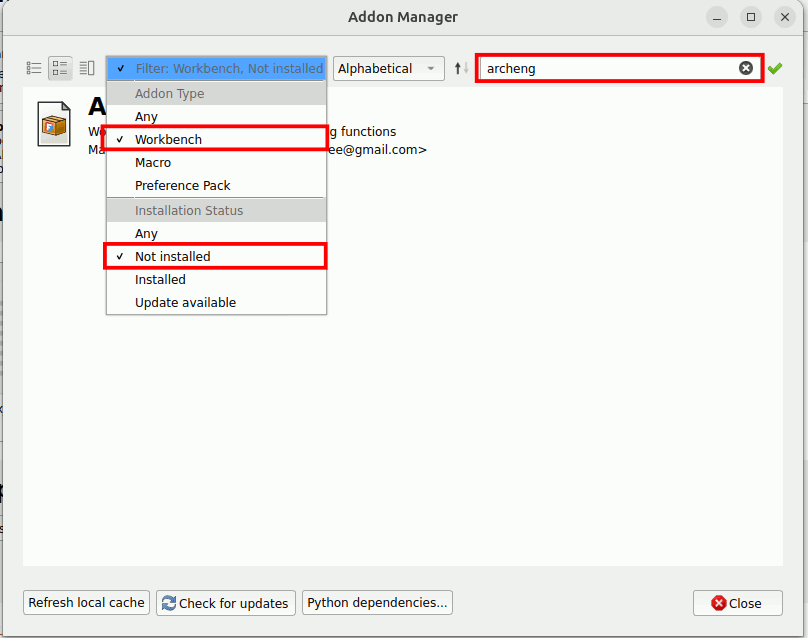
In the Addon manager window. For the Filter parameter, change it to Workbench, Not installed. In the search bar search for ‘archeng’. You should be able to see the ArchEng Workbench.
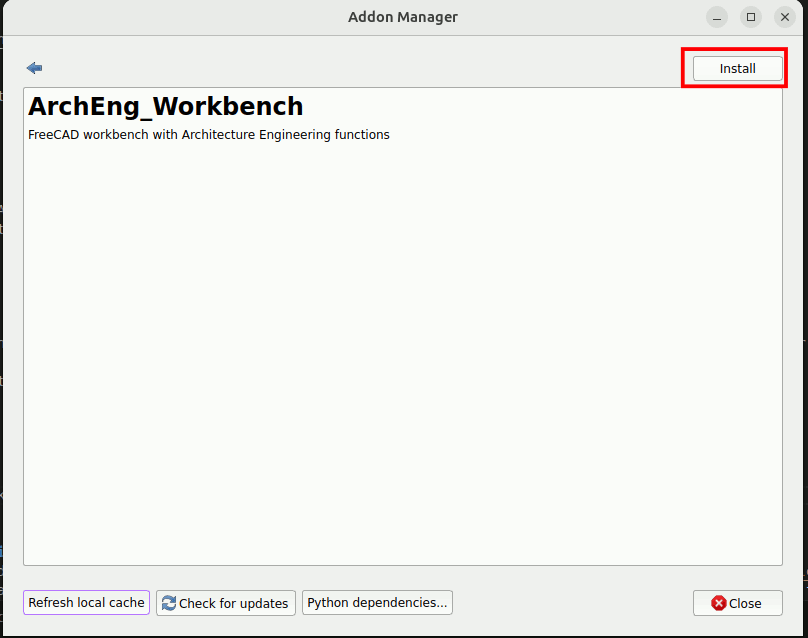
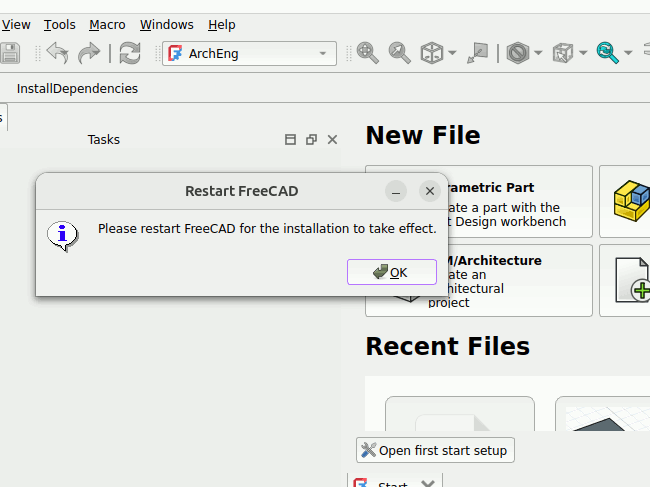
Install the workbench. After installation you will be asked to restart FreeCAD.
Once you restart FreeCAD. Go to the workbench dropdown list and choose ArchEng workbench. Then click on the InstallDependencies button.

You will be asked to install the dependencies. Click on Yes.

This will take some time. Wait for ~5mins, depending on the speed of your computer and internet connection (you must be connected to the internet). Once done, a message will pop up telling you to restart FreeCAD. Manually close FreeCAD and open it again.
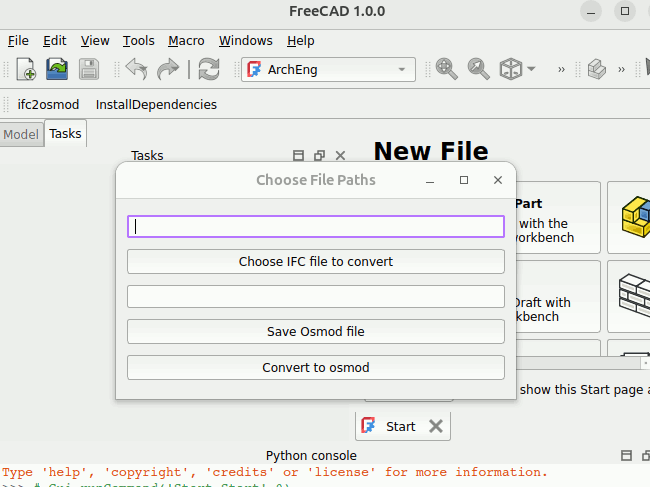
Once restarted, go to the ArchEng workbench and click on ifc2osmod. You should see a window pop up. You have successfully installed the workbench. Close the window and move on to next section of this guide.